plugins {
    id 'io.micronaut.test-resources' version '<micronaut-gradle-plugin-version>'
    id 'io.micronaut.application' version '<micronaut-gradle-plugin-version>'
}Table of Contents
Micronaut Test Resources
Test resources integration (like Testcontainers) for Micronaut
Version: 4.1.0-SNAPSHOT
1 Introduction
Micronaut Test Resources adds support for managing external resources which are required during development or testing.
For example, an application may need a database to run (say MySQL), but such a database may not be installed on the development machine or you may not want to handle the setup and tear down of the database manually.
Micronaut Test Resources offers a generic purpose solution for this problem, without any configuration when possible. In particular, it integrates with Testcontainers to provide throwaway containers for testing.
Test resources are only available during development (for example when running the Gradle run task or the Maven mn:run goal) and test execution: production code will require the resources to be available.
A key aspect of test resources to understand is that they are created in reaction to a missing property in configuration.
For example, if the datasources.default.url property is missing, then a test resource will be responsible for resolving its value.
If that property is set, then the test resource will not be used.
2 Release History
For this project, you can find a list of releases (with release notes) here:
3 Breaking Changes
Version 4.0.0
The remote test-resources RPC transport now uses a dedicated binary protocol instead of JSON.
This is an intentional breaking change on the unreleased 4.0.x line.
Consequences:
-
pre-change clients cannot talk to post-change servers, and post-change clients cannot talk to pre-change servers
-
direct JSON calls with tools such as
curlorhttpieare no longer a supported way to drive the RPC endpoints -
the supported debugging path is the documentation in this guide, server logs, and the control panel instead of ad hoc JSON requests
Version 3.0.0
MongoDB now defaults to using the latest image. Previously it used MongoDB 5.
4 Quick Start
Micronaut Test Resources are integrated via build plugins.
The recommended approach to get started is to use Micronaut Launch and select the test-resources feature.
If you want to integrate it manually, for Gradle you can use the micronaut-test-resources plugin.
Use the same Micronaut Gradle plugin version for io.micronaut.test-resources and io.micronaut.application:
Gradle
Please refer to the Gradle plugin’s Test Resources documentation for more information about configuring the test resources plugin.
In the case of Maven, you can enable test resources support simply by setting the property micronaut.test.resources.enabled (either in your
POM or via the command-line).
Please refer to the Maven plugin’s Test Resources documentation for more information about configuring the test resources plugin.
5 Supported Modules
The following modules are provided with Micronaut Test Resources.
5.1 Databases
Databases
Micronaut Test Resources provides support for the following databases:
| Database | JDBC | R2DBC | Database identifier | Default image |
|---|---|---|---|---|
Yes |
No |
|
n/a |
|
Yes |
Yes |
|
|
|
Yes |
Yes |
|
|
|
Yes |
Yes |
|
|
|
Yes |
Yes |
|
|
|
Yes |
Yes |
|
|
|
Yes |
Yes |
|
|
Most databases are supplied via a Testcontainers container.
H2 is containerless and starts a loopback-only in-memory TCP server for the lifetime of the test-resources process.
Shared or remote H2 test resources are not supported at this time, so the H2 resolver stays disabled when micronaut.test.resources.server.uri is configured.
It is possible to override the default image of the container by setting the following property in your application configuration:
-
test-resources.containers.[db-type].image-name
For example, you can override the default image of the container for the MariaDB database by setting the following property:
test-resources.containers.mariadb.image-name=mariadb:10.3test-resources:
containers:
mariadb:
image-name: mariadb:10.3[test-resources]
[test-resources.containers]
[test-resources.containers.mariadb]
image-name="mariadb:10.3"testResources {
containers {
mariadb {
imageName = "mariadb:10.3"
}
}
}{
test-resources {
containers {
mariadb {
image-name = "mariadb:10.3"
}
}
}
}{
"test-resources": {
"containers": {
"mariadb": {
"image-name": "mariadb:10.3"
}
}
}
}The db-type property value can be found in the table above.
Similarly, you can use the following properties to override some default test resources parameters:
-
test-resources.containers.[db-type].db-name: overrides the default test database name -
test-resources.containers.[db-type].username: overrides the default test user -
test-resources.containers.[db-type].password: overrides the default test password -
test-resources.containers.[db-type].init-script-path: a path to a SQL file on classpath, which will be executed at container startup
|
Using the Microsoft SQL Server container will require you to accept its license. In order to do this, you must set the |
| See the guide for Replace H2 with a Real Database for Testing to learn more. |
5.1.1 JDBC
The following properties will automatically be set when using a JDBC database:
-
datasources.*.url -
datasources.*.username -
datasources.*.password -
datasources.*.driver-class-name
Additionally, the MySQL resolver will automatically set the property datasources.*.x-protocol-url to be used with the
MySQL X DevAPI.
In order for the database to be properly detected, one of the following properties has to be set:
-
datasources.*.db-type: the kind of database (preferred, one ofh2,mariadb,mysql,oracle,oracle-xe,postgres) -
datasources.*.dialect: the dialect to use for the database (fallback)
Most JDBC databases are started via Testcontainers, so datasources.*.driver-class-name should usually be left empty because the JDBC driver from Testcontainers has to be used for URIs like jdbc:tc:postgres:14:///db.
H2 is the exception: it is supported in JDBC mode only, starts a containerless loopback-only in-memory TCP server, and automatically resolves org.h2.Driver.
Shared or remote H2 test resources are not supported at this time, so the H2 resolver stays disabled when micronaut.test.resources.server.uri is configured.
H2 support in this module is currently limited to JDBC test resources. R2DBC and Hibernate Reactive H2 support are out of scope for this feature.
To opt multiple logical JDBC datasources into the same physical test resource, set datasources.<name>.test-resources.resource-name to the same value on each datasource:
datasources.read.dialect=POSTGRES
datasources.read.test-resources.resource-name=main-db
datasources.write.dialect=POSTGRES
datasources.write.test-resources.resource-name=main-db
datasources:
read:
dialect: POSTGRES
test-resources:
resource-name: main-db
write:
dialect: POSTGRES
test-resources:
resource-name: main-db[datasources]
[datasources.read]
dialect="POSTGRES"
[datasources.read.test-resources]
resource-name="main-db"
[datasources.write]
dialect="POSTGRES"
[datasources.write.test-resources]
resource-name="main-db"datasources {
read {
dialect = "POSTGRES"
testResources {
resourceName = "main-db"
}
}
write {
dialect = "POSTGRES"
testResources {
resourceName = "main-db"
}
}
}{
datasources {
read {
dialect = "POSTGRES"
test-resources {
resource-name = "main-db"
}
}
write {
dialect = "POSTGRES"
test-resources {
resource-name = "main-db"
}
}
}
}{
"datasources": {
"read": {
"dialect": "POSTGRES",
"test-resources": {
"resource-name": "main-db"
}
},
"write": {
"dialect": "POSTGRES",
"test-resources": {
"resource-name": "main-db"
}
}
}
}If those datasources also declare different datasources.<name>.db-name values, Micronaut Test Resources will create separate databases on the shared PostgreSQL, MySQL, or MariaDB container and return datasource-specific URLs:
datasources.read.dialect=POSTGRES
datasources.read.db-name=read_db
datasources.read.test-resources.resource-name=main-db
datasources.write.dialect=POSTGRES
datasources.write.db-name=write_db
datasources.write.test-resources.resource-name=main-db
datasources:
read:
dialect: POSTGRES
db-name: read_db
test-resources:
resource-name: main-db
write:
dialect: POSTGRES
db-name: write_db
test-resources:
resource-name: main-db[datasources]
[datasources.read]
dialect="POSTGRES"
db-name="read_db"
[datasources.read.test-resources]
resource-name="main-db"
[datasources.write]
dialect="POSTGRES"
db-name="write_db"
[datasources.write.test-resources]
resource-name="main-db"datasources {
read {
dialect = "POSTGRES"
dbName = "read_db"
testResources {
resourceName = "main-db"
}
}
write {
dialect = "POSTGRES"
dbName = "write_db"
testResources {
resourceName = "main-db"
}
}
}{
datasources {
read {
dialect = "POSTGRES"
db-name = "read_db"
test-resources {
resource-name = "main-db"
}
}
write {
dialect = "POSTGRES"
db-name = "write_db"
test-resources {
resource-name = "main-db"
}
}
}
}{
"datasources": {
"read": {
"dialect": "POSTGRES",
"db-name": "read_db",
"test-resources": {
"resource-name": "main-db"
}
},
"write": {
"dialect": "POSTGRES",
"db-name": "write_db",
"test-resources": {
"resource-name": "main-db"
}
}
}
}For other engines, datasources.<name>.test-resources.resource-name still controls physical container reuse, but engine-specific multi-database bootstrap is only enabled where it is currently supported.
Micronaut Test Resources can also generate an IntelliJ IDEA/DataGrip datasource export file for resolved JDBC datasources. The export is opt-in and disabled by default.
Enable it with:
test-resources.intellij-idea.enabled=truetest-resources:
intellij-idea:
enabled: true[test-resources]
[test-resources.intellij-idea]
enabled=truetestResources {
intellijIdea {
enabled = true
}
}{
test-resources {
intellij-idea {
enabled = true
}
}
}{
"test-resources": {
"intellij-idea": {
"enabled": true
}
}
}By default, the generated export is written to .micronaut/test-resources/intellij-idea-datasources.xml.
You can override that location with test-resources.intellij-idea.output-path.
The export is generated from resolved datasources..url, datasources..username, datasources..password, and datasources..driver-class-name values, and supports multiple named JDBC datasources in the same run.
The file uses IntelliJ IDEA’s datasource export format so you can import or paste it into IntelliJ IDEA or DataGrip without rebuilding the connection details by hand.
The generated export contains local test usernames and passwords.
Do not commit it, and do not point the output path at .idea/ files in this first iteration.
|
5.1.2 R2DBC
In addition to traditional JDBC support, Micronaut Test Resources also supports R2DBC databases.
The following properties will automatically be set when using an R2DBC database:
-
r2dbc.datasources.*.url -
r2dbc.datasources.*.username -
r2dbc.datasources.*.password
In order for the database to be properly detected, one of the following properties has to be set:
-
r2dbc.datasources.*.db-type: the kind of database (preferred, one ofmariadb,mysql,oracle,oracle-xe,postgresql) -
r2dbc.datasources.*.driverClassName: the class name of the driver (fallback) -
r2dbc.datasources.*.dialect: the dialect to use for the database (fallback)
In addition, R2DBC databases can be configured simply by reading the traditional JDBC properties:
-
datasources.*.db-type: the kind of database (preferred, one ofmariadb,mysql,oracle,oracle-xe,postgresql) -
datasources.*.driverClassName: the class name of the driver (fallback) -
datasources.*.dialect: the dialect to use for the database (fallback) -
datasources.*.db-name: overrides the default test database name -
datasources.*.username: overrides the default test user -
datasources.*.password: overrides the default test password -
datasources.*.init-script-path: a path to a SQL file on classpath, which will be executed at container startup
In which case, the name of the datasource must match the name of the R2DBC datasource. This can be useful when using modules like Flyway which only support JDBC for updating schemas, but still have your application use R2DBC: in this case the container which will be used for R2DBC and JDBC will be the same.
If the logical datasource names differ, you can still opt JDBC and R2DBC into the same physical test resource by setting datasources.<name>.test-resources.resource-name and r2dbc.datasources.<name>.test-resources.resource-name to the same value:
datasources.migrations.dialect=POSTGRES
datasources.migrations.db-name=migrations_db
datasources.migrations.test-resources.resource-name=main-db
r2dbc.datasources.default.dialect=POSTGRES
r2dbc.datasources.default.db-name=default_db
r2dbc.datasources.default.test-resources.resource-name=main-db
datasources:
migrations:
dialect: POSTGRES
db-name: migrations_db
test-resources:
resource-name: main-db
r2dbc:
datasources:
default:
dialect: POSTGRES
db-name: default_db
test-resources:
resource-name: main-db[datasources]
[datasources.migrations]
dialect="POSTGRES"
db-name="migrations_db"
[datasources.migrations.test-resources]
resource-name="main-db"
[r2dbc]
[r2dbc.datasources]
[r2dbc.datasources.default]
dialect="POSTGRES"
db-name="default_db"
[r2dbc.datasources.default.test-resources]
resource-name="main-db"datasources {
migrations {
dialect = "POSTGRES"
dbName = "migrations_db"
testResources {
resourceName = "main-db"
}
}
}
r2dbc {
datasources {
'default' {
dialect = "POSTGRES"
dbName = "default_db"
testResources {
resourceName = "main-db"
}
}
}
}{
datasources {
migrations {
dialect = "POSTGRES"
db-name = "migrations_db"
test-resources {
resource-name = "main-db"
}
}
}
r2dbc {
datasources {
default {
dialect = "POSTGRES"
db-name = "default_db"
test-resources {
resource-name = "main-db"
}
}
}
}
}{
"datasources": {
"migrations": {
"dialect": "POSTGRES",
"db-name": "migrations_db",
"test-resources": {
"resource-name": "main-db"
}
}
},
"r2dbc": {
"datasources": {
"default": {
"dialect": "POSTGRES",
"db-name": "default_db",
"test-resources": {
"resource-name": "main-db"
}
}
}
}
}The same property can also be shared by multiple R2DBC datasources to reuse one physical container. When PostgreSQL, MySQL, or MariaDB datasources also declare distinct db-name values, Micronaut Test Resources creates those databases on the shared container and returns datasource-specific R2DBC URLs. For other engines, r2dbc.datasources.<name>.test-resources.resource-name still only controls container identity.
5.2 Elasticsearch
Elasticsearch support will automatically start an Elasticsearch container and provide the value of the elasticsearch.http-hosts property.
The default image (docker.elastic.co/elasticsearch/elasticsearch:9.2.1) can be overwritten by setting the test-resources.containers.elasticsearch.image-name property.
The default tag can be overwritten by setting the test-resources.containers.elasticsearch.image-tag property.
5.3 Azure Storage
Azure Storage support will automatically start an Azurite container and resolve the Micronaut Azure shared-key properties needed to talk to the emulator.
The default image can be overwritten by setting the test-resources.containers.azurite.image-name property.
The following properties are resolved automatically:
-
azure.credential.storage-shared-key.account-name -
azure.credential.storage-shared-key.account-key -
azure.credential.storage-shared-key.connection-string
The generated connection string uses Azurite’s mapped Testcontainers ports for the blob, queue, and table endpoints, so no fixed host port configuration is required.
By default, the provider starts mcr.microsoft.com/azure-storage/azurite:3.35.0 with blob, queue, and table listeners bound to all interfaces inside the container.
storage.client.connection-string=${azure.credential.storage-shared-key.connection-string}storage:
client:
connection-string: ${azure.credential.storage-shared-key.connection-string}[storage]
[storage.client]
connection-string="${azure.credential.storage-shared-key.connection-string}"storage {
client {
connectionString = "${azure.credential.storage-shared-key.connection-string}"
}
}{
storage {
client {
connection-string = "${azure.credential.storage-shared-key.connection-string}"
}
}
}{
"storage": {
"client": {
"connection-string": "${azure.credential.storage-shared-key.connection-string}"
}
}
}| If you need Azurite behavior outside these shared-key properties, the generic Testcontainers support remains available. |
5.4 OpenSearch
OpenSearch support will automatically start an OpenSearch container and provide the value of the micronaut.opensearch.rest-client.http-hosts or micronaut.opensearch.httpclient5.http-hosts properties.
The default image (opensearchproject/opensearch:3.6.0) can be overwritten by setting the test-resources.containers.opensearch.image-name property.
5.5 Kafka
Kafka support will automatically start a Kafka container and provide the value of the kafka.bootstrap.servers property.
The default image (apache/kafka:4.1.1) can be overwritten by setting the test-resources.containers.kafka.image-name property.
Kafka topics are only provisioned when test-resources.containers.kafka.topics is configured. When set, test resources creates any missing topics before returning kafka.bootstrap.servers.
The optional test-resources.containers.kafka.partitions property applies the same partition count to every configured topic and defaults to 1.
Topic replication is fixed to 1 because the Kafka test resource starts a single-broker container. This feature is intended for test-time broker preparation, not general Kafka administration.
|
| When a cached Kafka broker is reused inside the same test-resources scope, configured topics must agree on the partition count. If a topic already exists with a different partition count, resolution fails with a clear error instead of mutating the existing topic. |
test-resources.containers.kafka.topics[0]=orders
test-resources.containers.kafka.topics[1]=shipments
test-resources.containers.kafka.partitions=3
test-resources:
containers:
kafka:
topics:
- orders
- shipments
partitions: 3[test-resources]
[test-resources.containers]
[test-resources.containers.kafka]
topics=[
"orders",
"shipments"
]
partitions=3testResources {
containers {
kafka {
topics = ["orders", "shipments"]
partitions = 3
}
}
}{
test-resources {
containers {
kafka {
topics = ["orders", "shipments"]
partitions = 3
}
}
}
}{
"test-resources": {
"containers": {
"kafka": {
"topics": ["orders", "shipments"],
"partitions": 3
}
}
}
}Kafka services
The Kafka module can also start Confluent Schema Registry, Kafka Connect, and ksqlDB test containers.
Each service depends on the Kafka broker container and uses the same test resources scope, so requesting a service URL starts Kafka if it is not already running and reuses the broker if kafka.bootstrap.servers was already resolved.
| Resolved property | Default image | REST port |
|---|---|---|
|
|
|
|
|
|
|
|
|
The returned values are host-accessible http:// URLs using random Testcontainers host ports.
The containers communicate with Kafka on an internal Docker network, so no fixed host port is required.
Request one of the listed URL properties when a service should be started. For example, a test-only bean can require and inject the Schema Registry URL:
import io.micronaut.context.annotation.Requires;
import io.micronaut.context.annotation.Value;
import jakarta.inject.Singleton;

@Singleton
@Requires(property = "kafka.schema.registry.url")
class SchemaRegistryClientConfiguration {

    SchemaRegistryClientConfiguration(
            @Value("${kafka.schema.registry.url}") String schemaRegistryUrl) {
        // Configure a Schema Registry client for tests.
    }
}
Test Resources will provide the URL value for the matching service and start Kafka as a dependency.
These REST APIs are intended for local test infrastructure. They are exposed without credentials on random localhost ports and should not be used as production service configuration.
| See the guide for Testing Kafka Listener using Testcontainers with the Micronaut Framework to learn more. |
5.6 Mailpit
Mailpit support will automatically start a Mailpit container and provide JavaMail SMTP properties for Micronaut Email JavaMail applications. Mailpit captures local development and test email, provides a browser UI, and exposes an HTTP API for assertions. It is not a production SMTP relay.
If your application has io.micronaut.email:micronaut-email-javamail on the application classpath, the build tools infer the Mailpit test resources module automatically.
You can also add the module explicitly:
testResourcesService("io.micronaut.testresources:micronaut-test-resources-mailpit")<dependency>
<groupId>io.micronaut.testresources</groupId>
<artifactId>micronaut-test-resources-mailpit</artifactId>
<scope>testResourcesService</scope>
</dependency>When no external SMTP endpoint is configured, the provider resolves these properties:
-
javamail.properties.mail.smtp.host -
javamail.properties.mail.smtp.port -
javamail.properties.mail.smtp.auth=false -
javamail.properties.mail.smtp.starttls.enable=false -
mailpit.ui.url -
mailpit.api.url
The Mailpit SMTP and UI container ports are exposed through random host ports.
The mailpit.ui.url and mailpit.api.url values contain only local endpoint URLs.
The provider does not log captured messages, recipients, headers, credentials, or API responses.
If either javamail.properties.mail.smtp.host or javamail.properties.mail.smtp.port is already configured, Mailpit does not start and the existing JavaMail SMTP configuration remains unchanged.
javamail.properties.mail.smtp.host=smtp.example.test
javamail.properties.mail.smtp.port=2525
javamail:
properties:
mail:
smtp:
host: smtp.example.test
port: 2525[javamail]
[javamail.properties]
[javamail.properties.mail]
[javamail.properties.mail.smtp]
host="smtp.example.test"
port=2525javamail {
properties {
mail {
smtp {
host = "smtp.example.test"
port = 2525
}
}
}
}{
javamail {
  properties {
    mail {
      smtp {
        host = "smtp.example.test"
        port = 2525
      }
    }
  }
}
}{
"javamail": {
"properties": {
"mail": {
"smtp": {
"host": "smtp.example.test",
"port": 2525
}
}
}
}
}You can disable the provider:
test-resources.containers.mailpit.enabled=falsetest-resources:
containers:
mailpit:
enabled: false[test-resources]
[test-resources.containers]
[test-resources.containers.mailpit]
enabled=falsetestResources {
containers {
mailpit {
enabled = false
}
}
}{
test-resources {
containers {
mailpit {
enabled = false
}
}
}
}{
"test-resources": {
"containers": {
"mailpit": {
"enabled": false
}
}
}
}You can also override the image and Mailpit listener ports:
The default image (axllent/mailpit:v1.29.7) can be overwritten by setting the test-resources.containers.mailpit.image-name property.
The default version can be overwritten by setting the test-resources.containers.mailpit.image-tag property.
test-resources.containers.mailpit.image-name=axllent/mailpit
test-resources.containers.mailpit.image-tag=v1.29.7
test-resources.containers.mailpit.smtp-port=1025
test-resources.containers.mailpit.ui-port=8025
test-resources:
containers:
mailpit:
image-name: axllent/mailpit
image-tag: v1.29.7
smtp-port: 1025
ui-port: 8025[test-resources]
[test-resources.containers]
[test-resources.containers.mailpit]
image-name="axllent/mailpit"
image-tag="v1.29.7"
smtp-port=1025
ui-port=8025testResources {
containers {
mailpit {
imageName = "axllent/mailpit"
imageTag = "v1.29.7"
smtpPort = 1025
uiPort = 8025
}
}
}{
test-resources {
containers {
mailpit {
image-name = "axllent/mailpit"
image-tag = "v1.29.7"
smtp-port = 1025
ui-port = 8025
}
}
}
}{
"test-resources": {
"containers": {
"mailpit": {
"image-name": "axllent/mailpit",
"image-tag": "v1.29.7",
"smtp-port": 1025,
"ui-port": 8025
}
}
}
}The smtp-port and ui-port values configure Mailpit’s container listener ports.
They are exposed through random host ports and are not fixed host ports.
During development you can open the resolved mailpit.ui.url value in a browser to inspect captured messages.
In integration tests you can use mailpit.api.url to assert messages through the Mailpit HTTP API:
@Value("${mailpit.api.url}")
URI mailpitApiUrl;

HttpRequest<?> request = HttpRequest.GET(mailpitApiUrl.resolve("/api/v1/messages"));
For custom SMTP containers or non-JavaMail configuration, use Generic Testcontainers support.
5.7 Pulsar
Pulsar support will automatically start an Apache Pulsar container and provide the value of the pulsar.service-url property.
The default image (apachepulsar/pulsar:4.1.3) can be overridden by setting the test-resources.containers.pulsar.image-name property.
5.8 Localstack
Micronaut Test Resources supports a subset of Localstack via Testcontainers.
The default image (localstack/localstack:4.14.0) can be overwritten by setting the test-resources.containers.localstack.image-name property.
The following services are supported:
-
S3, by providing the
aws.services.s3.endpoint-overrideproperty -
DynamoDB, by providing the
aws.services.dynamodb.endpoint-overrideproperty -
SQS, by providing the
aws.services.sqs.endpoint-overrideproperty -
SNS, by providing the
aws.services.sns.endpoint-overrideproperty
In addition, the following properties will be resolved by test resources:
-
aws.access-key-id -
aws.secret-key -
aws.region
5.9 Floci
Micronaut Test Resources supports Floci via its Testcontainers module for the Floci services that are also configured by Micronaut AWS SDK v2 client factories.
Floci is an alternative AWS emulator dependency family. It does not replace LocalStack automatically, and the LocalStack modules keep their existing behavior and configuration. Choose a Floci module for the AWS service you want to emulate instead of the corresponding LocalStack module, or use the Floci core module when there is no service-specific Floci module.
The default image (floci/floci:1.5.19) can be overwritten by setting the test-resources.containers.floci.image-name property.
The following service endpoint overrides are supported:
-
API Gateway Management API, by providing the
aws.services.execute-api.endpoint-overrideproperty -
CloudWatch Logs, by providing the
aws.services.logs.endpoint-overrideproperty -
S3, by providing the
aws.services.s3.endpoint-overrideproperty -
DynamoDB, by providing the
aws.services.dynamodb.endpoint-overrideproperty -
Lambda, by providing the
aws.services.lambda.endpoint-overrideproperty -
Secrets Manager, by providing the
aws.services.secretsmanager.endpoint-overrideproperty -
SES, by providing the
aws.services.ses.endpoint-overrideproperty -
SQS, by providing the
aws.services.sqs.endpoint-overrideproperty -
SNS, by providing the
aws.services.sns.endpoint-overrideproperty -
SSM, by providing the
aws.services.ssm.endpoint-overrideproperty
In addition, the following properties will be resolved by test resources:
-
aws.access-key-id -
aws.secret-key -
aws.region
Avoid placing both a LocalStack and a Floci module for the same AWS service on the same test classpath unless you explicitly disable one resolver, for example by setting test-resources.containers.localstack.enabled or test-resources.containers.floci.enabled to false.
The upstream Floci Testcontainers integration currently bind-mounts the Docker socket into the container unconditionally. Micronaut Test Resources disables unsupported Floci services by default and enables the Floci services that map to Micronaut AWS SDK v2 client configuration, but you should still treat the Floci container as trusted infrastructure with Docker access through /var/run/docker.sock.
5.10 MinIO
MinIO support will automatically start a MinIO container via Testcontainers and provide the values of the minio.url, minio.access-key, and minio.secret-key properties.
The default image (minio/minio:RELEASE.2025-09-07T16-13-09Z) can be overwritten by setting the test-resources.containers.minio.image-name property.
5.11 SeaweedFS
SeaweedFS support will automatically start a SeaweedFS container and provide the values of the seaweedfs.url, seaweedfs.access-key, and seaweedfs.secret-key properties.
The default image (chrislusf/seaweedfs:4.22) can be overridden by setting the test-resources.containers.seaweedfs.image-name property.
5.12 Couchbase
Couchbase support will automatically start a Couchbase Server container and provide the values of the couchbase.uri, couchbase.username, and couchbase.password properties.
The provider uses the couchbase/server:8.0.1 image by default.
You can override the image name and tag with test-resources.containers.couchbase.image-name and test-resources.containers.couchbase.image-tag.
test-resources.containers.couchbase.image-name=my-couchbase/server
test-resources.containers.couchbase.image-tag=custom-tag
test-resources:
containers:
couchbase:
image-name: my-couchbase/server
image-tag: custom-tag[test-resources]
[test-resources.containers]
[test-resources.containers.couchbase]
image-name="my-couchbase/server"
image-tag="custom-tag"testResources {
containers {
couchbase {
imageName = "my-couchbase/server"
imageTag = "custom-tag"
}
}
}{
test-resources {
containers {
couchbase {
image-name = "my-couchbase/server"
image-tag = "custom-tag"
}
}
}
}{
"test-resources": {
"containers": {
"couchbase": {
"image-name": "my-couchbase/server",
"image-tag": "custom-tag"
}
}
}
}If you explicitly map any of those same properties through generic Testcontainers support, the dedicated Couchbase provider stands down for the full couchbase.uri / couchbase.username / couchbase.password connection set so values never come from mixed containers.
For unsupported Couchbase topologies or additional property shapes, continue using generic Testcontainers support.
5.13 MongoDB
MongoDB support will automatically start a MongoDB container and provide the value of the mongodb.uri property.
The container is configured with replica set functionality enabled.
The default image (mongo:8.2.7) can be overwritten by setting the test-resources.containers.mongodb.image-name property.
The default database name can be overwritten by setting the test-resources.containers.mongodb.db-name property.
Alternatively, if you have multiple MongoDB servers declared in your configuration, the test resources service will supply a different replica set for each database.
For example, if you have mongodb.servers.users and mongodb.servers.books defined, then the test resources service will supply the mongodb.servers.users.uri and mongodb.servers.books.uri properties.
Note that in this case, a single server is used, the value of test-resources.containers.mongodb.db-name is ignored, and the database name is set to the name of the database you declared (in this example, this would be respectively users and books).
This existing multiplexing behavior is unchanged by test-resources.resource-name. MongoDB already reuses one physical server across named logical databases when you configure mongodb.servers.*.
5.14 MQTT
MQTT support is provided using the hivemq/hivemq-ce:2021.3 HiveMQ container by default.
It will automatically configure the mqtt.client.server-uri property.
Alternatively, you can setup a custom container. For example, you can use Mosquitto instead:
mqtt.client.server-uri=tcp://${mqtt.host}:${mqtt.port}
mqtt.client.client-id=${random.uuid}
test-resources.containers.mosquitto.image-name=eclipse-mosquitto
test-resources.containers.mosquitto.hostnames[0]=mqtt.host
test-resources.containers.mosquitto.exposed-ports[0].mqtt.port=1883
test-resources.containers.mosquitto.ro-fs-bind[0].mosquitto.conf=/mosquitto/config/mosquitto.conf
mqtt:
client:
server-uri: tcp://${mqtt.host}:${mqtt.port}
client-id: ${random.uuid}
test-resources:
containers:
mosquitto:
image-name: eclipse-mosquitto
hostnames:
- mqtt.host
exposed-ports:
- mqtt.port: 1883
ro-fs-bind:
- "mosquitto.conf": /mosquitto/config/mosquitto.conf[mqtt]
[mqtt.client]
server-uri="tcp://${mqtt.host}:${mqtt.port}"
client-id="${random.uuid}"
[test-resources]
[test-resources.containers]
[test-resources.containers.mosquitto]
image-name="eclipse-mosquitto"
hostnames=[
"mqtt.host"
]
[[test-resources.containers.mosquitto.exposed-ports]]
"mqtt.port"=1883
[[test-resources.containers.mosquitto.ro-fs-bind]]
"mosquitto.conf"="/mosquitto/config/mosquitto.conf"mqtt {
client {
serverUri = "tcp://${mqtt.host}:${mqtt.port}"
clientId = "${random.uuid}"
}
}
testResources {
containers {
mosquitto {
imageName = "eclipse-mosquitto"
hostnames = ["mqtt.host"]
exposedPorts = [{
mqtt.port = 1883
}]
roFsBind = [{
mosquitto.conf = "/mosquitto/config/mosquitto.conf"
}]
}
}
}{
mqtt {
client {
server-uri = "tcp://${mqtt.host}:${mqtt.port}"
client-id = "${random.uuid}"
}
}
test-resources {
containers {
mosquitto {
image-name = "eclipse-mosquitto"
hostnames = ["mqtt.host"]
exposed-ports = [{
"mqtt.port" = 1883
}]
ro-fs-bind = [{
"mosquitto.conf" = "/mosquitto/config/mosquitto.conf"
}]
}
}
}
}{
"mqtt": {
"client": {
"server-uri": "tcp://${mqtt.host}:${mqtt.port}",
"client-id": "${random.uuid}"
}
},
"test-resources": {
"containers": {
"mosquitto": {
"image-name": "eclipse-mosquitto",
"hostnames": ["mqtt.host"],
"exposed-ports": [{
"mqtt.port": 1883
}],
"ro-fs-bind": [{
"mosquitto.conf": "/mosquitto/config/mosquitto.conf"
}]
}
}
}
}mosquitto.conf
persistence false
allow_anonymous true
connection_messages true
log_type all
listener 1883
5.15 Neo4j
Neo4j support will automatically start a Neo4j container and provide the value of the neo4j.uri property.
The default image (neo4j:5.26.25) can be overwritten by setting the test-resources.containers.neo4j.image-name property.
5.16 OpenTelemetry
OpenTelemetry support will automatically start a Grafana OpenTelemetry LGTM container and provide the value of the otel.exporter.otlp.endpoint property.
The provider exposes the LGTM OpenTelemetry Collector OTLP/gRPC port and resolves the endpoint in the form http://HOST:PORT.
Micronaut Test Resources uses a random mapped host port and does not bind container port 4317 directly.
To use it, add the OpenTelemetry test resource module and the Micronaut Tracing OpenTelemetry dependencies required by your application:
testResourcesService("io.micronaut.testresources:micronaut-test-resources-opentelemetry")<dependency>
<groupId>io.micronaut.testresources</groupId>
<artifactId>micronaut-test-resources-opentelemetry</artifactId>
<scope>testResourcesService</scope>
</dependency>implementation("io.micronaut.tracing:micronaut-tracing-opentelemetry")<dependency>
<groupId>io.micronaut.tracing</groupId>
<artifactId>micronaut-tracing-opentelemetry</artifactId>
</dependency>runtimeOnly("io.opentelemetry:opentelemetry-exporter-otlp")<dependency>
<groupId>io.opentelemetry</groupId>
<artifactId>opentelemetry-exporter-otlp</artifactId>
<scope>runtime</scope>
</dependency>Micronaut Tracing keeps OpenTelemetry exporters disabled by default. Enable only the signals you want to send to the local backend, for example traces:
otel.traces.exporter=otlpotel:
traces:
exporter: otlp[otel]
[otel.traces]
exporter="otlp"otel {
traces {
exporter = "otlp"
}
}{
otel {
  traces {
    exporter = "otlp"
  }
}
}{
"otel": {
"traces": {
"exporter": "otlp"
}
}
}Do not configure otel.exporter.otlp.endpoint for the local Test Resources backend.
When that property is absent and the OpenTelemetry test resource module is on the Test Resources classpath, Test Resources resolves it from the mapped LGTM OTLP/gRPC port.
If otel.exporter.otlp.endpoint is explicitly configured, including through the equivalent OTEL_EXPORTER_OTLP_ENDPOINT environment-variable configuration resolved by Micronaut, Test Resources will not start the local OpenTelemetry backend.
This lets CI, staging, or developer machines point to an existing collector:
otel.exporter.otlp.endpoint=http://collector.example:4317otel:
exporter:
otlp:
endpoint: "http://collector.example:4317"[otel]
[otel.exporter]
[otel.exporter.otlp]
endpoint="http://collector.example:4317"otel {
exporter {
otlp {
endpoint = "http://collector.example:4317"
}
}
}{
otel {
  exporter {
    otlp {
      endpoint = "http://collector.example:4317"
    }
  }
}
}{
"otel": {
"exporter": {
"otlp": {
"endpoint": "http://collector.example:4317"
}
}
}
}The default backend is lgtm, the default protocol is grpc, and the default image is grafana/otel-lgtm:0.27.1.
The image can be changed with the standard container image settings:
test-resources:
  containers:
    opentelemetry:
      image-name: "grafana/otel-lgtm"
      image-tag: 0.27.1
Only backend: lgtm and protocol: grpc are supported by this initial provider.
Unsupported values fail fast so that an application does not silently receive an endpoint for the wrong protocol.
The local Grafana UI is exposed on the mapped container port for Grafana port 3000.
When the endpoint is resolved, Test Resources logs a sanitized URL similar to:
OpenTelemetry LGTM Grafana UI available at http://localhost:<mapped port>The log message contains only the local UI URL. It does not include telemetry payloads, headers, tokens, or application data.
To disable this provider while keeping the module on the classpath:
test-resources.containers.opentelemetry.enabled=falsetest-resources:
containers:
opentelemetry:
enabled: false[test-resources]
[test-resources.containers]
[test-resources.containers.opentelemetry]
enabled=falsetestResources {
containers {
opentelemetry {
enabled = false
}
}
}{
test-resources {
containers {
opentelemetry {
enabled = false
}
}
}
}{
"test-resources": {
"containers": {
"opentelemetry": {
"enabled": false
}
}
}
}This module is intended for development and integration tests. It is not a production observability deployment, and applications should configure their production OpenTelemetry collector or managed backend independently.
5.17 RabbitMQ
RabbitMQ support will automatically start a RabbitMQ container and provide the value of the rabbitmq.uri property.
The default image (rabbitmq:4.3.0) can be overwritten by setting the test-resources.containers.rabbitmq.image-name property.
5.18 Redis
Redis support will automatically start a Redis container and provide the value of the redis.uri property.
This provider can be configured with a variety of parameters:
-
The default image (
redis:6.2.21, orgrokzen/redis-cluster:6.2.14in cluster mode) can be overwritten by setting thetest-resources.containers.redis.image-nameproperty. -
Have Test Resources spawn a Redis cluster by setting
test-resources.containers.redis.cluster-modetotrue. With this setting, the propertyredis.uriswill be defined instead ofredis.uri, and some cluster-specific parameters may be provided undertest-resources.containers.redis.cluster:-
The number of master nodes can be controlled by the
mastersproperty. -
The number of slaves per master can be controlled by the
slaves-per-masterproperty. -
The starting port number can be set with property
initial-port. For a port argument ofn, each cluster node numbered 0 toxwill have port numbern + x, respectively. The default is 7000. -
The cluster IP can be set with property
ip(may be necessary for cluster discovery on Mac computers). -
Keyspace notifications can be enabled by providing a string value to
notify-keyspace-events. If provided, the value will be set on thenotify-keyspace-eventsparameter in the redis.conf file for each node.
-
5.19 Hazelcast
Hazelcast support
Hazelcast support will automatically start a Hazelcast container and provide the values of the hazelcast.client.network.addresses property.
The default image (hazelcast/hazelcast:5.6.0-slim) can be overwritten by setting the test-resources.containers.hazelcast.image-name property.
The default version can be overwritten by setting the test-resources.containers.hazelcast.image-tag property.
Resolved properties:
hazelcast.client.network.addresses-
The list of Hazelcast client addresses (host:port) to connect to.
5.20 Infinispan
Infinispan support
Infinispan support will automatically start an Infinispan container and provide the values of the infinispan.client.hotrod.server.host and infinispan.client.hotrod.server.port properties.
The default image (quay.io/infinispan/server:16.1.3) can be overwritten by setting the test-resources.containers.infinispan.image-name property.
The default version can be overwritten by setting the test-resources.containers.infinispan.image-tag property.
Resolved properties:
infinispan.client.hotrod.server.host-
The host of the Infinispan server
infinispan.client.hotrod.server.port-
The port of the Infinispan server (Hot Rod protocol, 11222)
infinispan.client.hotrod.security.authentication.username-
Username for Hot Rod authentication (if configured in container)
infinispan.client.hotrod.security.authentication.password-
Password for Hot Rod authentication (if configured in container)
See the Testcontainers Infinispan module for more information.
5.21 WireMock
WireMock support automatically starts a WireMock container and provides the values of the wiremock.host, wiremock.port, and wiremock.url properties.
The provider module is io.micronaut.testresources:micronaut-test-resources-wiremock.
Use it when your build needs to add WireMock support explicitly to the Test Resources server classpath.
You can inject wiremock.url into a test and use it to configure the WireMock client:
@Value("${wiremock.url}")
String wireMockUrl;

URI uri = URI.create(wireMockUrl);
WireMock.configureFor(uri.getHost(), uri.getPort());
The default image (wiremock/wiremock:3.13.2-2) can be overwritten by setting the test-resources.containers.wiremock.image-name property.
The default version can be overwritten by setting the test-resources.containers.wiremock.image-tag property.
Additional WireMock CLI arguments can be configured with test-resources.containers.wiremock.cli-args.
The value may be a single argument string or a list of argument strings, which are passed directly to the WireMock container.
test-resources.containers.wiremock.cli-args[0]=--verbose
test-resources.containers.wiremock.cli-args[1]=--global-response-templating
test-resources:
containers:
wiremock:
cli-args:
- "--verbose"
- "--global-response-templating"[test-resources]
[test-resources.containers]
[test-resources.containers.wiremock]
cli-args=[
"--verbose",
"--global-response-templating"
]testResources {
containers {
wiremock {
cliArgs = ["--verbose", "--global-response-templating"]
}
}
}{
test-resources {
containers {
wiremock {
cli-args = ["--verbose", "--global-response-templating"]
}
}
}
}{
"test-resources": {
"containers": {
"wiremock": {
"cli-args": ["--verbose", "--global-response-templating"]
}
}
}
}WireMock mappings can be copied into the container with the generic Test Resources copy-to-container metadata.
Copy JSON mapping files to /home/wiremock/mappings/ and response body files to /home/wiremock/__files/:
test-resources.containers.wiremock.copy-to-container[0].classpath:wiremock/mappings/hello.json=/home/wiremock/mappings/hello.json
test-resources.containers.wiremock.copy-to-container[1].classpath:wiremock/__files/hello.txt=/home/wiremock/__files/hello.txt
test-resources:
containers:
wiremock:
copy-to-container:
- "classpath:wiremock/mappings/hello.json": /home/wiremock/mappings/hello.json
- "classpath:wiremock/__files/hello.txt": /home/wiremock/__files/hello.txt[test-resources]
[test-resources.containers]
[test-resources.containers.wiremock]
[[test-resources.containers.wiremock.copy-to-container]]
"classpath:wiremock/mappings/hello.json"="/home/wiremock/mappings/hello.json"
[[test-resources.containers.wiremock.copy-to-container]]
"classpath:wiremock/__files/hello.txt"="/home/wiremock/__files/hello.txt"testResources {
containers {
wiremock {
copyToContainer = [{
classpath:wiremock/mappings/hello.json = "/home/wiremock/mappings/hello.json"
}, {
classpath:wiremock/__files/hello.txt = "/home/wiremock/__files/hello.txt"
}]
}
}
}{
test-resources {
containers {
wiremock {
copy-to-container = [{
"classpath:wiremock/mappings/hello.json" = "/home/wiremock/mappings/hello.json"
}, {
"classpath:wiremock/__files/hello.txt" = "/home/wiremock/__files/hello.txt"
}]
}
}
}
}{
"test-resources": {
"containers": {
"wiremock": {
"copy-to-container": [{
"classpath:wiremock/mappings/hello.json": "/home/wiremock/mappings/hello.json"
}, {
"classpath:wiremock/__files/hello.txt": "/home/wiremock/__files/hello.txt"
}]
}
}
}
}The same metadata can also copy files from host paths. See Generic Testcontainers support for the full list of container metadata options.
Resolved properties:
wiremock.host-
The host name of the WireMock container.
wiremock.port-
The mapped HTTP port of the WireMock container.
wiremock.url-
The base HTTP URL of the WireMock container.
Mapping-specific Java helpers are not part of the initial WireMock provider surface.
5.22 OAuth2 / Keycloak
OAuth2 support currently provisions Keycloak for a Micronaut Security OAuth2 client named keycloak.
When micronaut-security-oauth2 is on the application classpath, Test Resources can resolve these properties automatically:
-
micronaut.security.oauth2.clients.keycloak.client-id -
micronaut.security.oauth2.clients.keycloak.client-secret -
micronaut.security.oauth2.clients.keycloak.openid.issuer -
micronaut.security.token.jwt.signatures.jwks.keycloak.url
The default image (quay.io/keycloak/keycloak:26.6.1) can be overwritten by setting the test-resources.containers.keycloak.image-name property.
The default image tag can be overwritten by setting the test-resources.containers.keycloak.image-tag property.
You can customize the imported realm and client credentials with:
test-resources.containers.keycloak.realm=micronaut
test-resources.containers.keycloak.client-id=my-client
test-resources.containers.keycloak.client-secret=my-secret
test-resources:
containers:
keycloak:
realm: 'micronaut'
client-id: 'my-client'
client-secret: 'my-secret'[test-resources]
[test-resources.containers]
[test-resources.containers.keycloak]
realm="micronaut"
client-id="my-client"
client-secret="my-secret"testResources {
containers {
keycloak {
realm = "micronaut"
clientId = "my-client"
clientSecret = "my-secret"
}
}
}{
test-resources {
containers {
keycloak {
realm = "micronaut"
client-id = "my-client"
client-secret = "my-secret"
}
}
}
}{
"test-resources": {
"containers": {
"keycloak": {
"realm": "micronaut",
"client-id": "my-client",
"client-secret": "my-secret"
}
}
}
}5.23 HashiCorp Vault
Vault support will automatically start a HashiCorp Vault container and provide the value of vault.client.uri property.
-
The default image (
vault:1.13.3) can be overwritten by setting thetest-resources.containers.hashicorp-vault.image-nameproperty. -
The default Vault access token is
vault-tokenbut this can be overridden by setting thetest-resources.containers.hashicorp-vault.tokenproperty. -
Secrets should be inserted into HashiCorp Vault at startup by adding the config:
test-resources.containers.hashicorp-vault.path=secret/my-path
test-resources.containers.hashicorp-vault.secrets[0]=key1=value1
test-resources.containers.hashicorp-vault.secrets[1]=key2=value2
test-resources:
containers:
hashicorp-vault:
path: 'secret/my-path'
secrets:
- "key1=value1"
- "key2=value2"[test-resources]
[test-resources.containers]
[test-resources.containers.hashicorp-vault]
path="secret/my-path"
secrets=[
"key1=value1",
"key2=value2"
]testResources {
containers {
hashicorpVault {
path = "secret/my-path"
secrets = ["key1=value1", "key2=value2"]
}
}
}{
test-resources {
containers {
hashicorp-vault {
path = "secret/my-path"
secrets = ["key1=value1", "key2=value2"]
}
}
}
}{
"test-resources": {
"containers": {
"hashicorp-vault": {
"path": "secret/my-path",
"secrets": ["key1=value1", "key2=value2"]
}
}
}
}5.24 HashiCorp Consul
Consul support will automatically start a HashiCorp Consul container and provide the values of the consul.client.host, consul.client.port, and consul.client.default-zone properties.
The default image (hashicorp/consul:1.15.4) can be overwritten by setting the test-resources.containers.hashicorp-consul.image-name property.
Key/value pairs can be inserted into HashiCorp Consul at startup with the test-resources.containers.hashicorp-consul.kv-properties property:
test-resources.containers.hashicorp-consul.kv-properties[0]=key1=value1
test-resources.containers.hashicorp-consul.kv-properties[1]=key2=value2
test-resources:
containers:
hashicorp-consul:
kv-properties:
- "key1=value1"
- "key2=value2"[test-resources]
[test-resources.containers]
[test-resources.containers.hashicorp-consul]
kv-properties=[
"key1=value1",
"key2=value2"
]testResources {
containers {
hashicorpConsul {
kvProperties = ["key1=value1", "key2=value2"]
}
}
}{
test-resources {
containers {
hashicorp-consul {
kv-properties = ["key1=value1", "key2=value2"]
}
}
}
}{
"test-resources": {
"containers": {
"hashicorp-consul": {
"kv-properties": ["key1=value1", "key2=value2"]
}
}
}
}5.25 Solr
Solr support will automatically start a Solr container and provide the value of the micronaut.solr.hosts property.
The default image (solr:9.8.0) can be overwritten by setting the test-resources.containers.solr.image-name property.
Resolved properties:
micronaut.solr.hosts-
The Solr endpoint URL.
micronaut.solr.zk-hosts-
The ZooKeeper endpoint when ZooKeeper is enabled.
The following configuration properties can be used to customize the Solr container:
solr.collection=my-collection
solr.config.name=my-config
solr.config.url=https://example.com/solr-config.zip
solr.schema.url=https://example.com/schema.xml
solr.zookeeper.enabled=true
solr:
collection: my-collection
config:
name: my-config
url: https://example.com/solr-config.zip
schema:
url: https://example.com/schema.xml
zookeeper:
enabled: true[solr]
collection="my-collection"
[solr.config]
name="my-config"
url="https://example.com/solr-config.zip"
[solr.schema]
url="https://example.com/schema.xml"
[solr.zookeeper]
enabled=truesolr {
collection = "my-collection"
config {
name = "my-config"
url = "https://example.com/solr-config.zip"
}
schema {
url = "https://example.com/schema.xml"
}
zookeeper {
enabled = true
}
}{
solr {
  collection = "my-collection"
  config {
    name = "my-config"
    url = "https://example.com/solr-config.zip"
  }
  schema {
    url = "https://example.com/schema.xml"
  }
  zookeeper {
    enabled = true
  }
}
}{
"solr": {
"collection": "my-collection",
"config": {
"name": "my-config",
"url": "https://example.com/solr-config.zip"
},
"schema": {
"url": "https://example.com/schema.xml"
},
"zookeeper": {
"enabled": true
}
}
}solr.collection configures the collection name, solr.config.name and solr.config.url configure a Solr config set, solr.schema.url configures a schema, and solr.zookeeper.enabled controls whether the container starts with ZooKeeper support.
5.26 Generic Testcontainers support
There are cases where the provided test resources modules don’t support your use case. For example, you may need a container image or protocol mapping that is not covered by a dedicated module.
In this case, Micronaut Test Resources provide generic support for starting arbitrary test containers. Unlike the other resources, this will require adding configuration to your application to make it work.
| For Micronaut Email JavaMail applications that need a local SMTP capture server, prefer the dedicated Mailpit support. |
Let’s illustrate how we can declare an SMTP test container (here using YAML configuration) for use with Micronaut Email:
test-resources.containers.fakesmtp.image-name=ghusta/fakesmtp
test-resources.containers.fakesmtp.hostnames[0]=smtp.host
test-resources.containers.fakesmtp.exposed-ports[0].smtp.port=25
test-resources:
containers:
fakesmtp:
image-name: ghusta/fakesmtp
hostnames:
- smtp.host
exposed-ports:
- smtp.port: 25[test-resources]
[test-resources.containers]
[test-resources.containers.fakesmtp]
image-name="ghusta/fakesmtp"
hostnames=[
"smtp.host"
]
[[test-resources.containers.fakesmtp.exposed-ports]]
"smtp.port"=25testResources {
containers {
fakesmtp {
imageName = "ghusta/fakesmtp"
hostnames = ["smtp.host"]
exposedPorts = [{
smtp.port = 25
}]
}
}
}{
test-resources {
containers {
fakesmtp {
image-name = "ghusta/fakesmtp"
hostnames = ["smtp.host"]
exposed-ports = [{
"smtp.port" = 25
}]
}
}
}
}{
"test-resources": {
"containers": {
"fakesmtp": {
"image-name": "ghusta/fakesmtp",
"hostnames": ["smtp.host"],
"exposed-ports": [{
"smtp.port": 25
}]
}
}
}
}-
fakesmtpnames the test container -
The
hostnamesdeclare what properties will be resolved with the value of the container host name. Thesmtp.hostproperty will be resolved with the container host name -
The
exposed-portsdeclares what ports the container exposes.smtp.portwill be set to the value of the mapped port25
Then the values smtp.host and smtp.port can for example be used in a bean configuration:
@Singleton
public class JavamailSessionProvider implements SessionProvider {
    @Value("${smtp.host}")          (1)
    private String smtpHost;

    @Value("${smtp.port}")          (2)
    private String smtpPort;


    @Override
    public Session session() {
        Properties props = new Properties();
        props.put("mail.smtp.host", smtpHost);
        props.put("mail.smtp.port", smtpPort);
        return Session.getDefaultInstance(props);
    }
}| 1 | The smtp.host property that we exposed in the test container configuration |
| 2 | The smtp.port property that we exposed in the test container configuration |
In addition, generic containers can bind file system resources (either read-only or read-write):
test-resources.containers.mycontainer.image-name=my/container
test-resources.containers.mycontainer.hostnames[0]=my.service.host
test-resources.containers.mycontainer.exposed-ports[0].my.service.port=1883
test-resources.containers.mycontainer.ro-fs-bind[0].readonly-file.conf=/path/to/container/readonly-file.conf
test-resources.containers.mycontainer.rw-fs-bind[0].readwrite-file.conf=/path/to/container/readwrite-file.conf
test-resources:
containers:
mycontainer:
image-name: my/container
hostnames:
- my.service.host
exposed-ports:
- my.service.port: 1883
ro-fs-bind:
- "readonly-file.conf": /path/to/container/readonly-file.conf
rw-fs-bind:
- "readwrite-file.conf": /path/to/container/readwrite-file.conf[test-resources]
[test-resources.containers]
[test-resources.containers.mycontainer]
image-name="my/container"
hostnames=[
"my.service.host"
]
[[test-resources.containers.mycontainer.exposed-ports]]
"my.service.port"=1883
[[test-resources.containers.mycontainer.ro-fs-bind]]
"readonly-file.conf"="/path/to/container/readonly-file.conf"
[[test-resources.containers.mycontainer.rw-fs-bind]]
"readwrite-file.conf"="/path/to/container/readwrite-file.conf"testResources {
containers {
mycontainer {
imageName = "my/container"
hostnames = ["my.service.host"]
exposedPorts = [{
my.service.port = 1883
}]
roFsBind = [{
readonlyFile.conf = "/path/to/container/readonly-file.conf"
}]
rwFsBind = [{
readwriteFile.conf = "/path/to/container/readwrite-file.conf"
}]
}
}
}{
test-resources {
containers {
mycontainer {
image-name = "my/container"
hostnames = ["my.service.host"]
exposed-ports = [{
"my.service.port" = 1883
}]
ro-fs-bind = [{
"readonly-file.conf" = "/path/to/container/readonly-file.conf"
}]
rw-fs-bind = [{
"readwrite-file.conf" = "/path/to/container/readwrite-file.conf"
}]
}
}
}
}{
"test-resources": {
"containers": {
"mycontainer": {
"image-name": "my/container",
"hostnames": ["my.service.host"],
"exposed-ports": [{
"my.service.port": 1883
}],
"ro-fs-bind": [{
"readonly-file.conf": "/path/to/container/readonly-file.conf"
}],
"rw-fs-bind": [{
"readwrite-file.conf": "/path/to/container/readwrite-file.conf"
}]
}
}
}
}Furthermore, generic containers can use tmpfs mappings (in read-only or read-write mode):
test-resources.containers.mycontainer.image-name=my/container
test-resources.containers.mycontainer.hostnames[0]=my.service.host
test-resources.containers.mycontainer.exposed-ports[0].my.service.port=1883
test-resources.containers.mycontainer.ro-tmpfs-mappings[0]=/path/to/readonly/container/file
test-resources.containers.mycontainer.rw-tmpfs-mappings[0]=/path/to/readwrite/container/file
test-resources:
containers:
mycontainer:
image-name: my/container
hostnames:
- my.service.host
exposed-ports:
- my.service.port: 1883
ro-tmpfs-mappings:
- /path/to/readonly/container/file
rw-tmpfs-mappings:
- /path/to/readwrite/container/file[test-resources]
[test-resources.containers]
[test-resources.containers.mycontainer]
image-name="my/container"
hostnames=[
"my.service.host"
]
ro-tmpfs-mappings=[
"/path/to/readonly/container/file"
]
rw-tmpfs-mappings=[
"/path/to/readwrite/container/file"
]
[[test-resources.containers.mycontainer.exposed-ports]]
"my.service.port"=1883testResources {
containers {
mycontainer {
imageName = "my/container"
hostnames = ["my.service.host"]
exposedPorts = [{
my.service.port = 1883
}]
roTmpfsMappings = ["/path/to/readonly/container/file"]
rwTmpfsMappings = ["/path/to/readwrite/container/file"]
}
}
}{
test-resources {
containers {
mycontainer {
image-name = "my/container"
hostnames = ["my.service.host"]
exposed-ports = [{
"my.service.port" = 1883
}]
ro-tmpfs-mappings = ["/path/to/readonly/container/file"]
rw-tmpfs-mappings = ["/path/to/readwrite/container/file"]
}
}
}
}{
"test-resources": {
"containers": {
"mycontainer": {
"image-name": "my/container",
"hostnames": ["my.service.host"],
"exposed-ports": [{
"my.service.port": 1883
}],
"ro-tmpfs-mappings": ["/path/to/readonly/container/file"],
"rw-tmpfs-mappings": ["/path/to/readwrite/container/file"]
}
}
}
}Generic containers can also declare Docker-managed anonymous volumes when you need container-local storage without binding any host filesystem path:
test-resources.containers.mycontainer.image-name=my/container
test-resources.containers.mycontainer.hostnames[0]=my.service.host
test-resources.containers.mycontainer.exposed-ports[0].my.service.port=1883
test-resources.containers.mycontainer.ro-anonymous-volumes[0]=/path/to/readonly/container/data
test-resources.containers.mycontainer.rw-anonymous-volumes[0]=/path/to/readwrite/container/data
test-resources:
containers:
mycontainer:
image-name: my/container
hostnames:
- my.service.host
exposed-ports:
- my.service.port: 1883
ro-anonymous-volumes:
- /path/to/readonly/container/data
rw-anonymous-volumes:
- /path/to/readwrite/container/data[test-resources]
[test-resources.containers]
[test-resources.containers.mycontainer]
image-name="my/container"
hostnames=[
"my.service.host"
]
ro-anonymous-volumes=[
"/path/to/readonly/container/data"
]
rw-anonymous-volumes=[
"/path/to/readwrite/container/data"
]
[[test-resources.containers.mycontainer.exposed-ports]]
"my.service.port"=1883testResources {
containers {
mycontainer {
imageName = "my/container"
hostnames = ["my.service.host"]
exposedPorts = [{
my.service.port = 1883
}]
roAnonymousVolumes = ["/path/to/readonly/container/data"]
rwAnonymousVolumes = ["/path/to/readwrite/container/data"]
}
}
}{
test-resources {
containers {
mycontainer {
image-name = "my/container"
hostnames = ["my.service.host"]
exposed-ports = [{
"my.service.port" = 1883
}]
ro-anonymous-volumes = ["/path/to/readonly/container/data"]
rw-anonymous-volumes = ["/path/to/readwrite/container/data"]
}
}
}
}{
"test-resources": {
"containers": {
"mycontainer": {
"image-name": "my/container",
"hostnames": ["my.service.host"],
"exposed-ports": [{
"my.service.port": 1883
}],
"ro-anonymous-volumes": ["/path/to/readonly/container/data"],
"rw-anonymous-volumes": ["/path/to/readwrite/container/data"]
}
}
}
}Unlike *-fs-bind, anonymous volumes do not map a host path. They use Docker-managed storage attached only to the container path, which is useful when the container expects persistent writable directories but you do not want filesystem exposure from the host. Anonymous volume targets must remain distinct from any existing bind, mount, or tmpfs target for the same container path.
It is also possible to copy files from the host to the container:
test-resources.containers.mycontainer.image-name=my/container
test-resources.containers.mycontainer.hostnames[0]=my.service.host
test-resources.containers.mycontainer.exposed-ports[0].my.service.port=1883
test-resources.containers.mycontainer.copy-to-container[0].path/to/local/readonly-file.conf=/path/to/container/file.conf
test-resources.containers.mycontainer.copy-to-container[1].classpath:/file/on/classpath.conf=/path/to/container/other.conf
test-resources:
containers:
mycontainer:
image-name: my/container
hostnames:
- my.service.host
exposed-ports:
- my.service.port: 1883
copy-to-container:
- path/to/local/readonly-file.conf: /path/to/container/file.conf
- classpath:/file/on/classpath.conf: /path/to/container/other.conf[test-resources]
[test-resources.containers]
[test-resources.containers.mycontainer]
image-name="my/container"
hostnames=[
"my.service.host"
]
[[test-resources.containers.mycontainer.exposed-ports]]
"my.service.port"=1883
[[test-resources.containers.mycontainer.copy-to-container]]
"path/to/local/readonly-file.conf"="/path/to/container/file.conf"
[[test-resources.containers.mycontainer.copy-to-container]]
"classpath:/file/on/classpath.conf"="/path/to/container/other.conf"testResources {
containers {
mycontainer {
imageName = "my/container"
hostnames = ["my.service.host"]
exposedPorts = [{
my.service.port = 1883
}]
copyToContainer = [{
path/to/local/readonlyFile.conf = "/path/to/container/file.conf"
}, {
classpath:/file/on/classpath.conf = "/path/to/container/other.conf"
}]
}
}
}{
test-resources {
containers {
mycontainer {
image-name = "my/container"
hostnames = ["my.service.host"]
exposed-ports = [{
"my.service.port" = 1883
}]
copy-to-container = [{
"path/to/local/readonly-file.conf" = "/path/to/container/file.conf"
}, {
"classpath:/file/on/classpath.conf" = "/path/to/container/other.conf"
}]
}
}
}
}{
"test-resources": {
"containers": {
"mycontainer": {
"image-name": "my/container",
"hostnames": ["my.service.host"],
"exposed-ports": [{
"my.service.port": 1883
}],
"copy-to-container": [{
"path/to/local/readonly-file.conf": "/path/to/container/file.conf"
}, {
"classpath:/file/on/classpath.conf": "/path/to/container/other.conf"
}]
}
}
}
}In case you want to copy a file found on classpath, the source path must be prefixed with classpath:.
The following properties are also supported:
-
command: Set the command that should be run in the container -
env: the map of environment variables -
labels: the map of labels -
startup-timeout: the container startup timeout
e.g:
test-resources.containers.mycontainer.image-name=my/container
test-resources.containers.mycontainer.hostnames[0]=my.service.host
test-resources.containers.mycontainer.exposed-ports[0].my.service.port=1883
test-resources.containers.mycontainer.command=some.sh
test-resources.containers.mycontainer.env[0].MY_ENV_VAR=my value
test-resources.containers.mycontainer.labels[0].my.label=my value
test-resources.containers.mycontainer.startup-timeout=120s
test-resources:
containers:
mycontainer:
image-name: my/container
hostnames:
- my.service.host
exposed-ports:
- my.service.port: 1883
command: "some.sh"
env:
- MY_ENV_VAR: "my value"
labels:
- my.label: "my value"
startup-timeout: 120s[test-resources]
[test-resources.containers]
[test-resources.containers.mycontainer]
image-name="my/container"
hostnames=[
"my.service.host"
]
command="some.sh"
startup-timeout="120s"
[[test-resources.containers.mycontainer.exposed-ports]]
"my.service.port"=1883
[[test-resources.containers.mycontainer.env]]
MY_ENV_VAR="my value"
[[test-resources.containers.mycontainer.labels]]
"my.label"="my value"testResources {
containers {
mycontainer {
imageName = "my/container"
hostnames = ["my.service.host"]
exposedPorts = [{
my.service.port = 1883
}]
command = "some.sh"
env = [{
MY_ENV_VAR = "my value"
}]
labels = [{
my.label = "my value"
}]
startupTimeout = "120s"
}
}
}{
test-resources {
containers {
mycontainer {
image-name = "my/container"
hostnames = ["my.service.host"]
exposed-ports = [{
"my.service.port" = 1883
}]
command = "some.sh"
env = [{
MY_ENV_VAR = "my value"
}]
labels = [{
"my.label" = "my value"
}]
startup-timeout = "120s"
}
}
}
}{
"test-resources": {
"containers": {
"mycontainer": {
"image-name": "my/container",
"hostnames": ["my.service.host"],
"exposed-ports": [{
"my.service.port": 1883
}],
"command": "some.sh",
"env": [{
"MY_ENV_VAR": "my value"
}],
"labels": [{
"my.label": "my value"
}],
"startup-timeout": "120s"
}
}
}
}Please refer to the configuration properties reference for details.
Advanced networking
By default, each container is spawned in its own network. It is possible to let containers communicate with each other by declaring the network they belong to:
test-resources.containers.producer.image-name=alpine:3.14
test-resources.containers.producer.command=top
test-resources.containers.producer.network=custom
test-resources.containers.producer.network-aliases=bob
test-resources.containers.producer.hostnames=producer.host
test-resources.containers.consumer.image-name=alpine:3.14
test-resources.containers.consumer.command=top
test-resources.containers.consumer.network=custom
test-resources.containers.consumer.network-aliases=alice
test-resources.containers.consumer.hostnames=consumer.host
test-resources:
containers:
producer:
image-name: alpine:3.14
command: top
network: custom
network-aliases: bob
hostnames: producer.host
consumer:
image-name: alpine:3.14
command: top
network: custom
network-aliases: alice
hostnames: consumer.host[test-resources]
[test-resources.containers]
[test-resources.containers.producer]
image-name="alpine:3.14"
command="top"
network="custom"
network-aliases="bob"
hostnames="producer.host"
[test-resources.containers.consumer]
image-name="alpine:3.14"
command="top"
network="custom"
network-aliases="alice"
hostnames="consumer.host"testResources {
containers {
producer {
imageName = "alpine:3.14"
command = "top"
network = "custom"
networkAliases = "bob"
hostnames = "producer.host"
}
consumer {
imageName = "alpine:3.14"
command = "top"
network = "custom"
networkAliases = "alice"
hostnames = "consumer.host"
}
}
}{
test-resources {
containers {
producer {
image-name = "alpine:3.14"
command = "top"
network = "custom"
network-aliases = "bob"
hostnames = "producer.host"
}
consumer {
image-name = "alpine:3.14"
command = "top"
network = "custom"
network-aliases = "alice"
hostnames = "consumer.host"
}
}
}
}{
"test-resources": {
"containers": {
"producer": {
"image-name": "alpine:3.14",
"command": "top",
"network": "custom",
"network-aliases": "bob",
"hostnames": "producer.host"
},
"consumer": {
"image-name": "alpine:3.14",
"command": "top",
"network": "custom",
"network-aliases": "alice",
"hostnames": "consumer.host"
}
}
}
}The network key is used to declare the network containers use.
The network-aliases can be used to assign host names to the containers.
The network-mode can be used to set the network mode (e.g. including 'host', 'bridge', 'none' or the name of an existing named network.)
Wait strategies
Micronaut Test Resources uses the underlying container’s default Testcontainers wait strategies unless you configure test-resources.containers.<name>.wait-strategy… or a provider documents a more specific default.
It is possible to override the default by configuration.
test-resources.containers.mycontainer.image-name=my/container
test-resources.containers.mycontainer.wait-strategy.log.regex=.*Started.*
test-resources:
containers:
mycontainer:
image-name: my/container
wait-strategy:
log:
regex: ".*Started.*"[test-resources]
[test-resources.containers]
[test-resources.containers.mycontainer]
image-name="my/container"
[test-resources.containers.mycontainer.wait-strategy]
[test-resources.containers.mycontainer.wait-strategy.log]
regex=".*Started.*"testResources {
containers {
mycontainer {
imageName = "my/container"
waitStrategy {
log {
regex = ".*Started.*"
}
}
}
}
}{
test-resources {
containers {
mycontainer {
image-name = "my/container"
wait-strategy {
log {
regex = ".*Started.*"
}
}
}
}
}
}{
"test-resources": {
"containers": {
"mycontainer": {
"image-name": "my/container",
"wait-strategy": {
"log": {
"regex": ".*Started.*"
}
}
}
}
}
}The following wait strategies are supported:
-
logstrategy with the following properties:-
regex: the regular expression to match -
times: the number of times the regex should be matched
-
-
httpstrategy with the following properties:-
path: the path to check -
tls: if TLS should be enabled -
port: the port to listen on -
status-code: the list of expected status codes
-
-
portstrategy -
healthcheck: Docker healthcheck strategy
Multiple strategies can be configured, in which case they are all applied (waits until all conditions are met):
test-resources.containers.mycontainer.image-name=my/container
test-resources.containers.mycontainer.wait-strategy.http.path=/
test-resources.containers.mycontainer.wait-strategy.http.port=8080
test-resources.containers.mycontainer.wait-strategy.log.regex=.*Started.*
test-resources:
containers:
mycontainer:
image-name: my/container
wait-strategy:
http:
path: /
port: 8080
log:
regex: ".*Started.*"[test-resources]
[test-resources.containers]
[test-resources.containers.mycontainer]
image-name="my/container"
[test-resources.containers.mycontainer.wait-strategy]
[test-resources.containers.mycontainer.wait-strategy.http]
path="/"
port=8080
[test-resources.containers.mycontainer.wait-strategy.log]
regex=".*Started.*"testResources {
containers {
mycontainer {
imageName = "my/container"
waitStrategy {
http {
path = "/"
port = 8080
}
log {
regex = ".*Started.*"
}
}
}
}
}{
test-resources {
containers {
mycontainer {
image-name = "my/container"
wait-strategy {
http {
path = "/"
port = 8080
}
log {
regex = ".*Started.*"
}
}
}
}
}
}{
"test-resources": {
"containers": {
"mycontainer": {
"image-name": "my/container",
"wait-strategy": {
"http": {
"path": "/",
"port": 8080
},
"log": {
"regex": ".*Started.*"
}
}
}
}
}
}It is possible to configure the all strategy itself:
test-resources.containers.mycontainer.image-name=my/container
test-resources.containers.mycontainer.wait-strategy.http.path=/
test-resources.containers.mycontainer.wait-strategy.http.port=8080
test-resources.containers.mycontainer.wait-strategy.log.regex=.*Started.*
test-resources.containers.mycontainer.wait-strategy.all.timeout=120s
test-resources:
containers:
mycontainer:
image-name: my/container
wait-strategy:
http:
path: /
port: 8080
log:
regex: ".*Started.*"
all:
timeout: 120s[test-resources]
[test-resources.containers]
[test-resources.containers.mycontainer]
image-name="my/container"
[test-resources.containers.mycontainer.wait-strategy]
[test-resources.containers.mycontainer.wait-strategy.http]
path="/"
port=8080
[test-resources.containers.mycontainer.wait-strategy.log]
regex=".*Started.*"
[test-resources.containers.mycontainer.wait-strategy.all]
timeout="120s"testResources {
containers {
mycontainer {
imageName = "my/container"
waitStrategy {
http {
path = "/"
port = 8080
}
log {
regex = ".*Started.*"
}
all {
timeout = "120s"
}
}
}
}
}{
test-resources {
containers {
mycontainer {
image-name = "my/container"
wait-strategy {
http {
path = "/"
port = 8080
}
log {
regex = ".*Started.*"
}
all {
timeout = "120s"
}
}
}
}
}
}{
"test-resources": {
"containers": {
"mycontainer": {
"image-name": "my/container",
"wait-strategy": {
"http": {
"path": "/",
"port": 8080
},
"log": {
"regex": ".*Started.*"
},
"all": {
"timeout": "120s"
}
}
}
}
}
}Dependencies between containers
In some cases, your containers may require other containers to be started before they start.
You can declare such dependencies with the depends-on property:
test-resources.containers.mycontainer.image-name=my/container
test-resources.containers.mycontainer.depends-on=other
test-resources.containers.other.image-name=my/other
test-resources:
containers:
mycontainer:
image-name: "my/container"
depends-on: other
# ...
other:
image-name: "my/other"
# ...[test-resources]
[test-resources.containers]
[test-resources.containers.mycontainer]
image-name="my/container"
depends-on="other"
[test-resources.containers.other]
image-name="my/other"testResources {
containers {
mycontainer {
imageName = "my/container"
dependsOn = "other"
}
other {
imageName = "my/other"
}
}
}{
test-resources {
containers {
mycontainer {
image-name = "my/container"
depends-on = "other"
}
other {
image-name = "my/other"
}
}
}
}{
"test-resources": {
"containers": {
"mycontainer": {
"image-name": "my/container",
"depends-on": "other"
},
"other": {
"image-name": "my/other"
}
}
}
}It’s worth noting that such containers need to be declared on the same network in order to be able to communicate with each other.
Dependencies between containers only work between generic containers. It is not possible to create a dependency between a generic container and a container created with the other test resources resolvers. For example, you cannot add a dependency on a container which provides a MySQL database by adding a depends-on: mysql.
|
Container-backed resolvers can distinguish between the logical consumer name and the physical test resource identity. When multiple consumers set the same test-resources.resource-name, Micronaut Test Resources can reuse one physical container for the same provider and scope. Supported database resolvers can also combine that shared resource name with per-datasource db-name values to create multiple databases on the same shared container. Without that opt-in property, each logical consumer keeps the default isolated behavior.
6 Micronaut Test extensions
Micronaut Test Resources also provides extensions to Micronaut Test to support more advanced use cases. The core extension provides a way to expand the set of test properties available to tests, while the JUnit Platform extension provides ways to isolate resources needed by different tests.
6.1 Core extension
In order to use the core extension, you need to add this dependency to your build:
testImplementation("io.micronaut.testresources:micronaut-test-resources-extensions-core")<dependency>
<groupId>io.micronaut.testresources</groupId>
<artifactId>micronaut-test-resources-extensions-core</artifactId>
<scope>test</scope>
</dependency>Expanding the set of test properties
Micronaut Test resources is capable of supplying the values of properties which are missing from your configuration when you execute tests.
For example, if the property datasources.default.url is missing, then the service will be called, a database will be provisioned and made available to your application.
However, there is one assumption: these properties are only available once the application context is available.
In some cases, you may need to expand the set of properties available to tests before the application under test is started (or before the application context is available).
In Micronaut, a test property can be supplied by implementing the io.micronaut.test.support.TestPropertyProvider interface, for example:
class MyTest implements TestPropertyProvider {
// ...
Map<String, String> getProperties() {
return Map.of(
"myapp.someProperty", "value"
);
}
}However, a TestPropertyProvider cannot access values which are provided by Micronaut Test Resources, or values which are available in your configuration files, which means that you cannot compute a new property based on the value of other properties.
The Micronaut test core extension offers an alternative mechanism to solve this problem: you can annotate a test with @TestResourcesProperties and provide a couple arguments:
-
the list of test resource properties which you need to compute your property
-
a class which is responsible for deriving new values from the set of available test properties
To illustrate this, imagine a test which needs to access a RabbitMQ cluster.
Micronaut test resources will not provide a rabbitmq.servers.product-cluster.port, but does provide a rabbitmq.url property.
What we need is therefore a provider which will compute the value of rabbitmq.servers.product-cluster.port from that rabbitmq.url property.
This has to be done before the application is started, so we can use @TestResourcesProperties for this.
First, annotate your test with:
@MicronautTest
@TestResourcesProperties(
value = "rabbitmq.uri",
providers = ConnectionSpec.RabbitMQProvider.class
)
class ConnectionSpec {
// ...
}Next implement the RabbitMQProvider type (here it’s done as a nested class in the test but there’s no limitation about where to find it):
@ReflectiveAccess
public static class RabbitMQProvider implements TestResourcesPropertyProvider {
@Override
public Map<String, String> provide(Map<String, Object> testProperties) {
String uri = (String) testProperties.get("rabbitmq.uri");
return Map.of(
"rabbitmq.servers.product-cluster.port", String.valueOf(URI.create(uri).getPort())
);
}
}A test resources property provider can access:
-
the list of properties requested via the
valueof@TestResourcesProperties -
the list of properties which are available in your configuration files
In this case, we are computing the value of rabbitmq.servers.product-cluster.port from the rabbitmq.uri and return it as a single map entry, which will be added to the set of test properties.
6.2 JUnit Platform
In order to use the JUnit Platform extension, you need to add this dependency to your build:
testImplementation("io.micronaut.testresources:micronaut-test-resources-extensions-junit-platform")<dependency>
<groupId>io.micronaut.testresources</groupId>
<artifactId>micronaut-test-resources-extensions-junit-platform</artifactId>
<scope>test</scope>
</dependency>This extension is compatible with test frameworks which use JUnit Platform, which means in particular all test frameworks supported by Micronaut:
Isolating test resources
By default, Micronaut Test Resources will share test resources for a whole test suite. For example, if 2 tests need a MySQL container, then the first test will start the container, and the next step will reuse that container. The main advantage is that you don’t pay the cost of starting a container twice (or more), which can dramatically speed up test suites. The responsibility of shutting down resources is delegated to the build tools (e.g Gradle or Maven), which do this at the end of the build. The advantage of this is that not only a test container can be shared by different tests of a test suite, but it can be shared by different tasks of a single build. In particular, this allows sharing a container between JVM tests and native tests: the container will be started at the beginning of the build, and reused for native tests.
While this behavior is usually preferred, there are situations where you may want to isolate tests, for example:
-
when your test requires a dedicated container with a different configuration from the other tests
-
when it’s difficult to clean up the state of a container after a test is executed
-
when your tests spawn many different containers and that resource consumption becomes too high
For example, you may have an application which runs tests on different databases.
By using the default behavior, it would mean that a database container would be started for each database, then left over even when the suite which tests that database is done.
In order to reduce consumption, you can now use the @TestResourcesScope annotation to declare the scope of test resources.
The easiest is to use an explicit name for a scope:
@TestResourcesScope("my scope")
class MyTest {
@Test
void testSomething() {
// ...
}
}When using this annotation, all tests which are using the same scope will share the test resources of that scope. Once the last test which requires that scope is finished, test resources of that scope are automatically closed.
In addition to an explicit name, it is possible to supply a naming strategy:
@TestResourcesScope(namingStrategy = MyStrategy)
class MyTest {
@Test
void testSomething() {
// ...
}
}Test resources come with 2 built-in strategies:
-
ScopeNamingStrategy.TestClassNamewill use the name of the test class as the scope, which means in practice that the resources are exclusive to this test class -
ScopeNamingStrategy.PackageNamewill use the name of the package of the test, which can be handy if all the tests which are in a common package share the same resources.
Known limitations of @TestResourcesScope
-
a test can only use single scope: it is not possible to have a test which requires multiple scopes, but nested test classes can override the scope of their parent test class
-
scopes are handled per process (e.g per JVM), which means that if 2 tests use the same scope but are executed on different JVMs, then the scope will be closed independently in these JVMs.
The 2nd point is important to understand as the test resources service runs independently of your test suite. This means in practice that if 2 tests executed in 2 different processes, then as soon as the first process has finished all tests which use that scope, the scope will be closed on the common server. While test resources can recover from that situation by spawning a new test resource when the 2nd process will need it, it is possible that a scope is closed while a test is running in a different process.
For this reason, we recommend to make sure that you only use this feature if you are not splitting your test suite on multiple processes, which can happen if you use forkEvery in Gradle or parallel test execution with the Surefire Maven plugin.
Similarly, using the test distribution plugin of Gradle will trigger the same problem.
In practice, this may not be an issue for your use cases, depending on how you use scopes.
7 Debugging
The supported debugging path for the remote protocol is:
-
Gradle debug mode for the test resources server process
-
server logs
-
the control panel when it is available on the server classpath
Mixed client/server versions across the JSON and binary protocol boundary are not supported.
7.1 Running the test resources service in debug mode
The test resources service runs as a separate service, on its own process.
Debugging the test resources service is currently only supported via the Gradle plugin. This can be configured using the following code:
tasks.named("internalStartTestResourcesService") {
debugServer = true
}tasks.internalStartTestResourcesService {
debugServer.set(true)
}Alternatively, you may want to add the test resources control panel.
On 4.0.x, the remote RPC endpoints are binary rather than JSON.
If you need to understand what the server is doing, prefer server logs, Gradle debug mode, and the control panel instead of calling the RPC routes with curl or httpie.
7.2 Control Panel
This module adds a Micronaut Control Panel to the test resources server.
When added, the control panel module will be available on /control-panel of the test resources service.
For example, at startup, you will see the following message:
Test Resources control panel can be browsed at http://localhost:40701/control-panel
This URL can only be accessed from the local host. It provides information about:
-
the Docker environment (status and containers which have been started)
-
the test resources modules which are loaded in the test resources service (one for each test resource)
-
the properties which have been resolved by each test resources provider
For example, it is possible to determine the database URL, username and password which were resolved by browsing to the corresponding test resources panel:
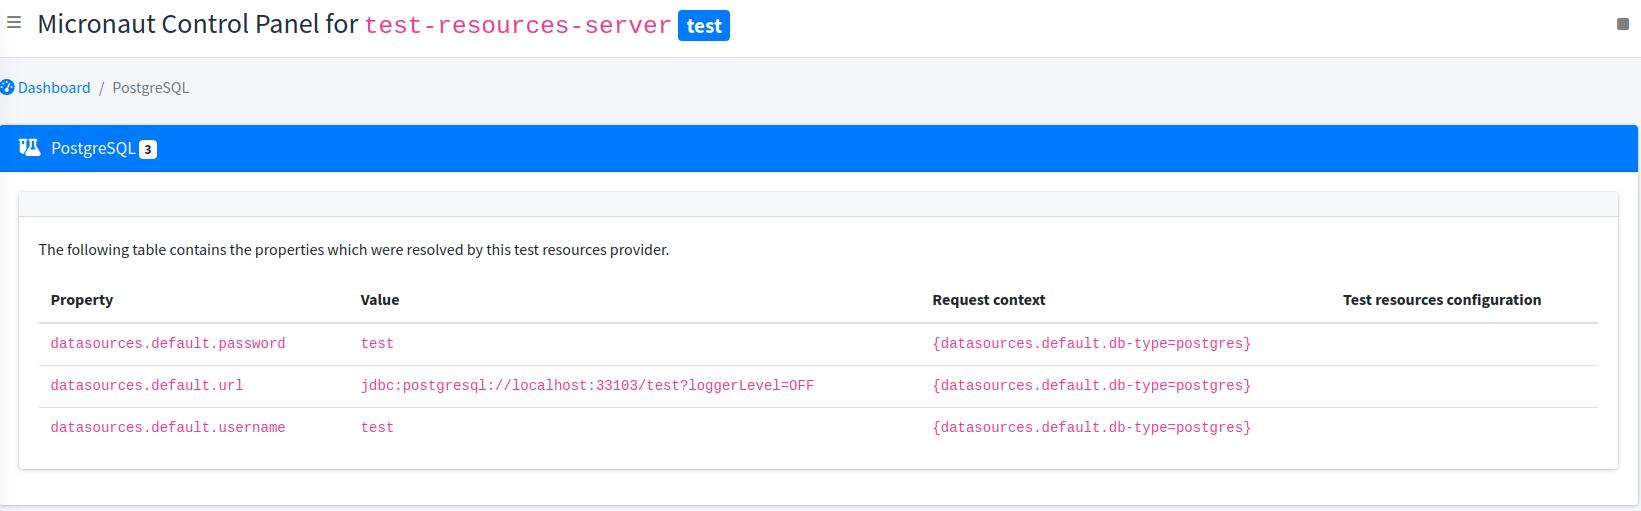
Note that the control panel cannot show properties before the application has tried to resolve them, because the value of the properties depends on the request context. That request context is displayed
8 Architecture
Micronaut Test Resources essentially consists of:
-
a test resource server, which is responsible for service "test provisioning requests"
-
a thin test resource client, which is injected in the classpath of the application under test
-
test resources support modules, which are injected on the server classpath by build tools, based on inference and configuration
The client is responsible for resolving "missing properties".
For example, if a bean needs the value of the datasources.default.url property and that this property isn’t set, then the client will issue a request on the test resources server to give the value of that property.
As a side effect of providing the value, a database container may be started.
On the 4.0.x line, the client/server RPC boundary uses a dedicated binary media type instead of JSON.
This keeps the remote protocol narrow and removes the JSON transport requirement from the client side.
8.1 The test resources server
The Micronaut Test Resources server is a service which is responsible for handling the lifecycle of test resources.
For example, a MySQL database may need to be started when the tests start, and shutdown at the end of the build.
For this purpose, the test resource server must be started before the application under test starts, and shutdown after test resources are no longer needed.
It means, for example, that with Gradle continuous builds, the test resources server would outlive a single build, making it possible to develop your application while not paying the price of starting a container on each build.
The remote RPC endpoints exposed by the server now consume and produce a dedicated binary media type.
Manual JSON callers are therefore not a supported integration path for those endpoints on 4.0.x.
8.1.1 Sharing containers between independent builds
By default, a server will be spawned for each build, and shutdown at the end of a build (or after several builds if using the continuous mode in Gradle).
However, what if you have several projects and that you want to share test resources between them? As an example, you might have a project which consists of a Kafka publisher and another project with a Kafka consumer. If they don’t use the same Kafka server, then they won’t be able to communicate with each other.
The solution to this problem is to use a shared server. By default builds would spawn a server per build on a different port, but if you specify a port explicitly, then both builds will use the same server.
| If you use a shared server, then you must make sure that the first build to start the server provides all the support modules. |
8.1.2 Configuring the server
Docker Client creation timeout
The test-resources server communicates with Docker via a docker client.
By default, creation of this client is expected to take less than 10 seconds.
However, under certain circumstances (limited resources, docker in docker, etc.), this may take longer.
To configure the timeout, you can pass a system property docker.check.timeout.seconds or an environment variable TEST_RESOURCES_DOCKER_CHECK_TIMEOUT_SECONDS with the number of seconds you require.
8.2 The test resources client
The Micronaut Test Resources client is a lightweight client which connects to the test resources server. It basically delegates requests of property resolution from Micronaut to the server.
This client is automatically injected on the application classpath in development mode or during tests. As a user, you should never have to deal with this module directly.
Conventional lookup locations
When the client is configured automatically, Micronaut Test Resources prefers system properties. This is the most reliable option because it supports the full client configuration, including shared servers and namespaces.
If the client cannot find the server settings in system properties, it falls back to test-resources.properties files in conventional locations:
-
./.micronaut/test-resources/test-resources.properties -
~/.micronaut/test-resources/test-resources.propertieswhen theTEST_RESOURCES_NAMESPACEenvironment variable is not set -
~/.micronaut/test-resources-<namespace>/test-resources.propertieswhen theTEST_RESOURCES_NAMESPACEenvironment variable is set
Build tools write this file when they start a server and create fresh recorded settings, then reuse it when reconnecting to an already-running shared server. The working-directory location is scoped to the current project checkout. The user-home location is intended for settings shared across builds, so it can survive older experiments or manually managed shared servers.
If Micronaut Test Resources unexpectedly connects to an old server or fails because a recorded server is no longer running, remove the stale test-resources.properties file from the relevant .micronaut directory and rerun the build so the settings can be recreated.
|
The remote transport is a small binary protocol shared with the server.
That protocol is intentionally limited to the value shapes used by the RPC layer: strings, booleans, integral numbers, lists, maps, and null.
8.3 Embedded test resources
The embedded test resources module is used by the Test Resources Server internally. It is responsible for aggregating several test resources resolvers and providing a unified interface to the test resources.
It is possible for an application to use the embedded test resources module directly instead of using the server and the client. However, we don’t recommend it because it would enhance the application classpath with unnecessary dependencies: each of the test resource resolver would add dependencies on the application that you may not want, potentially introducing conflicts.
The client/server model is designed to avoid this situation, while offering a more fine-grained control over the lifecycle of the test resources.
8.4 Implementing a test resource
In case the provided test resources are not enough, or if you have to tweak the configuration of test resources in such a way that is not possible via simple configuration (for example, you might need to execute commands in a test container, which is not supported), you can implement your own test resource resolver.
|
In the general case, test resources are not loaded in the same process as your tests: they will be loaded in a service which runs independently.
As a consequence, it is a mistake to put their implementation in your test source set (that is to say in |
A test resource resolver is loaded at application startup, before the ApplicationContext is available, and therefore cannot use traditional Micronaut dependency injection.
Therefore, a test resource resolver is a service implementing the TestResourcesResolver interface.
For test resources which make use of Testcontainers, you may extend the base AbstractTestContainersProvider class.
In addition, you need to declare the resolver for service loading, by adding your implementation type name in the META-INF/services/io.micronaut.testresources.core.TestResourcesResolver file.
Lifecycle
At application startup
Implementing a test resources resolver requires to understand the lifecycle of resolvers. An initial step is done when the resolvers are loaded (for example in the server process)
-
test resource resolvers are loaded via service loading
-
the
TestResourcesResolver#getRequiredPropertyEntries()method is called on a resolver. This method should return a list of property entries that the resolver needs to know about in order to determine which properties it can resolve. For example, a datasource URL resolver must know the names of the datasources before it can tell what properties it can resolve. Therefore, it would returndatasourcesto this method. -
the
TestResourcesResolver#getResolvablePropertiesmethod is called, with a couple maps:-
the first map contains at the key the name of a "required property entry" from the call in 2. For example,
datasources. The value is the list of entries for that property. For example,[default, users, books]. -
the second map contains the whole
test-resourcesconfiguration from the application, as a flat map of properties.
-
The resolver can then return a list of properties that it can resolve. For example, datasources.default.url, datasources.users.url, datasources.books.url, etc.
When a property needs to be resolved
At this stage, we know all properties that resolvers are able to resolve. So whenever Micronaut will encounter a property without value, it will ask the resolvers to resolve it. This is done in 2 steps:
-
the
TestResourceResolver#getRequiredPropertiesis called with the expression being resolved. It gives a chance to the resolver to tell what other properties it needs to read before resolving the expression. For example, a database resolver may need to read thedatasources.default.db-typeproperty before it can resolve thedatasources.default.urlproperty, so that it can tell if it’s actually capable of handling that database type or not. -
the
resolvemethod is called with the expression being resolved, the map of resolved properties from 1. and the whole configuration map of thetest-resourcesfrom the application.
It is the responsibility of the TestResourcesResolver to check, when resolve is called, that it can actually resolve the supplied expression. Do not assume that it will be called with an expression that it can resolve.
If, for some reason, the resolver cannot resolve the expression then Optional#empty() should be returned, otherwise the test resource resolver can return the resolved value.
As part of the resolution, a test resource may be started (for example a container).
9 Guides
See the following guides to learn more. They demonstrate using Testcontainers, followed by the simplification of using Test Resources instead.
10 Repository
You can find the source code of this project in this repository: