mn create-app example.micronaut.micronautguide --feature=aws-lambda --build=gradle --lang=kotlinDeploy a Micronaut application to AWS Lambda Java 11 Runtime
Learn how to distribute a Micronaut application to AWS Lambda 11 Runtime
Authors: Sergio del Amo
Micronaut Version: 2.5.0
1. Getting Started
In this guide we are going to create a Micronaut app written in Kotlin.
2. What you will need
To complete this guide, you will need the following:
-
Some time on your hands
-
A decent text editor or IDE
-
JDK 1.8 or greater installed with
JAVA_HOMEconfigured appropriately
3. Solution
We recommend that you follow the instructions in the next sections and create the app step by step. However, you can go right to the completed example.
-
Download and unzip the source
4. Writing the App
Create an app using the Micronaut Command Line Interface or with Micronaut Launch.
If you don’t specify the --build argument, Gradle is used as a build tool. If you don’t specify the --lang argument, Java is used as a language.
|
If you use Micronaut Launch, add aws-lambda feature.
The previous command creates a Micronaut app with the default package example.micronaut in a folder named micronautguide.
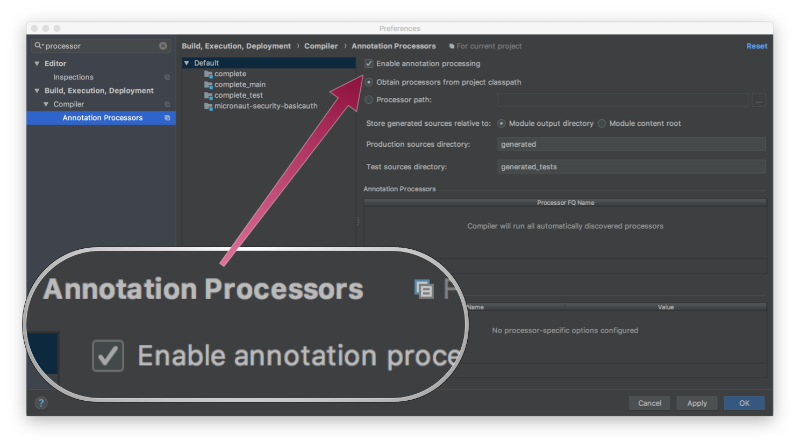
If you are using Java or Kotlin and IntelliJ IDEA, make sure you have enabled annotation processing.
The generated application contains a BookController. It responds to POST request to /.
src/main/kotlin/example/micronaut/BookController.kt
package example.micronaut
import io.micronaut.http.annotation.Body
import io.micronaut.http.annotation.Controller
import io.micronaut.http.annotation.Post
import java.util.UUID
import javax.validation.Valid

@Controller
open class BookController {
    @Post
    open fun save(@Valid @Body book: Book): BookSaved {
        val bookSaved = BookSaved()
        bookSaved.name = book.name
        bookSaved.isbn = UUID.randomUUID().toString()
        return bookSaved
    }
}-
The class is defined as a controller with the
@Controllerannotation mapped to the path / -
The
@Postannotation is used to map HTTP request to/to the thesavemethod. -
Add the
@Validannotation to any method parameter’s object which requires validation.
The controller’s method parameter is a Book object:
src/main/kotlin/example/micronaut/Book.kt
package example.micronaut
import io.micronaut.core.annotation.Introspected

@Introspected
class Book {
    var name: String? = null
}-
Annotate the class with
@Introspectedto generate the Bean Metainformation at compile time.
It returns a BookSaved object:
src/main/kotlin/example/micronaut/BookSaved.kt
package example.micronaut
import io.micronaut.core.annotation.Introspected

@Introspected
class BookSaved {
    var name: String? = null
    var isbn: String? = null
}-
Annotate the class with
@Introspectedto generate the Bean Metainformation at compile time.
The generated tests illustrates how the code works when the lambda gets invoked:
src/test/kotlin/example/micronaut/BookControllerTest.kt
package example.micronaut;
import com.amazonaws.serverless.proxy.internal.testutils.AwsProxyRequestBuilder
import com.amazonaws.serverless.proxy.internal.testutils.MockLambdaContext
import com.amazonaws.services.lambda.runtime.Context
import com.fasterxml.jackson.databind.ObjectMapper
import io.micronaut.http.HttpHeaders
import io.micronaut.http.HttpMethod
import io.micronaut.http.HttpStatus
import io.micronaut.http.MediaType
import org.junit.jupiter.api.Assertions
import org.junit.jupiter.api.Test
import io.micronaut.function.aws.proxy.MicronautLambdaHandler

class BookRequestHandlerTest {

    @Test
    fun testBookController() {
        val handler = MicronautLambdaHandler()
        val book = Book()
        book.name = "Building Microservices"
        val objectMapper = handler.applicationContext.getBean(ObjectMapper::class.java)
        val json = objectMapper.writeValueAsString(book)
        val request = AwsProxyRequestBuilder("/", HttpMethod.POST.toString())
                .header(HttpHeaders.CONTENT_TYPE, MediaType.APPLICATION_JSON)
                .body(json)
                .build()
        val lambdaContext: Context = MockLambdaContext()
        val response = handler.handleRequest(request, lambdaContext)
        Assertions.assertEquals(response.statusCode, HttpStatus.OK.code)
        val bookSaved: BookSaved = objectMapper.readValue(response.body, BookSaved::class.java)
        Assertions.assertNotNull(bookSaved)
        Assertions.assertEquals(bookSaved.name, book.name)
        Assertions.assertNotNull(bookSaved.isbn)
        handler.applicationContext.close()
    }
}-
When you instantiate the Handler, the application context starts.
-
Remember to close your application context when you end your test. You can use your handler to obtain it.
-
You don’t invoke the controller directly. Instead, your handler receives a AWS Proxy Request event which it is routed transparently to your controller.
5. Testing the Application
To run the tests:
$ ./gradlew test
$ open build/reports/tests/test/index.html
6. Lambda
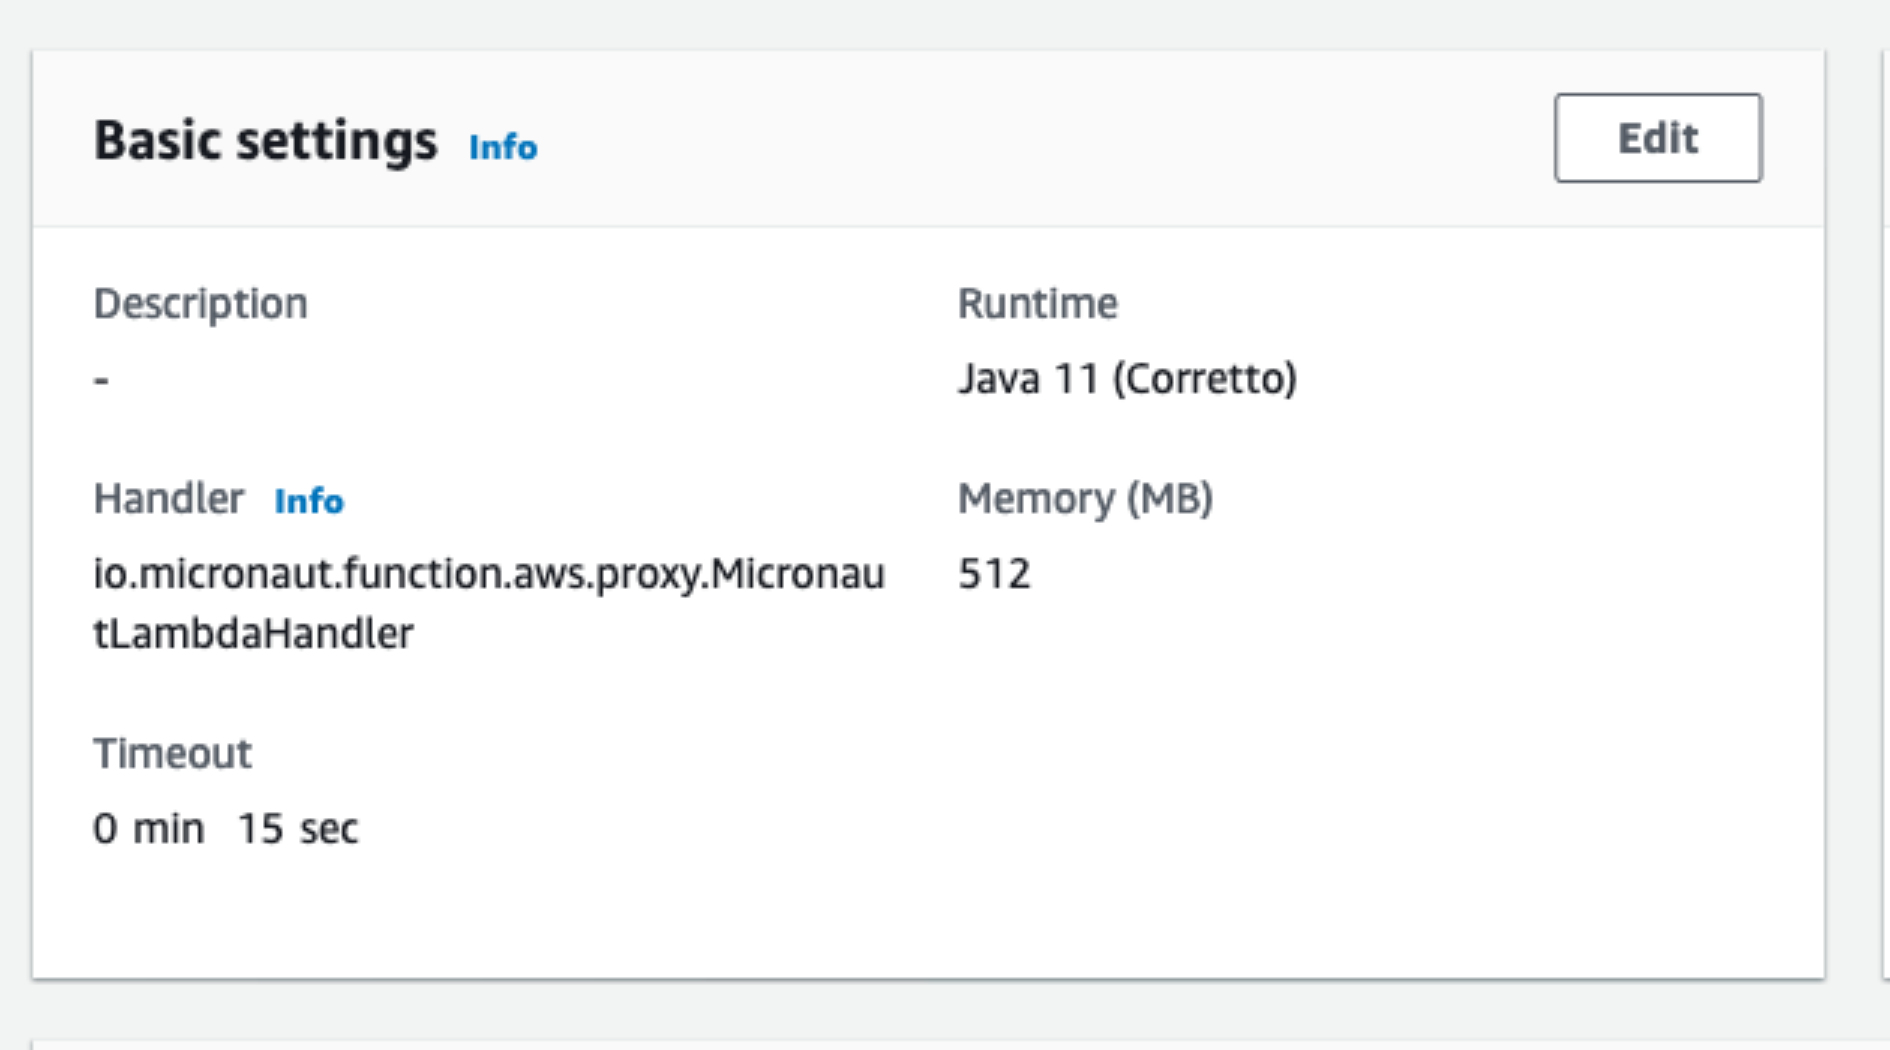
Create a Lambda Function. As a runtime, select Java 11 (Correto).

6.1. Upload Code
Create an executable jar including all dependencies:
$ ./gradlew assembleUpload it:

6.2. Handler
As Handler, set:
io.micronaut.function.aws.proxy.MicronautLambdaHandler
6.3. Test
You can test it easily. As Event Template use apigateway-aws-proxy to get you started:
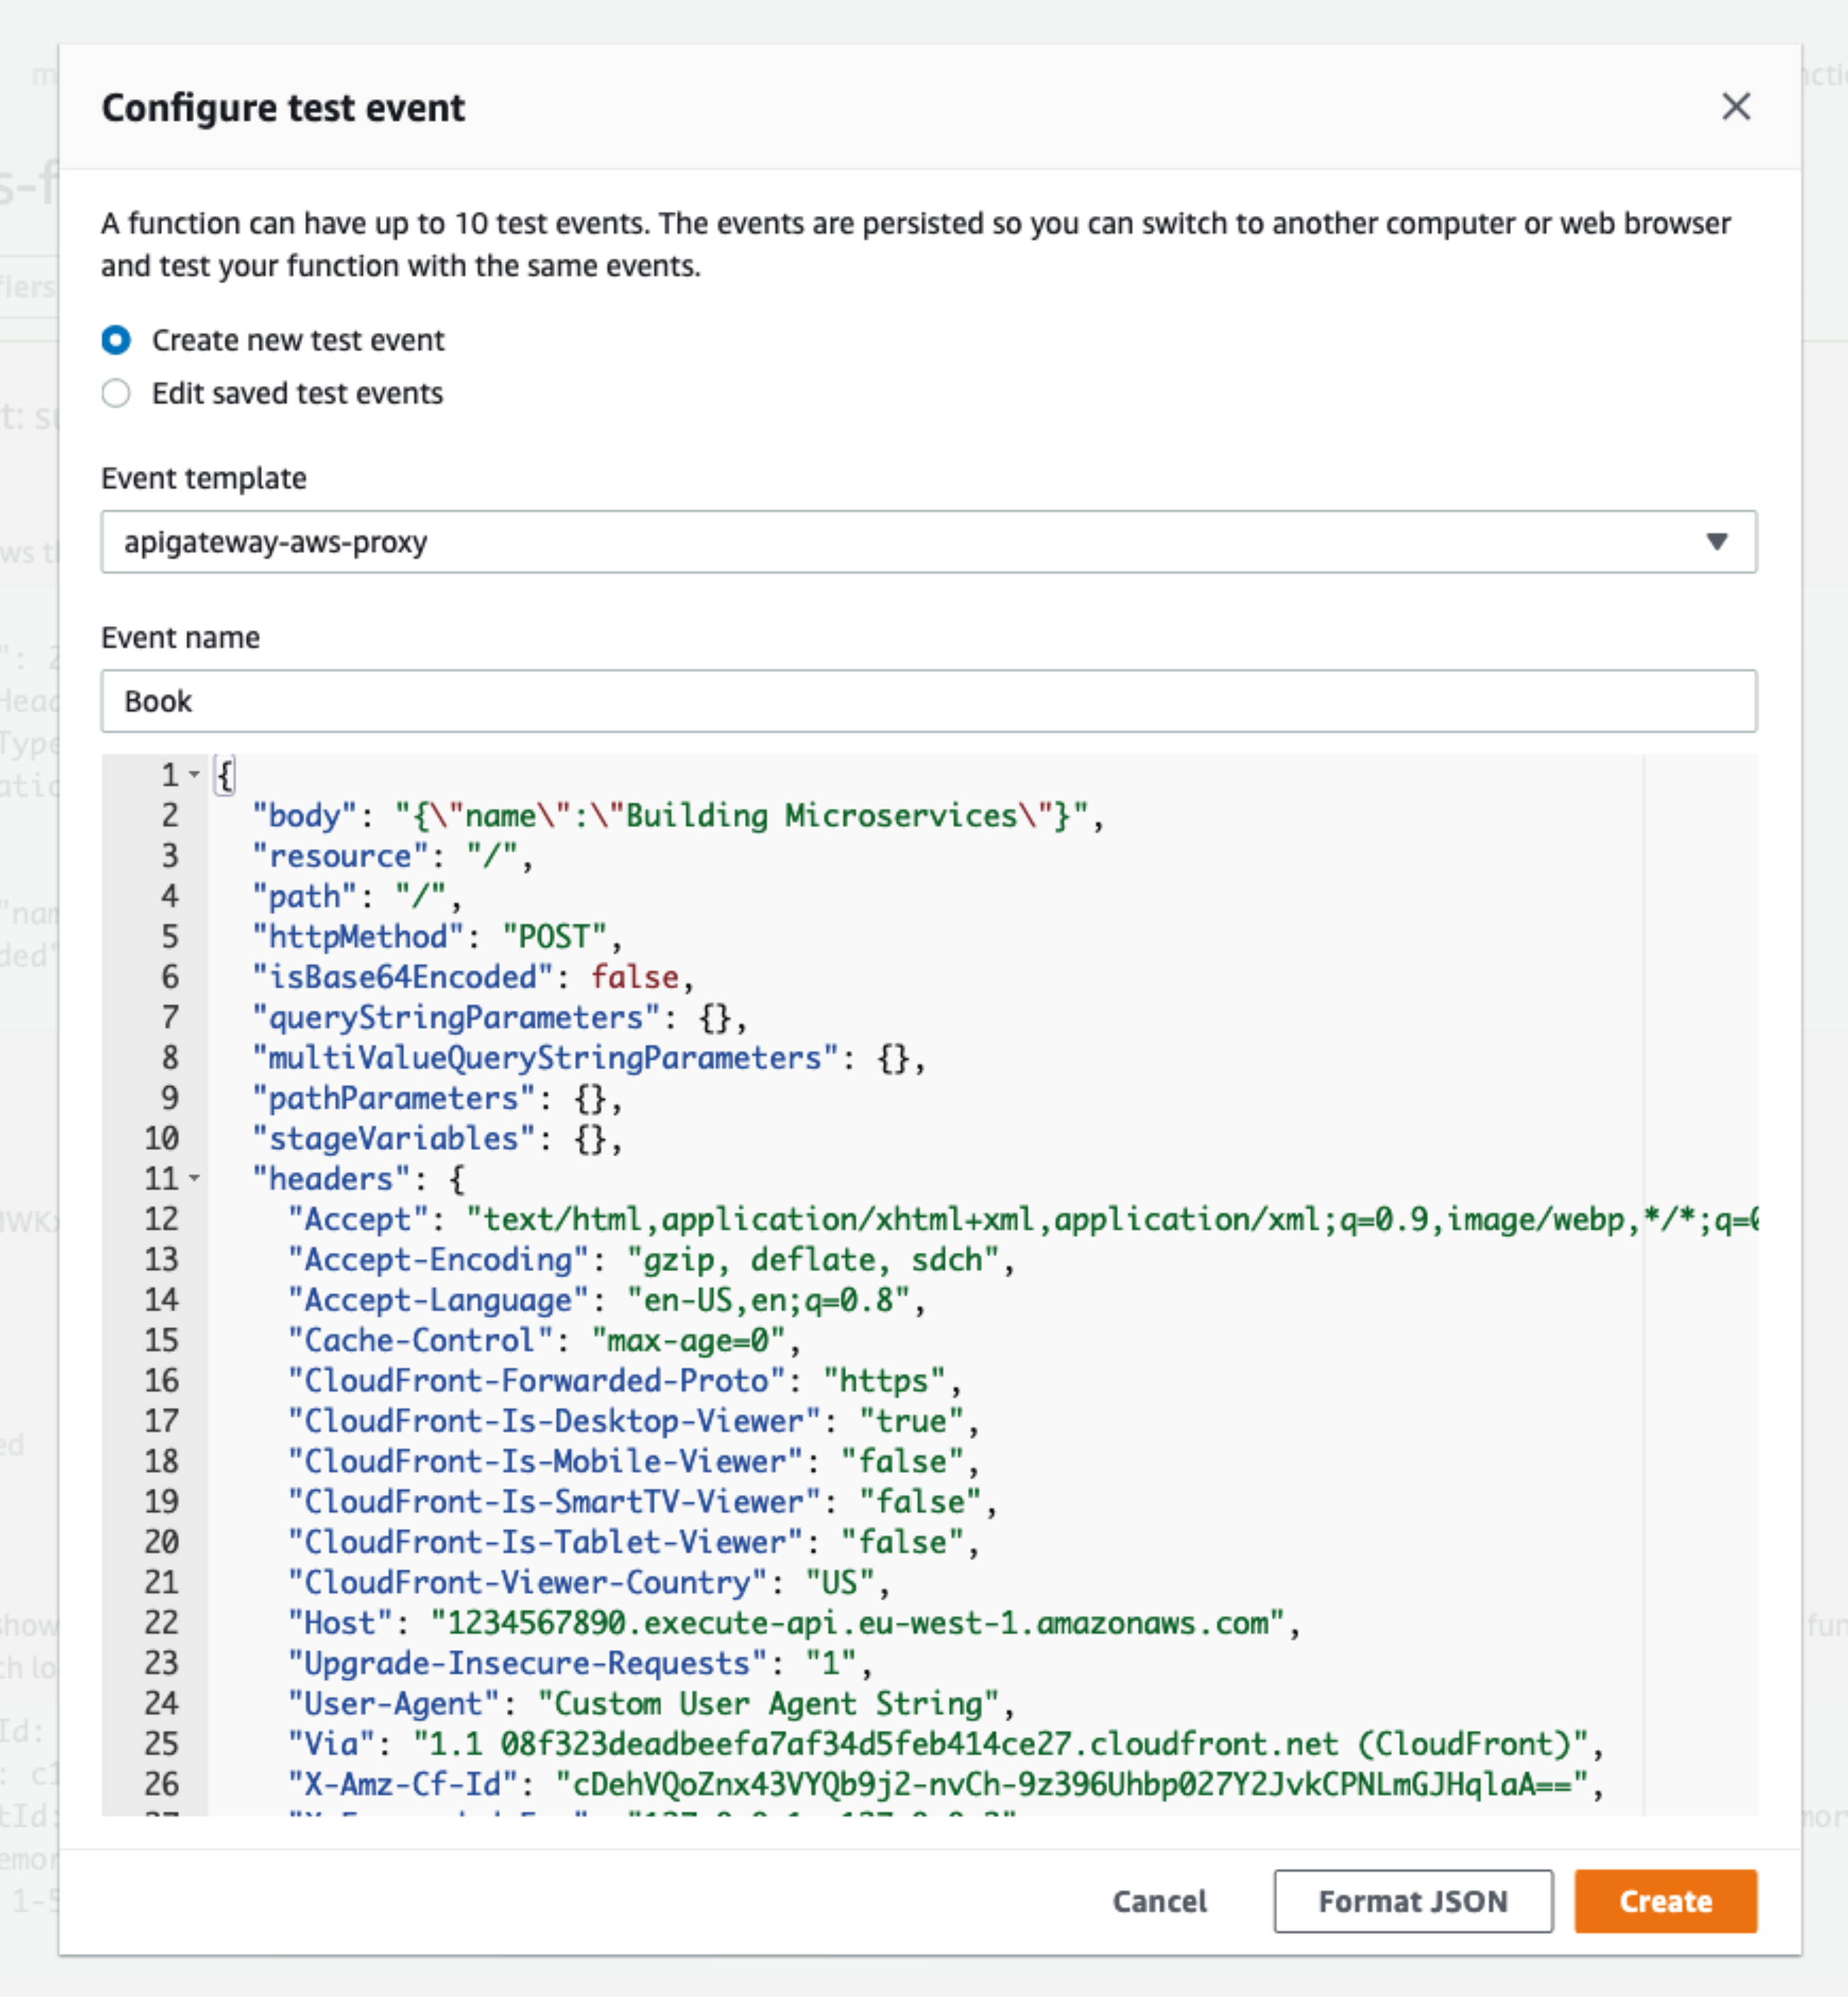
{
"body": "{\"name\": \"Building Microservices\"}",
"resource": "/",
"path": "/",
"httpMethod": "POST",
"isBase64Encoded": false,
"queryStringParameters": {},
"multiValueQueryStringParameters": {},
"pathParameters": {},
"stageVariables": {},
...
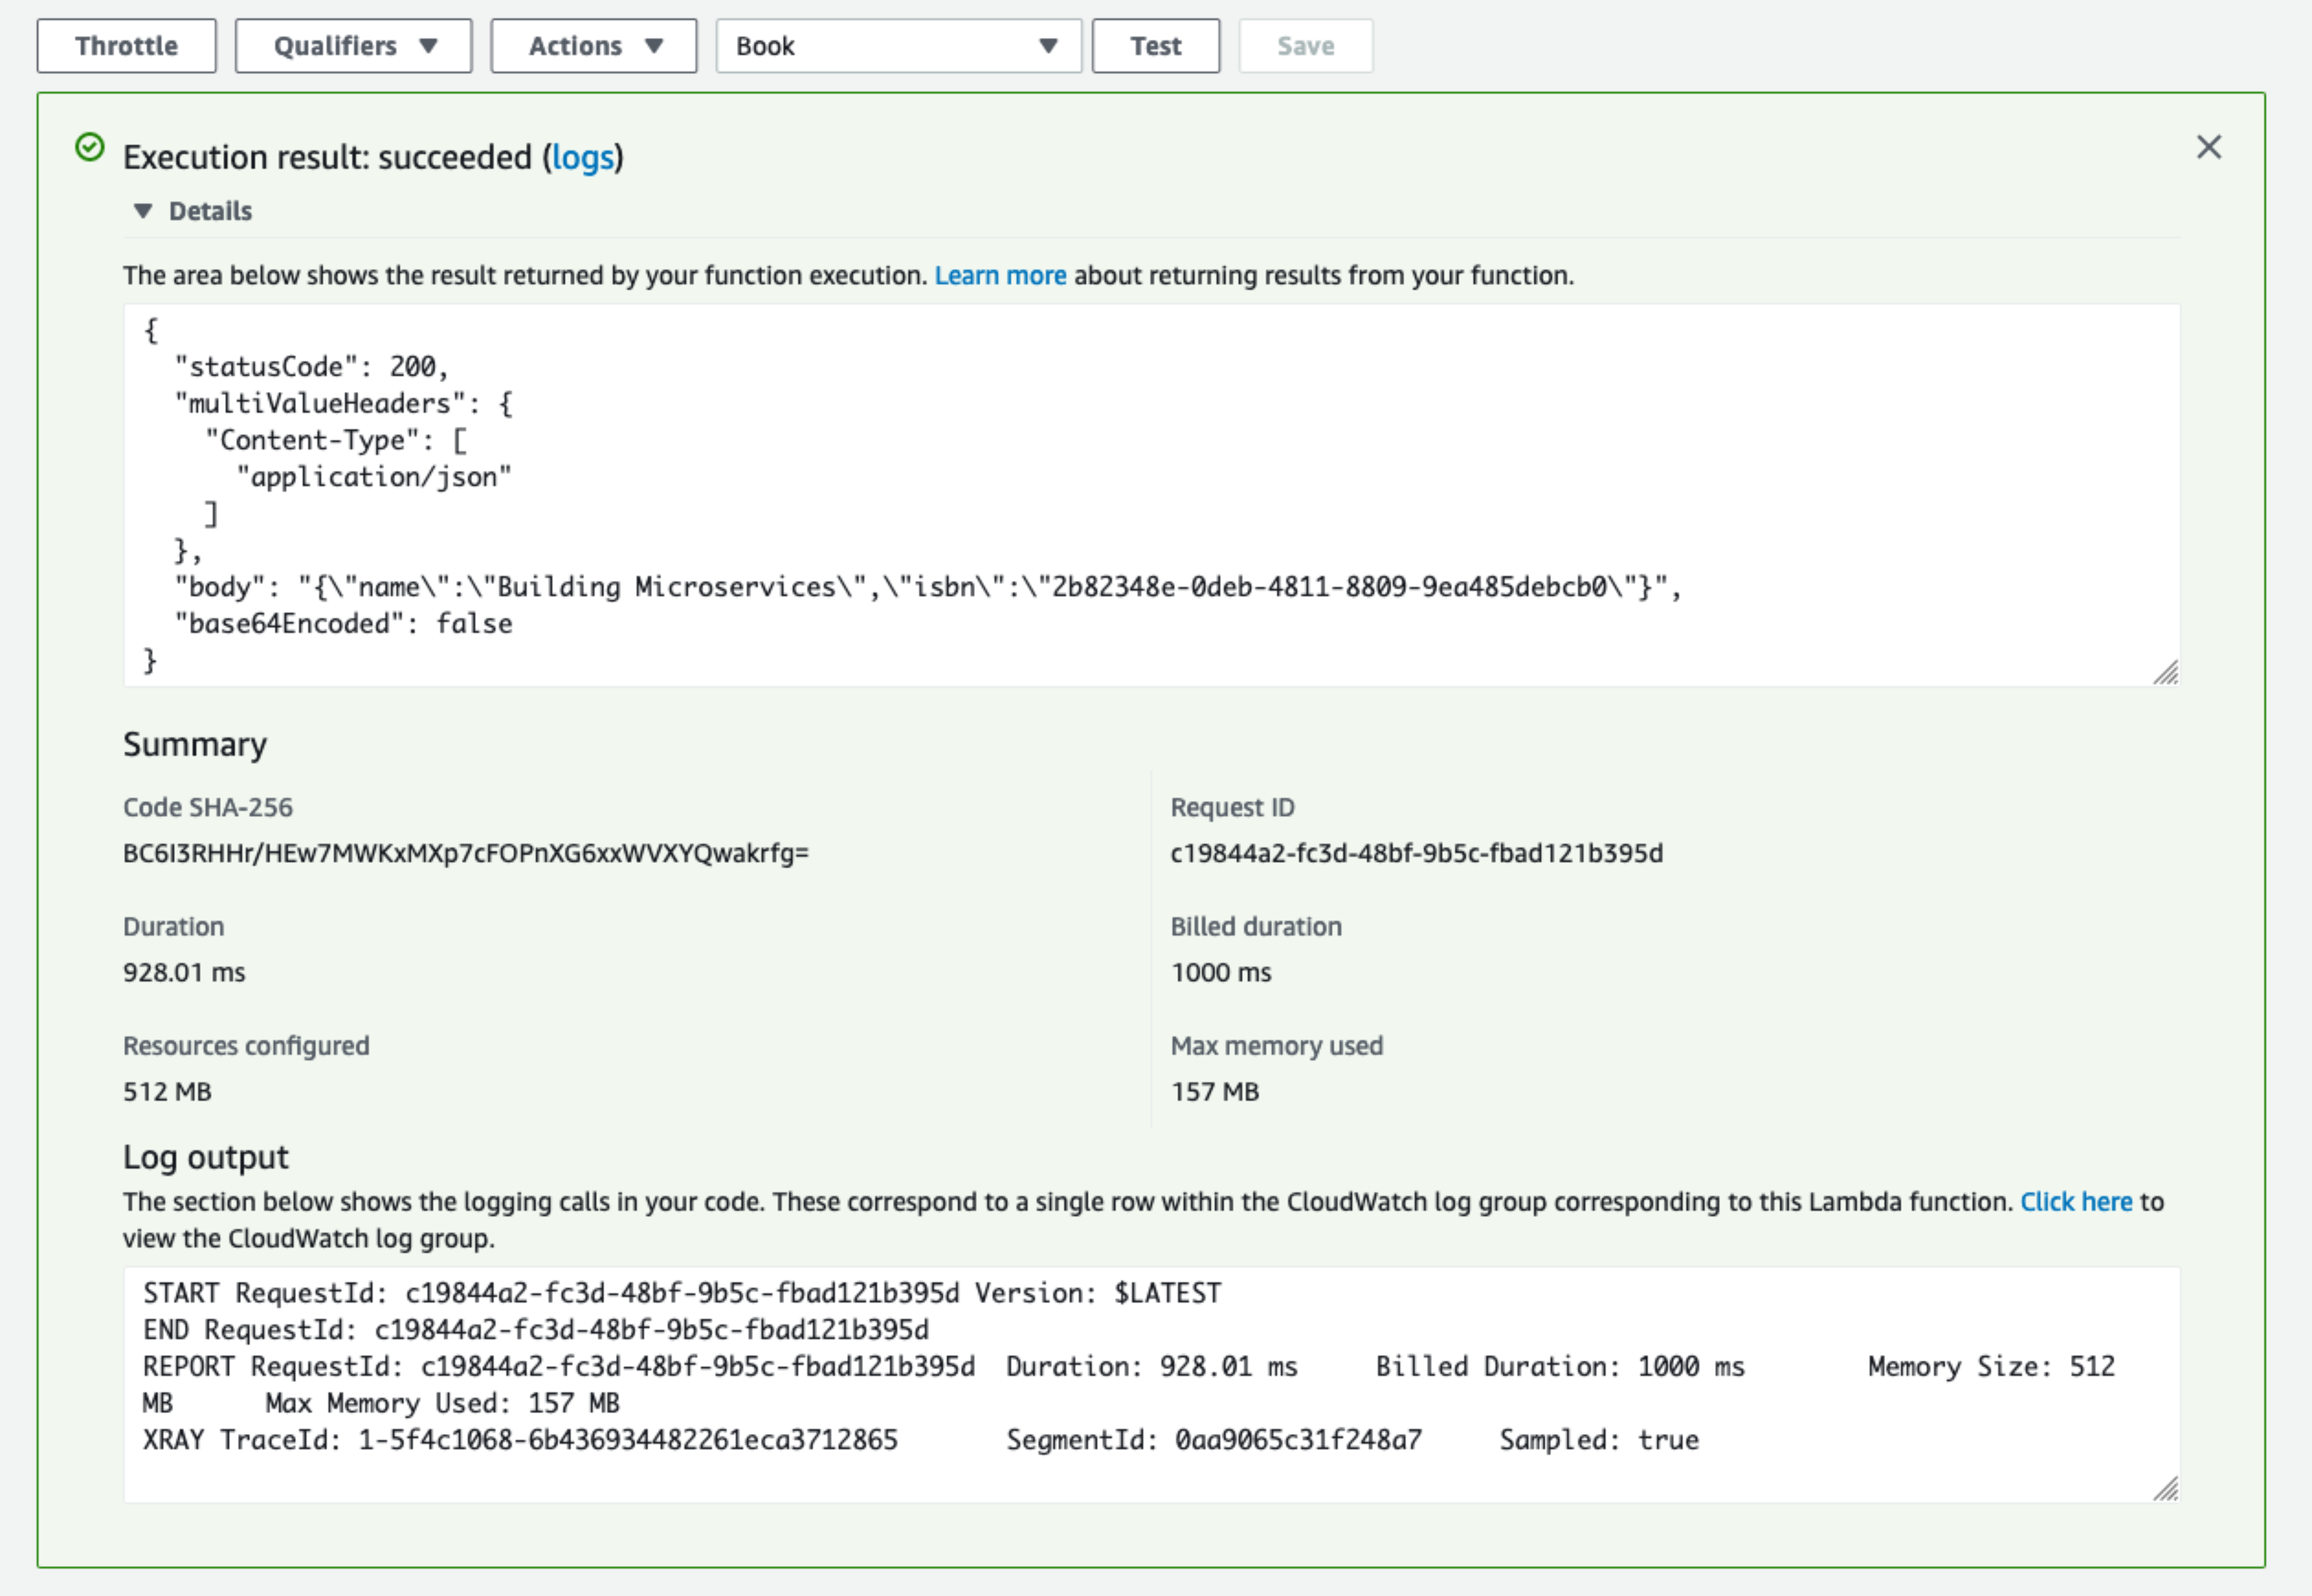
}You should see a 200 response:
7. Next steps
Explore more features with Micronaut Guides.
Read more about:
8. Help with Micronaut
Object Computing, Inc. (OCI) sponsored the creation of this Guide. A variety of consulting and support services are available.