
Micronaut JWT authentication via Cookies
Learn how to secure a Micronaut app using JWT (JSON Web Token) based authentication where the JWT tokens are transported via Cookies.
Authors: Sergio del Amo
Micronaut Version: 2.5.0
1. Getting Started
In this guide you are going to setup JWT based authentication and configure it so that JWT tokens are transported and read via Cookies.
The following sequence illustrates the authentication flow:
2. What you will need
To complete this guide, you will need the following:
-
Some time on your hands
-
A decent text editor or IDE
-
JDK 1.8 or greater installed with
JAVA_HOMEconfigured appropriately
3. Solution
We recommend that you follow the instructions in the next sections and create the app step by step. However, you can go right to the completed example.
-
Download and unzip the source
4. Writing the Application
Create an app using the Micronaut Command Line Interface.
mn create-app example.micronaut.micronautguide --test=spock --lang=kotlin
The previous command creates a micronaut app with the default package example.micronaut in a folder named micronautguide.
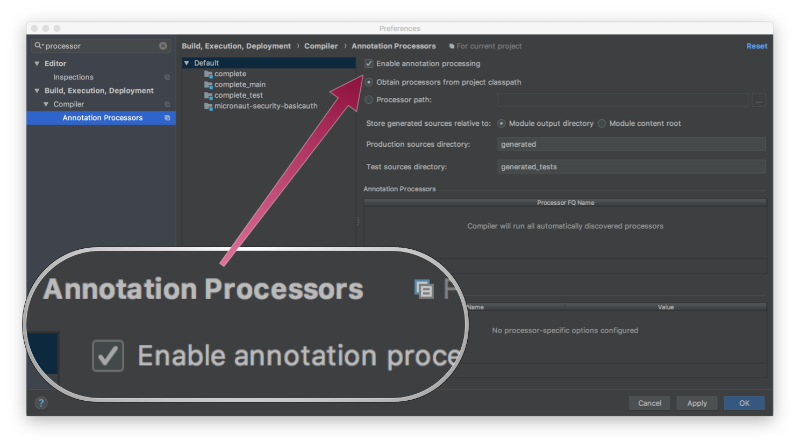
If you are using Java or Kotlin and IntelliJ IDEA, make sure you have enabled annotation processing.
4.1. Security Dependency
Add Micronaut’s JWT security dependency.
build.gradle
kapt("io.micronaut.security:micronaut-security-annotations")
implementation("io.micronaut.security:micronaut-security-jwt")
4.2. Configuration
Add the following configuration:
src/main/resources/application.yml
micronaut:
  security:
    authentication: cookie (1)
    redirect:
      login-failure: /login/authFailed  (2)
    token:
      jwt:
        signatures:
          secret:
            generator:  (3)
secret: '"${JWT_GENERATOR_SIGNATURE_SECRET:pleaseChangeThisSecretForANewOne}"' (4)| 1 | Enable Cookie authentication. |
| 2 | If the login fails, redirect to /login/authFailed |
| 3 | You can create a SecretSignatureConfiguration named generator via configuration as illustrated above. The generator signature is used to sign the issued JWT claims. |
| 4 | Change this by your own secret and keep it safe. |
4.3. Authentication Provider
To keep this guide simple, create a naive AuthenticationProvider to simulate user’s authentication.
src/main/kotlin/example/micronaut/AuthenticationProviderUserPassword.kt
package example.micronaut

import io.micronaut.http.HttpRequest
import io.micronaut.security.authentication.AuthenticationException
import io.micronaut.security.authentication.AuthenticationFailed
import io.micronaut.security.authentication.AuthenticationProvider
import io.micronaut.security.authentication.AuthenticationRequest
import io.micronaut.security.authentication.AuthenticationResponse
import io.micronaut.security.authentication.UserDetails
import io.reactivex.BackpressureStrategy
import io.reactivex.Flowable
import io.reactivex.FlowableEmitter
import org.reactivestreams.Publisher
import javax.inject.Singleton

@Singleton (1)
class AuthenticationProviderUserPassword : AuthenticationProvider { (2)
    override fun authenticate(httpRequest: HttpRequest<*>?, authenticationRequest: AuthenticationRequest<*, *>): Publisher<AuthenticationResponse> {
        return Flowable.create({ emitter: FlowableEmitter<AuthenticationResponse> ->
            if (authenticationRequest.identity == "sherlock" && authenticationRequest.secret == "password") {
                emitter.onNext(UserDetails(authenticationRequest.identity as String, ArrayList()))
                emitter.onComplete()
            } else {
                emitter.onError(AuthenticationException(AuthenticationFailed()))
            }
        }, BackpressureStrategy.ERROR)
    }
}| 1 | To register a Singleton in Micronaut’s application context annotate your class with javax.inject.Singleton |
| 2 | A Micronaut’s Authentication Provider implements the interface io.micronaut.security.authentication.AuthenticationProvider |
4.4. Apache Velocity
By default, Micronaut’s controllers produce JSON. Usually, you consume those endpoints with a mobile phone application, or a Javascript front end (Angular, React, Vue.js …). However, to keep this guide simple we are going to produce HTML in our controllers.
In order to do that, we use Apache Velocity.
Velocity is a Java-based template engine. It permits anyone to use a simple yet powerful template language to reference objects defined in Java code.
Add a dependency to Micronaut’s Server Side View Rendering Module and to Velocity:
build.gradle
implementation("io.micronaut.views:micronaut-views-velocity")Create two velocity templates in src/main/resources/views:
src/main/resources/views/home.vm
<!DOCTYPE html>
<html>
    <head>
        <title>Home</title>
    </head>
    <body>
        #if( $loggedIn )
            <h1>username: <span>$username</span></h1>
        #else
            <h1>You are not logged in</h1>
        #end
        #if( $loggedIn )
            <form action="logout" method="POST">
                <input type="submit" value="Logout"/>
            </form>
        #else
            <p><a href="/login/auth">Login</a></p>
        #end
    </body>
</html>
src/main/resources/views/auth.vm
<!DOCTYPE html>
<html>
    <head>
        #if( $errors )
            <title>Login Failed</title>
        #else
            <title>Login</title>
        #end
    </head>
<body>
    <form action="/login" method="POST">
        <ol>
            <li>
                <label for="username">Username</label>
                <input type="text" name="username" id="username"/>
            </li>
            <li>
                <label for="password">Password</label>
                <input type="password" name="password" id="password"/>
            </li>
            <li>
                <input type="submit" value="Login"/>
            </li>
            #if( $errors )
                <li id="errors">
                    <span style="color: red;">Login Failed</span>
                </li>
            #end
        </ol>
    </form>
</body>
</html>
4.5. Controllers
Create a file named HomeController which resolves the base URL /:
src/main/kotlin/example/micronaut/HomeController.kt
package example.micronaut

import io.micronaut.http.annotation.Controller
import io.micronaut.http.annotation.Get
import io.micronaut.security.annotation.Secured
import io.micronaut.views.View
import java.security.Principal

@Secured("isAnonymous()") (1)
@Controller("/") (2)
class HomeController {

    @Get("/") (3)
    @View("home")(4)
    fun index(principal: Principal?): Map<String, Any> { (5)
        val data = mutableMapOf<String, Any>()
        data["loggedIn"] = (principal != null) as Any
        if (principal != null) {
            data["username"] = principal.name as Any
        }
        return data
    }
}| 1 | Annotate with io.micronaut.security.Secured to configure security access. Use isAnonymous() expression for anonymous access. |
| 2 | Annotate with io.micronaut.http.annotation.Controller to designate a class as a Micronaut’s controller. |
| 3 | You can specify the HTTP verb for which a controller’s action responds to. To respond to a GET request, use io.micronaut.http.annotation.Get |
| 4 | You can specify the HTTP verb for which a controller’s action responds to. To respond to a GET request, use io.micronaut.http.annotation.Get. |
| 5 | If you are authenticated, you can use the java.security.Principal as a parameter type. For parameters which maybe null, use io.micronaut.core.annotation.Nullable. |
4.6. Login Form
Next, create LoginAuthController which renders the login form.
src/main/kotlin/example/micronaut/LoginAuthController.kt
package example.micronaut

import io.micronaut.http.annotation.Controller
import io.micronaut.http.annotation.Get
import io.micronaut.security.annotation.Secured
import io.micronaut.views.View

@Secured("isAnonymous()") (1)
@Controller("/login") (2)
class LoginAuthController {

    @Get("/auth") (3)
    @View("auth") (4)
    fun auth(): Map<String, Any> {
        return HashMap()
    }

    @Get("/authFailed") (5)
    @View("auth") (4)
    fun authFailed(): Map<String, Any> {
        return mapOf(Pair("errors", true))
    }
}| 1 | Annotate with io.micronaut.security.Secured to configure security access. Use isAnonymous() expression for anonymous access. |
| 2 | Annotate with io.micronaut.http.annotation.Controller to designate a class as a Micronaut’s controller. |
| 3 | responds to GET requests at /login/auth |
| 4 | Use View annotation to specify which template would you like to render the response against. |
| 5 | responds to GET requests at /login/authFailed |
5. Tests
We also use Geb, a browser automation solution.
To use Geb, add these dependencies:
build.gradle
testImplementation("org.gebish:geb-spock:4.0")
testImplementation("org.seleniumhq.selenium:htmlunit-driver:2.47.1")
Geb uses the Page concept pattern - The Page Object Pattern gives us a common sense way to model content in a reusable and maintainable way.
Create two pages:
src/test/groovy/example/micronaut/HomePage.groovy
package example.micronaut

import geb.Page

class HomePage extends Page {

    static url = '/'

    static at = { title == 'Home' }

    static content = {
        loginLink { $('a', text: 'Login') }
        logoutButton { $('input', type: 'submit', value: 'Logout') }
        usernameElement(required: false) { $('h1 span', 0) }
    }

    String username() {
        if (usernameElement.empty) {
            return null
        }
        usernameElement.text()
    }

    void login() {
        loginLink.click()
    }

    void logout() {
        logoutButton.click()
    }
}
src/test/groovy/example/micronaut/LoginPage.groovy
package example.micronaut

import geb.Page

class LoginPage extends Page {

    static url = '/login/auth'

    static at = { title.contains 'Login' }

    static content = {
        usernameInput { $('#username') }
        passwordInput { $('#password') }
        submitInput { $('input', type: 'submit') }
        errorsLi(required: false) { $('li#errors') }
    }

    boolean hasErrors() {
        !errorsLi.empty
    }

    void login(String username, String password) {
        usernameInput = username
        passwordInput = password
        submitInput.click()
    }
}
Create a tests which verifies the user authentication flow.
src/test/groovy/example/micronaut/AuthenticationSpec.groovy
@MicronautTest (1)
class AuthenticationSpec extends GebSpec {

    @Inject
    EmbeddedServer embeddedServer (2)

    def "verify session based authentication works"() {
        given:
        browser.baseUrl = "http://localhost:${embeddedServer.port}"

        when:
        to HomePage

        then:
        at HomePage

        when:
        HomePage homePage = browser.page HomePage

        then: 'As we are not logged in, there is no username'
        homePage.username() == null

        when: 'click the login link'
        homePage.login()

        then:
        at LoginPage

        when: 'fill the login form, with invalid credentials'
        LoginPage loginPage = browser.page LoginPage
        loginPage.login('foo', 'foo')

        then: 'the user is still in the login form'
        at LoginPage

        and: 'and error is displayed'
        loginPage.hasErrors()

        when: 'fill the form with valid credentials'
        loginPage.login('sherlock', 'password')

        then: 'we get redirected to the home page'
        at HomePage

        when:
        homePage = browser.page HomePage

        then: 'the username is populated'
        homePage.username() == 'sherlock'

        when: 'click the logout button'
        homePage.logout()

        then: 'we are in the home page'
        at HomePage

        when:
        homePage = browser.page HomePage

        then: 'but we are no longer logged in'
        homePage.username() == null
    }
}| 1 | Annotate the class with @MicronautTest to let Micronaut starts the embedded server and inject the beans. More info: https://micronaut-projects.github.io/micronaut-test/latest/guide/index.html. |
| 2 | Inject the EmbeddedServer bean. |
6. Testing the Application
To run the tests:
$ ./gradlew test
$ open build/reports/tests/test/index.html
7. Running the Application
To run the application use the ./gradlew run command which will start the application on port 8080.
8. Generate a Micronaut app’s Native Image with GraalVM
We are going to use GraalVM, the polyglot embeddable virtual machine, to generate a Native image of our Micronaut application.
Native images compiled with GraalVM ahead-of-time improve the startup time and reduce the memory footprint of JVM-based applications.
Use of GraalVM’s native-image tool is only supported in Java or Kotlin projects. Groovy relies heavily on
reflection which is only partially supported by GraalVM.
|
8.1. Native Image generation
The easiest way to install GraalVM is to use SDKMan.io.
# For Java 8
$ sdk install java 21.1.0.r8-grl

# For Java 11
$ sdk install java 21.1.0.r11-grl
You need to install the native-image component which is not installed by default.
$ gu install native-imageTo generate a native image using Gradle run:
$ ./gradlew nativeImageThe native image will be created in build/native-image/application and can be run with ./build/native-image/application
It is also possible to customize the name of the native image or pass additional parameters to GraalVM:
build.gradle
nativeImage {
    args('--verbose')
    imageName('mn-graalvm-application') (1)
}| 1 | The native image name will now be mn-graalvm-application |
9. Next steps
Explore more features with Micronaut Guides.
10. Help with Micronaut
Object Computing, Inc. (OCI) sponsored the creation of this Guide. A variety of consulting and support services are available.