mn create-app example.micronaut.micronautguide --build=maven --lang=javaMicronaut Basic Auth
Learn how to secure a Micronaut app using 'Basic' HTTP Authentication Scheme.
Authors: Sergio del Amo
Micronaut Version: 2.5.0
1. Getting Started
In this guide we are going to create a Micronaut app written in Java.
RFC7617 defines the "Basic" Hypertext Transfer Protocol (HTTP) authentication scheme, which transmits credentials as user-id/password pairs, encoded using Base64.
In this guide you are going to create a Micronaut app and secure it with HTTP Basic Auth.
2. What you will need
To complete this guide, you will need the following:
-
Some time on your hands
-
A decent text editor or IDE
-
JDK 1.8 or greater installed with
JAVA_HOMEconfigured appropriately
3. Solution
We recommend that you follow the instructions in the next sections and create the app step by step. However, you can go right to the completed example.
-
Download and unzip the source
4. Writing the App
Create an app using the Micronaut Command Line Interface or with Micronaut Launch.
If you don’t specify the --build argument, Gradle is used as a build tool. If you don’t specify the --lang argument, Java is used as a language.
|
The previous command creates a Micronaut app with the default package example.micronaut in a folder named micronautguide.
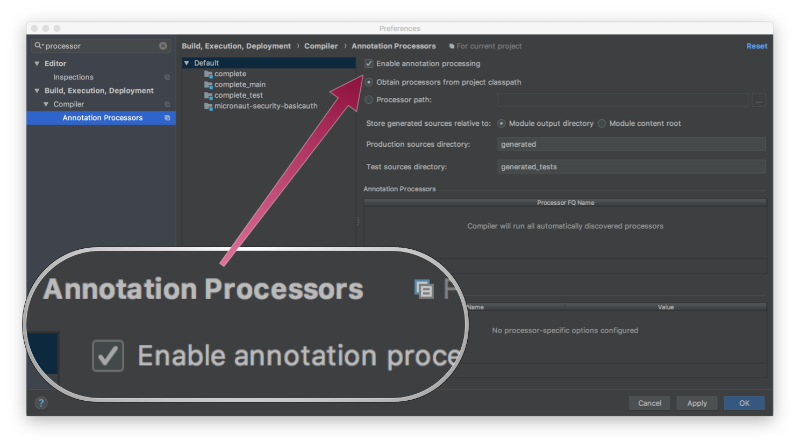
If you are using Java or Kotlin and IntelliJ IDEA, make sure you have enabled annotation processing.
4.1. Security Dependency
Add Micronaut’s security dependency to your build file.
pom.xml
<dependency>
    <groupId>io.micronaut</groupId>
    <artifactId>micronaut-security</artifactId>
    <scope>compile</scope>
</dependency>
4.2. Authentication Provider
To keep this guide simple, create a naive AuthenticationProvider to simulate user’s authentication.
src/main/java/example/micronaut/AuthenticationProviderUserPassword.java
package example.micronaut;

import io.micronaut.core.annotation.Nullable;
import io.micronaut.http.HttpRequest;
import io.micronaut.security.authentication.AuthenticationException;
import io.micronaut.security.authentication.AuthenticationFailed;
import io.micronaut.security.authentication.AuthenticationProvider;
import io.micronaut.security.authentication.AuthenticationRequest;
import io.micronaut.security.authentication.AuthenticationResponse;
import io.micronaut.security.authentication.UserDetails;
import io.reactivex.BackpressureStrategy;
import io.reactivex.Flowable;
import org.reactivestreams.Publisher;

import javax.inject.Singleton;
import java.util.ArrayList;

@Singleton (1)
public class AuthenticationProviderUserPassword implements AuthenticationProvider  { (2)

    @Override
    public Publisher<AuthenticationResponse> authenticate(@Nullable HttpRequest<?> httpRequest, AuthenticationRequest<?, ?> authenticationRequest) {
        return Flowable.create(emitter -> {
            if ( authenticationRequest.getIdentity().equals("sherlock") &&
                    authenticationRequest.getSecret().equals("password") ) {
                emitter.onNext(new UserDetails((String) authenticationRequest.getIdentity(), new ArrayList<>()));
                emitter.onComplete();
            } else {
                emitter.onError(new AuthenticationException(new AuthenticationFailed()));
            }
        }, BackpressureStrategy.ERROR);
    }
}| 1 | To register a Singleton in Micronaut’s application context, annotate your class with javax.inject.Singleton |
| 2 | A Micronaut’s Authentication Provider implements the interface io.micronaut.security.authentication.AuthenticationProvider |
4.3. Controllers
Create a file named HomeController which resolves the base URL /:
src/main/java/example/micronaut/HomeController.java
package example.micronaut;

import io.micronaut.http.MediaType;
import io.micronaut.http.annotation.Controller;
import io.micronaut.http.annotation.Get;
import io.micronaut.http.annotation.Produces;
import io.micronaut.security.annotation.Secured;
import io.micronaut.security.rules.SecurityRule;

import java.security.Principal;

@Secured(SecurityRule.IS_AUTHENTICATED) (1)
@Controller  (2)
public class HomeController {

    @Produces(MediaType.TEXT_PLAIN)
    @Get  (3)
    String index(Principal principal) {  (4)
        return principal.getName();
    }
}| 1 | Annotate with io.micronaut.security.Secured to configure secured access. The isAuthenticated() expression will allow access only to authenticated users. |
| 2 | Annotate with io.micronaut.http.annotation.Controller to designate a class as a Micronaut controller. |
| 3 | You can specify the HTTP verb that a controller’s action responds to. To respond to a GET request, use the io.micronaut.http.annotation.Get annotation. |
| 4 | If a user is authenticated, Micronaut will bind the user object to an argument of type java.security.Principal (if present). |
4.4. Tests
Create a test which verifies the user authentication flow via Basic Auth.
src/test/java/example/micronaut/BasicAuthTest.java
package example.micronaut;

import io.micronaut.http.HttpRequest;
import io.micronaut.http.HttpResponse;
import io.micronaut.http.HttpStatus;
import io.micronaut.http.MediaType;
import io.micronaut.http.client.RxHttpClient;
import io.micronaut.http.client.annotation.Client;
import io.micronaut.http.client.exceptions.HttpClientResponseException;
import io.micronaut.runtime.server.EmbeddedServer;
import io.micronaut.test.extensions.junit5.annotation.MicronautTest;
import org.junit.jupiter.api.Test;
import org.junit.jupiter.api.Assertions;

import javax.inject.Inject;
import org.junit.jupiter.api.function.Executable;
import static org.junit.jupiter.api.Assertions.assertEquals;
import static org.junit.jupiter.api.Assertions.assertThrows;

@MicronautTest  (1)
public class BasicAuthTest {

    @Inject
    @Client("/")
    RxHttpClient client; (2)

    @Test
    void verifyHttpBasicAuthWorks() {
        //when: 'Accessing a secured URL without authenticating'
        Executable e = () -> client.toBlocking().exchange(HttpRequest.GET("/").accept(MediaType.TEXT_PLAIN)); (3)

        // then: 'returns unauthorized'
        HttpClientResponseException thrown = assertThrows(HttpClientResponseException.class, e); (4)
        assertEquals(thrown.getStatus(), HttpStatus.UNAUTHORIZED);

        //when: 'A secured URL is accessed with Basic Auth'
        HttpResponse<String> rsp = client.toBlocking().exchange(HttpRequest.GET("/")
                .accept(MediaType.TEXT_PLAIN)
                .basicAuth("sherlock", "password"), (5)
                String.class); (6)
        //then: 'the endpoint can be accessed'
        assertEquals(rsp.getStatus(),  HttpStatus.OK);
        assertEquals(rsp.getBody().get(),  "sherlock"); (7)
    }
}| 1 | Annotate the class with @MicronautTest to let Micronaut starts the embedded server and inject the beans. More info: https://micronaut-projects.github.io/micronaut-test/latest/guide/index.html. |
| 2 | Inject the RxHttpClient bean. |
| 3 | Creating HTTP Requests is easy thanks to Micronaut’s fluid API. |
| 4 | If you attempt to access a secured endpoint without authentication, 401 is returned |
| 5 | By using basicAuth method, you populate the Authorization header with user-id:password pairs, encoded using Base64. |
| 6 | Micronaut’s HttpClient simplifies parsing HTTP response payload to Java objects. In this example, we parse the response to String. |
| 7 | Use .body() to retrieve the parsed payload. |
4.5. Use Micronaut’s HTTP Client and Basic Auth
If you want to access a secured endpoint, you can also use Micronaut’s HTTP Client and supply the Basic Auth as the Authorization header value.
First create a @Client with a method home which accepts an Authorization HTTP Header.
src/test/java/example/micronaut/AppClient.java
package example.micronaut;

import io.micronaut.http.MediaType;
import io.micronaut.http.annotation.Consumes;
import io.micronaut.http.annotation.Get;
import io.micronaut.http.annotation.Header;
import io.micronaut.http.client.annotation.Client;

@Client("/")
public interface AppClient {

    @Consumes(MediaType.TEXT_PLAIN) (1)
    @Get("/")
    String home(@Header String authorization); (2)
}| 1 | The method consumes plain text, because of it Micronaut includes the HTTP Header Accept: text/plain. |
| 2 | The first character of the parameter name is capitalized and that value (Authorization) is used the HTTP Header name. If you wish to change the parameter name you can specify the @Header annotation value. |
Create a test which uses the previous @Client
src/test/java/example/micronaut/BasicAuthClientTest.java
package example.micronaut;

import io.micronaut.test.extensions.junit5.annotation.MicronautTest;
import org.junit.jupiter.api.Test;

import javax.inject.Inject;
import java.util.Base64;

import static org.junit.jupiter.api.Assertions.assertEquals;

@MicronautTest (1)
public class BasicAuthClientTest {

    @Inject
    AppClient appClient; (2)

    @Test
    void verifyBasicAuthWorks() {
        String credsEncoded = Base64.getEncoder().encodeToString("sherlock:password".getBytes());
        String rsp = appClient.home("Basic " +credsEncoded); (3)
        assertEquals(rsp, "sherlock");
    }

}| 1 | Annotate the class with @MicronautTest to let Micronaut starts the embedded server and inject the beans. More info: https://micronaut-projects.github.io/micronaut-test/latest/guide/index.html. |
| 2 | Inject the AppClient bean. |
| 3 | Generate Basic Auth header value and pass it as the parameter value. |
5. Testing the Application
To run the tests:
$ ./mvnw test6. Running the Application
To run the application use the ./mvnw mn:run command which will start the application on port 8080.
To test the running application, issue a GET request to localhost:8080 with a basic authentication header in place. One way to do this is with the popular curl command:
curl -v -u sherlock:password localhost:8080
7. Generate a Micronaut app’s Native Image with GraalVM
We are going to use GraalVM, the polyglot embeddable virtual machine, to generate a Native image of our Micronaut application.
Native images compiled with GraalVM ahead-of-time improve the startup time and reduce the memory footprint of JVM-based applications.
Use of GraalVM’s native-image tool is only supported in Java or Kotlin projects. Groovy relies heavily on
reflection which is only partially supported by GraalVM.
|
7.1. Native Image generation
The easiest way to install GraalVM is to use SDKMan.io.
# For Java 8
$ sdk install java 21.1.0.r8-grl

# For Java 11
$ sdk install java 21.1.0.r11-grl
You need to install the native-image component which is not installed by default.
$ gu install native-imageTo generate a native image using Maven run:
$ ./mvnw package -Dpackaging=native-imageThe native image will be created in target/application and can be run with ./target/application.
You can invoke the controller exposed by the native image:
curl "http://localhost:8080" -u 'sherlock:password'8. Next steps
Check Micronaut’s security documentation to learn more.
9. Help with Micronaut
Object Computing, Inc. (OCI) sponsored the creation of this Guide. A variety of consulting and support services are available.