mn create-app example.micronaut.micronautguide --build=maven --lang=javaSchedule periodic tasks inside your Micronaut applications
Learn how to schedule periodic tasks inside your Micronaut microservices.
Authors: Sergio del Amo
Micronaut Version: 2.5.0
1. Getting Started
In this guide we are going to create a Micronaut app written in Java.
Nowadays it is pretty usual to have some kind of cron or scheduled task that needs to run every midnight, every hour, a few times a week,…
In this guide you will learn how to use Micronaut native capabilities to schedule periodic tasks inside a Micronaut microservice.
2. What you will need
To complete this guide, you will need the following:
-
Some time on your hands
-
A decent text editor or IDE
-
JDK 1.8 or greater installed with
JAVA_HOMEconfigured appropriately
3. Solution
We recommend that you follow the instructions in the next sections and create the app step by step. However, you can go right to the completed example.
-
Download and unzip the source
4. Writing the App
Create an app using the Micronaut Command Line Interface or with Micronaut Launch.
If you don’t specify the --build argument, Gradle is used as a build tool. If you don’t specify the --lang argument, Java is used as a language.
|
The previous command creates a Micronaut app with the default package example.micronaut in a folder named micronautguide.
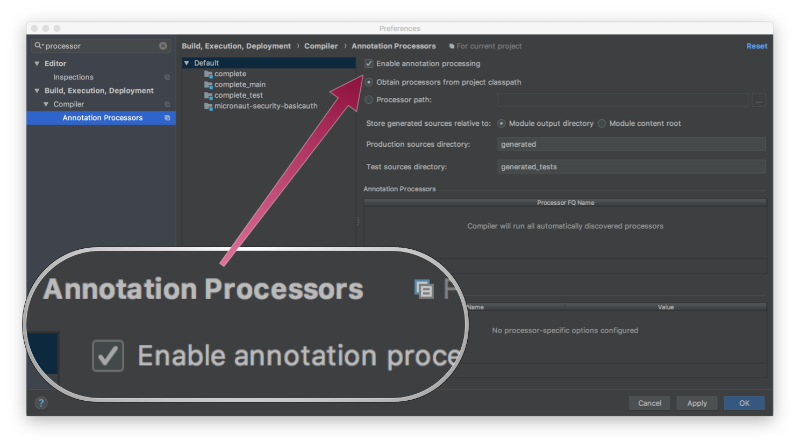
If you are using Java or Kotlin and IntelliJ IDEA, make sure you have enabled annotation processing.
4.1. Set log level INFO for package demo
During this guide, we are going to use several log statements to show Job execution.
Add at the end of logback.xml the next statement:
src/main/resources/logback.xml
<logger name="example.micronaut" level="INFO"/>The above line configures a logger for package example.micronaut with log level INFO.
4.2. Creating a Job
Create a file and add the following:
src/main/java/example/micronaut/HelloWorldJob.java
package example.micronaut;

import io.micronaut.scheduling.annotation.Scheduled;
import org.slf4j.Logger;
import org.slf4j.LoggerFactory;

import javax.inject.Singleton;
import java.text.SimpleDateFormat;
import java.util.Date;

@Singleton (1)
public class HelloWorldJob {
    private static final Logger LOG = LoggerFactory.getLogger(HelloWorldJob.class); (2)

    @Scheduled(fixedDelay = "10s") (3)
    void executeEveryTen() {
        LOG.info("Simple Job every 10 seconds: {}", new SimpleDateFormat("dd/M/yyyy hh:mm:ss").format(new Date()));
    }

    @Scheduled(fixedDelay = "45s", initialDelay = "5s") (4)
    void executeEveryFourtyFive() {
        LOG.info("Simple Job every 45 seconds: {}", new SimpleDateFormat("dd/M/yyyy hh:mm:ss").format(new Date()));
    }
}| 1 | To register a Singleton in Micronaut’s application context annotate your class with javax.inject.Singleton |
| 2 | Inject a Logger. |
| 3 | Create trigger every 10 seconds |
| 4 | Create another trigger every 45 seconds with an initial delay of 5 seconds (5000 millis) |
Now start the application. Execute the ./mvnw mn:run command which will start the application on port 8080.
After a few seconds you will see the following output:
... Simple Job every 10 seconds :15/5/2018 12:48:02 (1)
... Simple Job every 45 seconds :15/5/2018 12:48:07 (2)
... Simple Job every 10 seconds :15/5/2018 12:48:12 (3)
... Simple Job every 10 seconds :15/5/2018 12:48:22
... Simple Job every 10 seconds :15/5/2018 12:48:32
... Simple Job every 10 seconds :15/5/2018 12:48:42
... Simple Job every 45 seconds :15/5/2018 12:48:52 (4)
... Simple Job every 10 seconds :15/5/2018 12:48:52| 1 | First execution of 10 seconds job just after the application starts |
| 2 | The 45 seconds job just starts 5 seconds after the app starts |
| 3 | Second execution of 10 seconds job just 10 seconds after the first execution |
| 4 | Second execution of 45 seconds job just 45 seconds after the first execution |
4.3. Business logic in dedicated Use Cases
Although the previous example is valid, usually you don’t want to put your business logic in a Job. A better approach is
to create an additional bean which the Job invokes. This approach decouples your business logic from the scheduling logic.
Moreover, it facilitates testing and maintenance. Let’s see an example:
Create the following use case:
src/main/java/example/micronaut/EmailUseCase.java
package example.micronaut;

import org.slf4j.Logger;
import org.slf4j.LoggerFactory;

import javax.inject.Singleton;
import java.text.SimpleDateFormat;
import java.util.Date;

@Singleton
public class EmailUseCase {
    private static final Logger LOG = LoggerFactory.getLogger(EmailUseCase.class);

    void send(String user, String message) {
        LOG.info("Sending email to {}: {} at {}", user, message, new SimpleDateFormat("dd/M/yyyy hh:mm:ss").format(new Date()));
    }
}
And then the job:
src/main/java/example/micronaut/DailyEmailJob.java
package example.micronaut;

import io.micronaut.scheduling.annotation.Scheduled;

import javax.inject.Singleton;

@Singleton (1)
public class DailyEmailJob {

    protected final EmailUseCase emailUseCase;

    public DailyEmailJob(EmailUseCase emailUseCase) {  (2)
        this.emailUseCase = emailUseCase;
    }

    @Scheduled(cron = "0 30 4 1/1 * ?") (3)
    void execute() {
        emailUseCase.send("john.doe@micronaut.example", "Test Message"); (4)
    }
}| 1 | To register a Singleton in Micronaut’s application context annotate your class with javax.inject.Singleton |
| 2 | Constructor injection. |
| 3 | Trigger the job once a day at 04:30 AM |
| 4 | Call the injected use case |
4.4. Scheduling a Job Manually
Imagine the following scenario. You want to send every user an email 2 hours after they registered into your app. You want to ask him about his experiences during this first interaction with your application.
For this guide, we are going to schedule a Job to trigger after one minute.
To test it out, we are going to call twice a new use case named RegisterUseCase when the app starts.
Modify Application.java:
src/main/java/example/micronaut/Application.java
package example.micronaut;

import io.micronaut.context.event.ApplicationEventListener;
import io.micronaut.runtime.Micronaut;
import io.micronaut.runtime.server.event.ServerStartupEvent;

import javax.inject.Singleton;

@Singleton (1)
public class Application implements ApplicationEventListener<ServerStartupEvent> {  (2)

    private final RegisterUseCase registerUseCase;

    public Application(RegisterUseCase registerUseCase) {  (3)
        this.registerUseCase = registerUseCase;
    }

    public static void main(String[] args) {
        Micronaut.run(Application.class);
    }

    @Override
    public void onApplicationEvent(ServerStartupEvent event) {  (4)
        try {
            registerUseCase.register("harry@micronaut.example");
            Thread.sleep(20000);
            registerUseCase.register("ron@micronaut.example");
        } catch (InterruptedException e) {
            e.printStackTrace();
        }
    }
}| 1 | Annotate the class with @Singleton to register it in the application context. |
| 2 | Listen to the event ServerStartupEvent |
| 3 | Constructor injection of RegisterUseCase |
| 4 | onApplicationEvent is invoked when the app starts. |
As you see in the previous example, subscribing to an event is as easy as implementing ApplicationEventListener.
Create a runnable task EmailTask.java
src/main/java/example/micronaut/EmailTask.java
package example.micronaut;

public class EmailTask implements Runnable {

    private String email;
    private String message;
    private EmailUseCase emailUseCase;

    public EmailTask(EmailUseCase emailUseCase, String email, String message) {
        this.email = email;
        this.message = message;
        this.emailUseCase = emailUseCase;
    }

    @Override
    public void run() {
        emailUseCase.send(email, message);
    }

}
Create RegisterUseCase.java which schedules the previous task.
src/main/java/example/micronaut/RegisterUseCase.java
package example.micronaut;

import io.micronaut.scheduling.TaskExecutors;
import io.micronaut.scheduling.TaskScheduler;
import org.slf4j.Logger;
import org.slf4j.LoggerFactory;

import javax.inject.Named;
import javax.inject.Singleton;
import java.text.SimpleDateFormat;
import java.time.Duration;
import java.util.Date;

@Singleton
public class RegisterUseCase {

    private static final Logger LOG = LoggerFactory.getLogger(RegisterUseCase.class);

    protected final TaskScheduler taskScheduler;
    protected final EmailUseCase emailUseCase;

    public RegisterUseCase(EmailUseCase emailUseCase, (1)
                           @Named(TaskExecutors.SCHEDULED) TaskScheduler taskScheduler) {  (2)
        this.emailUseCase = emailUseCase;
        this.taskScheduler = taskScheduler;
    }

    public void register(String email) {
        LOG.info("saving {} at {}", email, new SimpleDateFormat("dd/M/yyyy hh:mm:ss").format(new Date()));
        scheduleFollowupEmail(email, "Welcome to Micronaut");
    }

    private void scheduleFollowupEmail(String email, String message) {
        EmailTask task = new EmailTask(emailUseCase, email, message); (3)
        taskScheduler.schedule(Duration.ofMinutes(1), task);  (4)
    }
}| 1 | Constructor injection of EmailUseCase |
| 2 | Inject the TaskScheduler bean |
| 3 | Create a Runnable task. |
| 4 | Schedule the task to run a minute from now. |
If you execute the above code you will see the Job being executed one minute after we schedule it and with the supplied email address.
INFO  example.micronaut.RegisterUseCase - saving harry@micronaut.example at 15/5/2018 06:25:14
INFO  example.micronaut.RegisterUseCase - saving ron@micronaut.example at 15/5/2018 06:25:34
INFO  example.micronaut.EmailUseCase - Sending email to harry@micronaut.example : Welcome to Micronaut at 15/5/2018 06:26:14
INFO  example.micronaut.EmailUseCase - Sending email to ron@micronaut.example : Welcome to Micronaut at 15/5/2018 06:26:34
5. Summary
During this guide, we learned how to configure Jobs using the @Scheduled annotation using fixedDelay, initialDelay,
and cron as well as manually configuring jobs with a TaskScheduler and tasks.
6. Generate a Micronaut app’s Native Image with GraalVM
We are going to use GraalVM, the polyglot embeddable virtual machine, to generate a Native image of our Micronaut application.
Native images compiled with GraalVM ahead-of-time improve the startup time and reduce the memory footprint of JVM-based applications.
Use of GraalVM’s native-image tool is only supported in Java or Kotlin projects. Groovy relies heavily on
reflection which is only partially supported by GraalVM.
|
6.1. Native Image generation
The easiest way to install GraalVM is to use SDKMan.io.
# For Java 8
$ sdk install java 21.1.0.r8-grl

# For Java 11
$ sdk install java 21.1.0.r11-grl
You need to install the native-image component which is not installed by default.
$ gu install native-imageTo generate a native image using Maven run:
$ ./mvnw package -Dpackaging=native-imageThe native image will be created in target/application and can be run with ./target/application.
Execute the native image, and you will see the log message of the jobs appear:
$ 10:16:20.803 [pool-2-thread-1] INFO  example.micronaut.HelloWorldJob - Simple Job every 10 seconds: 09/12/2019 10:16:20
$ 10:16:20.806 [main] INFO  example.micronaut.RegisterUseCase - saving harry@micronaut.example at 09/12/2019 10:16:20
$ 10:16:25.804 [pool-2-thread-2] INFO  example.micronaut.HelloWorldJob - Simple Job every 45 seconds: 09/12/2019 10:16:25
$ 10:16:30.807 [pool-2-thread-4] INFO  example.micronaut.HelloWorldJob - Simple Job every 10 seconds: 09/12/2019 10:16:30
7. Next steps
Explore more features with Micronaut Guides.
8. Help with Micronaut
Object Computing, Inc. (OCI) sponsored the creation of this Guide. A variety of consulting and support services are available.