RabbitMQ RPC and Micronaut
Use RabbitMQ RPC to use request-reply pattern in your Micronaut applications.
Authors: Iván López
Micronaut Version: 2.5.0
1. Getting Started
In this guide we are going to create a Micronaut app written in Java.
In this guide, we are going to create three microservices and communicate each other with RabbitMQ using the request-response pattern with RPC (Remote Procedure Call).
RabbitMQ is an open-source message-broker software that originally implemented the Advanced Message Queuing Protocol (AMQP) and has since been extended with a plug-in architecture to support Streaming Text Oriented Messaging Protocol (STOMP), Message Queuing Telemetry Transport (MQTT), and other protocols.
2. What you will need
To complete this guide, you will need the following:
-
Some time on your hands
-
A decent text editor or IDE
-
JDK 1.8 or greater installed with
JAVA_HOMEconfigured appropriately
3. Solution
We recommend that you follow the instructions in the next sections and create the app step by step. However, you can go right to the completed example.
-
Download and unzip the source
4. Writing the app
Let’s describe the microservices you are going to build through the tutorial.
-
bookcatalogue- It returns a list of books. It uses a domain consisting of a book name and isbn. -
bookinventory- It exposes an endpoint to check whether a book has sufficient stock to fulfill an order. It uses a domain consisting of a stock level and isbn. -
bookrecommendation- It consumes previous services and exposes an endpoint which recommends book names which are in stock.
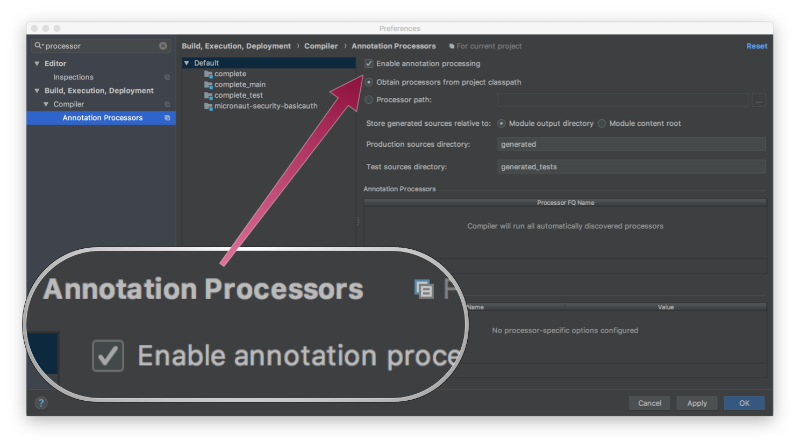
If you are using Java or Kotlin and IntelliJ IDEA, make sure you have enabled annotation processing.
4.1. Catalogue microservice
Create the bookcatalogue microservice:
mn create-app example.micronaut.bookcatalogue
The previous command creates a folder named bookcatalogue, and a Micronaut app inside it with default package:
`example.micronaut.
Add rabbitmq dependency. As we only want to use RabbitMQ to receive requests we can remove Micronaut HTTP client and Server.
pom.xml
<dependency>
    <groupId>io.micronaut.rabbitmq</groupId>
    <artifactId>micronaut-rabbitmq</artifactId>
    <scope>compile</scope>
</dependency>
By default Micronaut will connect to a RabbitMQ instance running on localhost so it is not necessary to add anything
to application.yml. In case you want to change the configuration, add the following:
bookcatalogue/src/main/resources/application.yml
rabbitmq:
  uri: amqp://localhost:5672
4.1.1. Create RabbitMQ exchange, queue and binding
Before being able to send and receive messages using RabbitMQ it is necessary to define the exchange, queue and binding.
One option is create them directly in the RabbitMQ Admin UI available on http://localhost:15672. Use guest for both
username and password.
Another option is create them programmatically with Micronaut. Create the class ChannelPoolListener.java:
bookcatalogue/src/main/java/example/micronaut/ChannelPoolListener.java
package example.micronaut;

import com.rabbitmq.client.BuiltinExchangeType;
import com.rabbitmq.client.Channel;
import io.micronaut.rabbitmq.connect.ChannelInitializer;

import javax.inject.Singleton;
import java.io.IOException;

@Singleton
public class ChannelPoolListener extends ChannelInitializer {

    @Override
    public void initialize(Channel channel) throws IOException {
        channel.exchangeDeclare("micronaut", BuiltinExchangeType.DIRECT, true); (1)

        channel.queueDeclare("inventory", true, false, false, null); (2)
        channel.queueBind("inventory", "micronaut", "books.inventory"); (3)

        channel.queueDeclare("catalogue", true, false, false, null); (4)
        channel.queueBind("catalogue", "micronaut", "books.catalogue"); (5)
    }
}| 1 | Define an exchange named micronaut. From the producer point of view everything is sent to the exchange with the
appropriate routing key. |
| 2 | Define a queue named inventory. The consumer will listen for messages in that queue. |
| 3 | Define a binding between the exchange and the queue using the routing key books.inventory. |
| 4 | Define a queue named catalogue. The consumer will listen for messages in that queue. |
| 5 | Define a binding between the exchange and the queue using the routing key books.catalogue. |
In this Catalogue Microservice the only necessary element is the catalogue queue, but it is a good practice to define
all the elements in the same file and share the file between all the projects.
|
4.1.2. Create consumer
Create a BookCatalogueService class to handle incoming RPC requests into the bookcatalogue microservice:
bookcatalogue/src/main/java/example/micronaut/BookCatalogueService.java
package example.micronaut;

import io.micronaut.rabbitmq.annotation.Queue;
import io.micronaut.rabbitmq.annotation.RabbitListener;

import java.util.Arrays;
import java.util.List;

@RabbitListener (1)
public class BookCatalogueService {

    @Queue("catalogue") (2)
    List<Book> listBooks() {
        Book buildingMicroservices = new Book("1491950358", "Building Microservices");
        Book releaseIt = new Book("1680502395", "Release It!");
        Book cidelivery = new Book("0321601912", "Continuous Delivery:");

        return Arrays.asList(buildingMicroservices, releaseIt, cidelivery);
    }
}| 1 | Annotate the class with @RabbitListener to indicate that this bean will consume messages from RabbitMQ. |
| 2 | Annotate the method with @Queue. This listener will listen to messages in catalogue queue. |
The previous service responds a List<Book>. Create the Book POJO:
bookcatalogue/src/main/java/example/micronaut/Book.java
package example.micronaut;

import io.micronaut.core.annotation.Introspected;

import java.util.Objects;

@Introspected
public class Book {
    private String isbn;
    private String name;

    public Book() {
    }

    public Book(String isbn, String name) {
        this.isbn = isbn;
        this.name = name;
    }

    public String getIsbn() {
        return isbn;
    }

    public void setIsbn(String isbn) {
        this.isbn = isbn;
    }

    public String getName() {
        return name;
    }

    public void setName(String name) {
        this.name = name;
    }

    @Override
    public String toString() {
        return "Book{" +
                "isbn='" + isbn + '\'' +
                ", name='" + name + '\'' +
                '}';
    }

    @Override
    public boolean equals(Object o) {
        if (this == o) return true;
        if (o == null || getClass() != o.getClass()) return false;
        Book book = (Book) o;
        return Objects.equals(isbn, book.isbn) &&
                Objects.equals(name, book.name);
    }

    @Override
    public int hashCode() {
        return Objects.hash(isbn, name);
    }
}
4.2. Inventory microservice
Create the bookinventory microservice:
mn create-app example.micronaut.bookinventory
The previous command creates a folder named bookinventory, and a Micronaut app inside it with default package :
example.micronaut.
Add rabbitmq dependency. As we only want to use RabbitMQ to receive requests we can remove Micronaut HTTP client and Server.
pom.xml
<dependency>
    <groupId>io.micronaut.rabbitmq</groupId>
    <artifactId>micronaut-rabbitmq</artifactId>
    <scope>compile</scope>
</dependency>
4.2.1. Create RabbitMQ exchange, queue and binding
As we did in Catalogue Microservice, create the class ChannelPoolListener.java in bookinventory/src/main/java/example/micronaut/bookcatalogue/ChannelPoolListener.java
with the same content as before.
4.2.2. Create consumer
Create a BookInventoryService class to handle incoming RPC requests into the bookinventory microservice:
bookinventory/src/main/java/example/micronaut/BookInventoryService.java
package example.micronaut;

import io.micronaut.rabbitmq.annotation.Queue;
import io.micronaut.rabbitmq.annotation.RabbitListener;

import javax.validation.constraints.NotBlank;
import java.util.Optional;

@RabbitListener (1)
public class BookInventoryService {

    @Queue("inventory") (2)
    public Boolean stock(@NotBlank String isbn) {
        return bookInventoryByIsbn(isbn).map(bi -> bi.getStock() > 0).orElse(null);
    }

    private Optional<BookInventory> bookInventoryByIsbn(String isbn) {
        if (isbn.equals("1491950358")) {
            return Optional.of(new BookInventory(isbn, 4));
        } else if (isbn.equals("1680502395")) {
            return Optional.of(new BookInventory(isbn, 0));
        }
        return Optional.empty();
    }
}| 1 | Annotate the class with @RabbitListener to indicate that this bean will consume messages from RabbitMQ. |
| 2 | Annotate the method with @Queue. This listener will listen to messages in inventory queue. |
The previous service uses BookInventory POJO. Create it:
bookinventory/src/main/java/example/micronaut/BookInventory.java
package example.micronaut;

import io.micronaut.core.annotation.Introspected;

import java.util.Objects;

@Introspected
public class BookInventory {
    private String isbn;
    private Integer stock;

    public BookInventory() {
    }

    public BookInventory(String isbn, Integer stock) {
        this.isbn = isbn;
        this.stock = stock;
    }

    public String getIsbn() {
        return isbn;
    }

    public void setIsbn(String isbn) {
        this.isbn = isbn;
    }

    public Integer getStock() {
        return stock;
    }

    public void setStock(Integer stock) {
        this.stock = stock;
    }

    @Override
    public boolean equals(Object o) {
        if (this == o) return true;
        if (o == null || getClass() != o.getClass()) return false;
        BookInventory that = (BookInventory) o;
        return Objects.equals(isbn, that.isbn) &&
                Objects.equals(stock, that.stock);
    }

    @Override
    public int hashCode() {
        return Objects.hash(isbn, stock);
    }
}
4.3. Recommendation microservice
Create the bookrecommendation microservice:
mn create-app example.micronaut.bookrecommendation
The previous command creates a folder named bookrecommendation, and a Micronaut app inside it with
default package: example.micronaut.
Add rabbitmq dependency. In this microservice we will use Micronaut HTTP Server to receive REST request, so it is
not necessary to remove any dependency.
pom.xml
<dependency>
    <groupId>io.micronaut.rabbitmq</groupId>
    <artifactId>micronaut-rabbitmq</artifactId>
    <scope>compile</scope>
</dependency>
4.3.1. Create RabbitMQ exchange, queue and binding
As we did in Catalogue Microservice, create the class ChannelPoolListener.java in bookrecommendation/src/main/java/example/micronaut/bookcatalogue/ChannelPoolListener.java
with the same content as before.
4.3.2. Create clients
Let’s create two interfaces to send messages to RabbitMQ. Micronaut will implement the interfaces at compilation time.
Create CatalogueClient.java:
bookrecommendation/src/main/java/example/micronaut/CatalogueClient.java
package example.micronaut;

import io.micronaut.rabbitmq.annotation.Binding;
import io.micronaut.rabbitmq.annotation.RabbitClient;
import io.micronaut.rabbitmq.annotation.RabbitProperty;
import io.reactivex.Flowable;

import java.util.List;

@RabbitClient("micronaut") (1)
@RabbitProperty(name = "replyTo", value = "amq.rabbitmq.reply-to") (2)
public interface CatalogueClient {

    @Binding("books.catalogue") (3)
    Flowable<List<Book>> findAll(byte[] data); (4)

}| 1 | Send the messages to exchange micronaut. |
| 2 | Set the replyTo property to amq.rabbitmq.reply-to. This is a special queue that always exists and does not need
to be created. That it is why we did not create the queue in the ChannelInitializer. RabbitMQ uses that queue in a
special way and setting the value of the property replyTo to that queue will enable this call as a RPC one. RabbitMQ
will create a temporary queue for the callback. |
| 3 | Set the routing key. |
| 4 | Define the method that will "mirror" the one in the consumer. Keep in mind that in the consumer it is not possible to return a reactive type, but on the client side it is. Also, it is necessary to send something, even if it’s not used in the consumer. |
Create InventoryClient.java:
bookrecommendation/src/main/java/example/micronaut/InventoryClient.java
package example.micronaut;

import io.micronaut.rabbitmq.annotation.Binding;
import io.micronaut.rabbitmq.annotation.RabbitClient;
import io.micronaut.rabbitmq.annotation.RabbitProperty;
import io.reactivex.Maybe;

@RabbitClient("micronaut") (1)
@RabbitProperty(name = "replyTo", value = "amq.rabbitmq.reply-to") (2)
public interface InventoryClient {

    @Binding("books.inventory") (3)
    Maybe<Boolean> stock(String isbn); (4)

}| 1 | Send the messages to exchange micronaut. |
| 2 | Set the replyTo property to amq.rabbitmq.reply-to. |
| 3 | Set the routing key. |
| 4 | Define the method that will "mirror" the one in the consumer. As we did with CatalogueClient we use a reactive
type to wrap the result. |
4.3.3. Create the controller
Create a Controller which injects both clients.
bookrecommendation/src/main/java/example/micronaut/BookController.java
package example.micronaut;

import io.micronaut.http.annotation.Controller;
import io.micronaut.http.annotation.Get;
import io.reactivex.Flowable;

@Controller("/books") (1)
public class BookController {

    private final CatalogueClient catalogueClient; (2)
    private final InventoryClient inventoryClient; (2)

    public BookController(CatalogueClient catalogueClient, InventoryClient inventoryClient) { (2)
        this.catalogueClient = catalogueClient;
        this.inventoryClient = inventoryClient;
    }

    @Get("/") (3)
    public Flowable<BookRecommendation> index() {
        return catalogueClient.findAll(null)
                .flatMap(Flowable::fromIterable)
                .flatMapMaybe(book -> inventoryClient.stock(book.getIsbn())
                        .filter(Boolean::booleanValue)
                        .map(response -> book))
                .map(book -> new BookRecommendation(book.getName()));
    }

}| 1 | The class is defined as a controller with the @Controller annotation mapped to the path /books |
| 2 | Clients are injected via constructor injection |
| 3 | The @Get annotation is used to map the index method to an HTTP GET request on /books. |
The previous controller returns a Flowable<BookRecommendation>. Create the BookRecommendation POJO:
bookrecommendation/src/main/java/example/micronaut/BookRecommendation.java
package example.micronaut;

import io.micronaut.core.annotation.Introspected;

import java.util.Objects;

@Introspected
public class BookRecommendation {
    private String name;

    public BookRecommendation() {
    }

    public BookRecommendation(String name) {
        this.name = name;
    }

    public String getName() {
        return name;
    }

    public void setName(String name) {
        this.name = name;
    }

    @Override
    public boolean equals(Object o) {
        if (this == o) return true;
        if (o == null || getClass() != o.getClass()) return false;
        BookRecommendation that = (BookRecommendation) o;
        return Objects.equals(name, that.name);
    }

    @Override
    public int hashCode() {
        return Objects.hash(name);
    }
}
5. RabbitMQ and Micronaut
5.1. Install RabbitMQ via Docker
The fastest way to start using RabbitMQ is via Docker:
docker run --rm -it \
        -p 5672:5672 \
        -p 15672:15672 \
        rabbitmq:3.8.12-management
Alternatively you can install and run a local RabbitMQ instance.
6. Running the app
Configure bookinventory to run on port 8082:
bookinventory/src/main/resources/application.yml
micronaut:
  server:
    port: 8082 (1)
Run bookinventory microservice:
bookinventory $ ./mvnw mn:run

13:30:22.426 [main] INFO  io.micronaut.runtime.Micronaut - Startup completed in 742ms. Server Running: 1 active message listeners.
Configure bookcatalogue to run on port 8081:
bookcatalogue/src/main/resources/application.yml
micronaut:
  server:
    port: 8081 (1)
Run bookcatalogue microservice:
bookcatalogue $ ./mvnw mn:run

13:31:19.887 [main] INFO  io.micronaut.runtime.Micronaut - Startup completed in 949ms. Server Running: 1 active message listeners.
Configure bookrecommendation to run on port 8080:
bookrecommendation/src/main/resources/application.yml
micronaut:
  server:
    port: 8080 (1)
8080 is the default port if you don’t specify micronaut.server.port property
|
Run bookrecommendation microservice:
bookcatalogue $ ./mvnw mn:run

13:32:06.045 [main] INFO  io.micronaut.runtime.Micronaut - Startup completed in 959ms. Server Running: http://localhost:8080
You can run a curl command to test the whole application:
$ curl http://localhost:8080/books
[{"name":"Building Microservices"}]
7. Generate a Micronaut app’s Native Image with GraalVM
We are going to use GraalVM, the polyglot embeddable virtual machine, to generate a Native image of our Micronaut application.
Native images compiled with GraalVM ahead-of-time improve the startup time and reduce the memory footprint of JVM-based applications.
Use of GraalVM’s native-image tool is only supported in Java or Kotlin projects. Groovy relies heavily on
reflection which is only partially supported by GraalVM.
|
7.1. Native Image generation
The easiest way to install GraalVM is to use SDKMan.io.
# For Java 8
$ sdk install java 21.1.0.r8-grl

# For Java 11
$ sdk install java 21.1.0.r11-grl
You need to install the native-image component which is not installed by default.
$ gu install native-imageTo generate a native image using Maven run:
$ ./mvnw package -Dpackaging=native-imageThe native image will be created in target/application and can be run with ./target/application.
Start the native images for the two microservices and run the same curl request as before to check that everything works with GraalVM.
8. Next steps
Read more about RabbitMQ RPC support inside Micronaut.