fun <T> MutableList<T>.swap(index1: Int, index2: Int) {
    val tmp = this[index1] // 'this' corresponds to the list
    this[index1] = this[index2]
    this[index2] = tmp
}Using Kotlin Extension Functions in Micronaut
Take a tour of the extension functions in Micronaut and learn to write your own
Authors: Will Buck
Micronaut Version: 2.5.0
1. Getting Started
In this guide we are going to create a Micronaut app written in Kotlin.
2. What you will need
To complete this guide, you will need the following:
-
Some time on your hands
-
A decent text editor or IDE
-
JDK 1.8 or greater installed with
JAVA_HOMEconfigured appropriately
3. Solution
We recommend that you follow the instructions in the next sections and create the app step by step. However, you can go right to the completed example.
-
Download and unzip the source
4. Kotlin Extension Functions
Before we get started writing the application, let’s touch briefly on what extension functions are and why they’re useful.
4.1. What Are Extension Functions?
The kotlin documentation explains that extension functions are "an ability to extend a class with new functionality without having to inherit from the class or use design patterns such as Decorator."
They’re useful for writing new functions for classes in a third-party library or quickly creating new methods for common use cases of a class you otherwise can’t edit directly.
For example, perhaps your application often needs to take a list and swap the index of two items in the list.
To define a swap method for any mutable list, you could write:
Then use it like it was a regular method of MutableList
val languages = mutableListOf('java', 'groovy', 'kotlin')

languages.swap(0,2) // Will swap 'java' and 'kotlin' so kotlin comes first
4.2. Using Extension Functions in an App
To show off the extension functions available for use in Micronaut (and how to write your own), we’ll build a simple application that
-
Consumes this fun dad joke API (I love a good dad joke) with an http client
-
Schedules the joke to "be sent" to someone [we won’t actually be integrating a message sender for simplicity]
-
Writes our own extension function for the client (as if it was provided by a third party)
-
Puts everything together in a controller
-
Starts the application with the
startApplicationextension function
5. Writing the App
Create an app using the Micronaut Command Line Interface or with Micronaut Launch.
mn create-app example.micronaut.micronautguide --build=gradle --lang=kotlin
If you don’t specify the --build argument, Gradle is used as a build tool. If you don’t specify the --lang argument, Java is used as a language.
|
The previous command creates a Micronaut app with the default package example.micronaut in a folder named micronautguide.
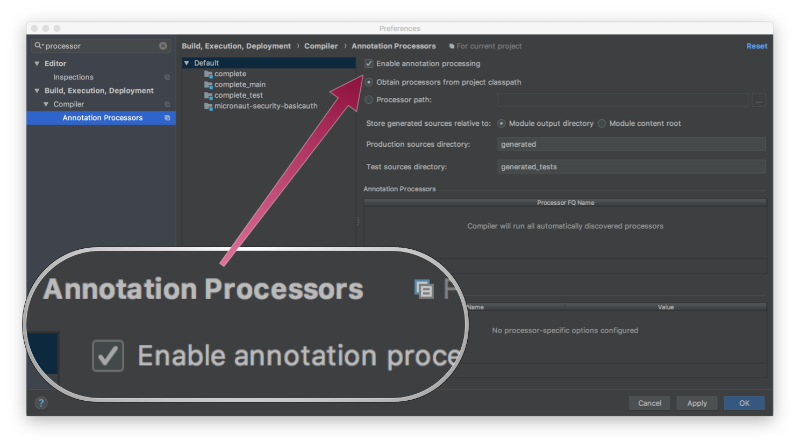
If you are using Java or Kotlin and IntelliJ IDEA, make sure you have enabled annotation processing.
5.1. The Micronaut Kotlin Extension Functions
To aid kotlin developers in writing more idiomatic kotlin code in Micronaut, we have provided a kotlin extension function library for use.
To use them in our project, we simply need to include the dependency
build.gradle
implementation("io.micronaut.kotlin:micronaut-kotlin-extension-functions")You can see the dokka docs for the full list of functions here
Big credit is due to Alejandro Gomez for allowing for the use of his initial collection of extension functions!
Let’s see these functions in action!
5.2. Application
Right away let’s modify the generated Application.kt to use the startApplication extension function
src/main/kotlin/example/micronaut/Application.kt
package example.micronaut

import io.micronaut.runtime.startApplication (1)

object ApplicationKt { (2)
        @JvmStatic
        fun main(args: Array<String>) {
                startApplication<ApplicationKt>(*args) (3)
        }
}| 1 | Here we import the extension function |
| 2 | Since the extension function takes a type argument, we’ll define our Application as a kotlin object, which is an easy shortcut for a singleton or place to put a static method like main.
We’re naming it ApplicationKt simply because this guide’s build file is auto-generated, and we want to match the mainClass name it generates. Application alone would be a preferable name outside the context of this guide. |
| 3 | startApplication<ApplicationKt> here does the work of .build().mainClass(ApplicationKt::class.java).start(). Convenient! |
5.3. DadJokeClient
Next we’ll build out our functionality. We’ll start by modelling the response types for the plain GET request for the Dad Joke API (that just return a random joke),
as well as the paged results that are returned from the /search endpoint.
src/main/kotlin/example/micronaut/DadJoke.kt
package example.micronaut

import io.micronaut.core.annotation.Introspected

@Introspected (1)
data class DadJoke(val id: String, val joke: String, val status: Int)
src/main/kotlin/example/micronaut/DadJokePagedResults.kt
package example.micronaut

import io.micronaut.core.annotation.Introspected

@Introspected (1)
data class DadJokePagedResults(
    val current_page: Int,
    val limit: Int,
    val previous_page: Int,
    val next_page: Int,
    val total_jokes: Int,
    val total_pages: Int,
    val results: List<DadJoke>
)| 1 | We make both of these classes @Introspected for compatibility with Graal, you can omit them if you do not plan to build a native image |
Then, we can create a standard Micronaut http client for the DadJoke API endpoint, letting the @Client annotation implement the interface we lay out.
src/main/kotlin/example/micronaut/DadJokeClient.kt
package example.micronaut

import io.micronaut.http.annotation.Get
import io.micronaut.http.annotation.Header
import io.micronaut.http.annotation.QueryValue
import io.micronaut.http.client.annotation.Client
import io.reactivex.Single

@Client("https://icanhazdadjoke.com/")
@Header(name = "Accept", value = "application/json")
interface DadJokeClient {
    @Get
    fun tellMeAJoke(): Single<DadJoke>

    @Get("/search?term={searchTerm}")
    fun searchDadJokes(@QueryValue searchTerm: String): Single<DadJokePagedResults>
}
Note that while we are creating this client for the purposes of this guide, often times something like this may come from a third party library. Perhaps you’re getting it from a public dependency you don’t have permission to edit, or from another team within your company that has different priorities from your own team.
It could also be that you simply have a specific use case for the client involving specific setup for your application that doesn’t belong in the client proper.
Let’s see how we can extend this client to suit our own use case.
5.4. DadJokeController
We’ll create a controller to utilize the client’s standard GET for a random joke.
src/main/kotlin/example/micronaut/DadJokeController.kt
package example.micronaut

import io.micronaut.http.annotation.Controller
import io.micronaut.http.annotation.Get
import javax.inject.Inject

@Controller("/dadJokes")
class DadJokeController {

    @Inject
    lateinit var dadJokeClient: DadJokeClient

    @Get("/joke")
    fun getAJoke(): String {
        return dadJokeClient.tellMeAJoke().blockingGet().joke
    }

}
Now, say we have a particular way we want to use a client frequently (like attaching common headers, or filling in some parameters by default.
Let’s explore how we can extend the client for our benefit. We’ll define a method for the client to specifically look for jokes about dogs.
In your controller file, at the bottom, add this extension function definition:
src/main/kotlin/example/micronaut/DadJokeController.kt
fun DadJokeClient.getDogJokes(): List<DadJoke> { (1)
    return this.searchDadJokes("dog").blockingGet().results
}| 1 | We define a getDogJokes method on the DadJokeClient. This method will be available anywhere within the example.micronaut package |
While this is a simplified (and somewhat silly) example, you can imagine how with a more sophisticated API, this could be a very powerful tool to encapsulate common functionality and explicitly relate it to the appropriate class, rather than defining another class just to encapsulate this common routine.
We can then use this extension function within our controller by defining a /dogJoke endpoint
src/main/kotlin/example/micronaut/DadJokeController.kt
    @Get("/dogJokes")
    fun getDogJokes(): List<DadJoke> {
        return dadJokeClient.getDogJokes() (1)
}| 1 | Note how we can use this function as if it were defined on the client class itself. |
Now we have our application!
5.5. Writing some tests
Lastly, let’s use a few more convenient functions included in micronaut-kotlin-extension-functions in our test
src/test/kotlin/example/micronaut/DadJokeTest.kt
package example.micronaut
import io.micronaut.context.createBean
import io.micronaut.context.run
import io.micronaut.http.HttpRequest
import io.micronaut.http.client.HttpClient
import io.micronaut.http.retrieveList
import io.micronaut.http.retrieveObject
import io.micronaut.runtime.server.EmbeddedServer
import org.junit.jupiter.api.Assertions.assertFalse
import org.junit.jupiter.api.Test

class DadJokeTest {

    @Test
    fun testDadJokeController() {
        val embeddedServer = run<EmbeddedServer>() (1)
        val client = embeddedServer.applicationContext.createBean<HttpClient>(embeddedServer.url).toBlocking() (2)

        // Test single object retrieve extension
        val anyJoke = client.retrieveObject<String>(HttpRequest.GET("/dadJokes/joke")) (3)
        assertFalse(anyJoke.isNullOrBlank())

        // Test list retrieve extension
        val dogJoke = client.retrieveList<DadJoke>(HttpRequest.GET("/dadJokes/dogJokes")) (3)
        assertFalse(dogJoke.isEmpty())
        assertFalse(dogJoke.first().joke.isNullOrBlank())

        client.close()
        embeddedServer.close()
    }

}| 1 | Here we have run<EmbeddedServer> as a little syntatic sugar for ApplicationContext.run(EmbeddedServer::class.java) |
| 2 | Same here for createBean<HttpClient>, we’re reducing our need to type ::class.java all over the place |
| 3 | retrieveObject and retrieveList give us nice shortcuts to reduce the need for Argument.of and Argument.listOf, in addition to reducing our ::class.java uses. |
Now we can test everything out!
6. Testing the Application
To run the tests:
$ ./gradlew test
$ open build/reports/tests/test/index.html
7. Running the Application
To run the application use the ./gradlew run command which will start the application on port 8080.
8. Generate a Micronaut app’s Native Image with GraalVM
We are going to use GraalVM, the polyglot embeddable virtual machine, to generate a Native image of our Micronaut application.
Native images compiled with GraalVM ahead-of-time improve the startup time and reduce the memory footprint of JVM-based applications.
Use of GraalVM’s native-image tool is only supported in Java or Kotlin projects. Groovy relies heavily on
reflection which is only partially supported by GraalVM.
|
8.1. Native Image generation
The easiest way to install GraalVM is to use SDKMan.io.
# For Java 8
$ sdk install java 21.1.0.r8-grl

# For Java 11
$ sdk install java 21.1.0.r11-grl
You need to install the native-image component which is not installed by default.
$ gu install native-imageTo generate a native image using Gradle run:
$ ./gradlew nativeImageThe native image will be created in build/native-image/application and can be run with ./build/native-image/application
It is also possible to customize the name of the native image or pass additional parameters to GraalVM:
build.gradle
nativeImage {
    args('--verbose')
    imageName('mn-graalvm-application') (1)
}| 1 | The native image name will now be mn-graalvm-application |
Whether you run the app via gradle or as a native image, you should be able to get a good laugh by typing:
curl localhost:8080/dadJokes/joke
or
curl localhost:8080/dadJokes/dogJokes
Hopefully it brings a smile to your day!
9. Next steps
See all the useful libraries for Micronaut Kotlin developers in the Micronaut Kotlin documentation.
10. Help with Micronaut
Object Computing, Inc. (OCI) sponsored the creation of this Guide. A variety of consulting and support services are available.