mn create-app example.micronaut.micronautguide --build=gradle --lang=javaTable of Contents
- 1. Getting Started
- 2. What you will need
- 3. Solution
- 4. Writing the App
- 5. Team Configuration with @ConfigurationProperties
- 6. Team Admin Builder with @ConfigurationBuilder
- 7. Stadiums with @EachProperty
- 8. Running the Application
- 9. Controller
- 10. Generate a Micronaut app’s Native Image with GraalVM
- 11. Next steps
- 12. Help with Micronaut
@Configuration and @ConfigurationBuilder
Learn how to utilize @Configuration and @ConfigurationBuilder annotations to effectively configure declared properties.
Authors: Nirav Assar
Micronaut Version: 2.5.0
1. Getting Started
In this guide we are going to create a Micronaut app written in Java.
In this guide you are going to learn how to effectively use the annotations @ConfigurationProperties, @ConfigurationBuilder, and
@EachProperty to use configured properties in a Micronaut application. These annotations allow declared values to be injected
into a bean for easy usage in the application.
2. What you will need
To complete this guide, you will need the following:
-
Some time on your hands
-
A decent text editor or IDE
-
JDK 1.8 or greater installed with
JAVA_HOMEconfigured appropriately
3. Solution
We recommend that you follow the instructions in the next sections and create the app step by step. However, you can go right to the completed example.
-
Download and unzip the source
4. Writing the App
Create an app using the Micronaut Command Line Interface or with Micronaut Launch.
If you don’t specify the --build argument, Gradle is used as a build tool. If you don’t specify the --lang argument, Java is used as a language.
|
The previous command creates a Micronaut app with the default package example.micronaut in a folder named micronautguide.
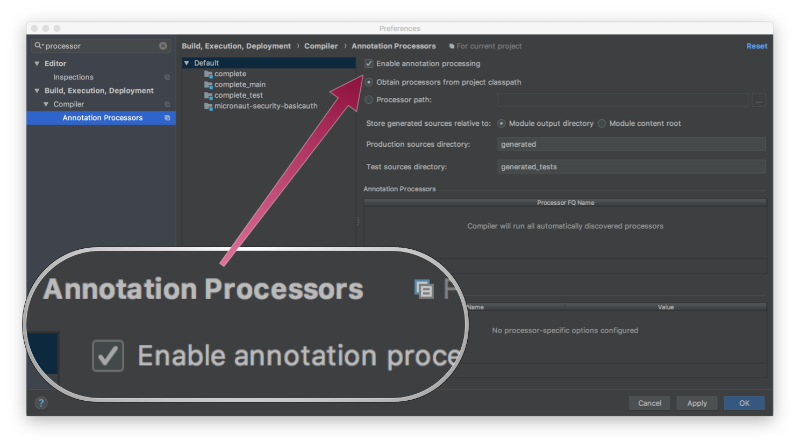
If you are using Java or Kotlin and IntelliJ IDEA, make sure you have enabled annotation processing.
5. Team Configuration with @ConfigurationProperties
Imagine a feature where you can configure a sports team in a declarative manner. The team has a few attributes like team name, color, and players.
src/main/resources/application.yml
team:
  name: 'Steelers'
  color: 'Black'
  player-names:
    - 'Mason Rudolph'
    - 'James Connor'
With Micronaut, we can use the @ConfigurationProperties annotation to slurp the configuration into a bean. Each property that matches
the configuration in the application.yml will call the setter in the bean. The bean will be subsequently available for injection in the application!
src/main/java/example/micronaut/TeamConfiguration.java
@ConfigurationProperties("team")
public class TeamConfiguration {
    private String name;
    private String color;
    private List<String> playerNames;

    public String getName() {
        return name;
    }

    public void setName(String name) {
        this.name = name;
    }

    public String getColor() {
        return color;
    }

    public void setColor(String color) {
        this.color = color;
    }

    public List<String> getPlayerNames() {
        return playerNames;
    }

    public void setPlayerNames(List<String> playerNames) {
        this.playerNames = playerNames;
    }
}
5.1. Test @ConfigurationProperties
Let’s validate that the bean is available in the application context and is created with the values declared in the application.xml.
src/test/java/example/micronaut/TeamConfigurationTest.java
    @Test
    void testTeamConfiguration() {
        List<String> names = Arrays.asList("Nirav Assar", "Lionel Messi");
        Map<String, Object> items = new HashMap<>();
        items.put("team.name", "evolution");
        items.put("team.color", "green");
        items.put("team.player-names", names);

        ApplicationContext ctx = ApplicationContext.run(items); (1)
        TeamConfiguration teamConfiguration = ctx.getBean(TeamConfiguration.class);

        assertEquals("evolution", teamConfiguration.getName());
        assertEquals("green", teamConfiguration.getColor());
        assertEquals(names.size(), teamConfiguration.getPlayerNames().size());
        names.forEach(name -> assertTrue(teamConfiguration.getPlayerNames().contains(name)));

        ctx.close();
}| 1 | Setup configuration properties for the test to use |
6. Team Admin Builder with @ConfigurationBuilder
The Builder pattern is a great way to build configuration objects incrementally. Read about the Builder pattern in this
DZone article to learn more. Micronaut supports the Builder
pattern with @ConfigurationBuilder.
Let’s suppose we want to add team administrators to a team. The team administration is composed by using a builder pattern object. We can add a coach, manager and president to the team.
src/main/resources/application.yml
team:
  name: 'Steelers'
  color: 'Black'
  player-names:
    - 'Mason Rudolph'
    - 'James Connor'
  team-admin:
    manager: 'Nirav Assar' (1)
    coach: 'Mike Tomlin'
president: 'Dan Rooney'| 1 | manager property is an example of an element that will be built |
The TeamAdmin object abides by the Builder pattern.
src/main/java/example/micronaut/TeamAdmin.java
package example.micronaut;

public class TeamAdmin { (1)

    private String manager;
    private String coach;
    private String president;

    // should use the builder pattern to create the object
    private TeamAdmin() {
    }

    public String getManager() {
        return manager;
    }

    public void setManager(String manager) {
        this.manager = manager;
    }

    public String getCoach() {
        return coach;
    }

    public void setCoach(String coach) {
        this.coach = coach;
    }

    public String getPresident() {
        return president;
    }

    public void setPresident(String president) {
        this.president = president;
    }

    public static Builder builder() {
        return new Builder();
    }

    public static class Builder { (2)
        private String manager;
        private String coach;
        private String president;

        (3)
        public Builder withManager(String manager) {
            this.manager = manager;
            return this;
        }

        public Builder withCoach(String coach) {
            this.coach = coach;
            return this;
        }

        public Builder withPresident(String president) {
            this.president = president;
            return this;
        }

        public TeamAdmin build() { (4)
            TeamAdmin teamAdmin = new TeamAdmin();
            teamAdmin.manager = this.manager;
            teamAdmin.coach = this.coach;
            teamAdmin.president = this.president;
            return teamAdmin;
        }

        public String getManager() {
            return manager;
        }

        public String getCoach() {
            return coach;
        }

        public String getPresident() {
            return president;
        }
    }
}| 1 | TeamAdmin is the configuration object which consumes the declared properties. |
| 2 | The builder object is used to incrementally construct the object. |
| 3 | An example of a builder method, where a attribute is set and then the builder itself is returned. |
| 4 | The final build() method creates the TeamAdmin object. |
At the bottom of TeamConfiguration, we add the inner class TeamAdmin.Builder and annotate it with @ConfigurationBuilder.
This tells Micronaut that configuration can be read in and an object can be constructed using the Builder pattern.
We are using the builder only here, so we will have to call builder.build() to actually get the TeamAdmin object, at a later time.
In our case, we will call builder.build() in the JUnit test.
|
src/main/java/example/micronaut/TeamConfiguration.java
package example.micronaut;

import io.micronaut.context.annotation.ConfigurationBuilder;
import io.micronaut.context.annotation.ConfigurationProperties;

import java.util.List;

//tag::teamConfigClassNoBuilder[]
@ConfigurationProperties("team")
public class TeamConfiguration {
    private String name;
    private String color;
    private List<String> playerNames;
//end::teamConfigClassNoBuilder[]

    public TeamConfiguration() {
    }

    @ConfigurationBuilder(prefixes = "with", configurationPrefix = "team-admin") (1)
    protected TeamAdmin.Builder builder = TeamAdmin.builder(); (2)

    public TeamAdmin.Builder getBuilder() {
        return builder;
    }

    public void setBuilder(TeamAdmin.Builder builder) {
        this.builder = builder;
    }

    //tag::gettersandsetters[]
    public String getName() {
        return name;
    }

    public void setName(String name) {
        this.name = name;
    }

    public String getColor() {
        return color;
    }

    public void setColor(String color) {
        this.color = color;
    }

    public List<String> getPlayerNames() {
        return playerNames;
    }

    public void setPlayerNames(List<String> playerNames) {
        this.playerNames = playerNames;
    }
}
//end::gettersandsetters[]| 1 | prefixes tells Micronaut to find methods that are prefixed by with; configurationPrefix allows the developer to customize the application.yml element |
| 2 | Instantiate the builder object so it can be populated with configuration values. |
6.1. Test @ConfigurationBuilder
We can validate @ConfigurationBuilder is applied properly with the following JUnit test. The test format is similar to previous tests.
src/test/java/example/micronaut/TeamConfigurationTest.java
    @Test
    void testTeamConfigurationBuilder() {
        List<String> names = Arrays.asList("Nirav Assar", "Lionel Messi");
        Map<String, Object> items = new HashMap<>();
        items.put("team.name", "evolution");
        items.put("team.color", "green");
        items.put("team.team-admin.manager", "Jerry Jones"); (1)
        items.put("team.team-admin.coach", "Tommy O'Neill");
        items.put("team.team-admin.president", "Mark Scanell");
        items.put("team.player-names", names);

        ApplicationContext ctx = ApplicationContext.run(items);
        TeamConfiguration teamConfiguration = ctx.getBean(TeamConfiguration.class);
        TeamAdmin teamAdmin = teamConfiguration.builder.build(); (2)

        assertEquals("evolution", teamConfiguration.getName());
        assertEquals("green", teamConfiguration.getColor());
        assertEquals("Nirav Assar", teamConfiguration.getPlayerNames().get(0));
        assertEquals("Lionel Messi", teamConfiguration.getPlayerNames().get(1));

        // check the builder has values set
        assertEquals("Jerry Jones", teamConfiguration.builder.getManager());
        assertEquals("Tommy O'Neill", teamConfiguration.builder.getCoach());
        assertEquals("Mark Scanell", teamConfiguration.builder.getPresident());

        // check the object can be built
        assertEquals("Jerry Jones", teamAdmin.getManager()); (3)
        assertEquals("Tommy O'Neill", teamAdmin.getCoach());
        assertEquals("Mark Scanell", teamAdmin.getPresident());

        ctx.close();
}| 1 | Properties which will invoke the builder methods on TeamAdmin.Builder |
| 2 | The builder object is now configured, so we must run build() on it to create the TeamAdmin object |
| 3 | Verify the object is created with the applicaton.yml properties |
7. Stadiums with @EachProperty
Micronaut is also able to read a "list" of configurations that are related. Imagine we would like to declare stadiums and their attributes.
src/main/resources/application.yml
stadium:
  coors: (1)
    city: 'Denver'
    size: 50000
  pnc:
    city: 'Pittsburgh'
size: 35000| 1 | This element will be the name of the bean. |
We can use @EachProperty which will cycle through the configuration and read each nested clause as a bean. The higher level
property will be parameterized as the name.
src/main/java/example/micronaut/StadiumConfiguration.java
package example.micronaut;

import io.micronaut.context.annotation.EachProperty;
import io.micronaut.context.annotation.Parameter;
import io.micronaut.core.annotation.Introspected;

@Introspected
@EachProperty("stadium") (1)
public class StadiumConfiguration {
    private String name; (2)
    private String city;
    private Integer size;

    public StadiumConfiguration(@Parameter String name) { (2)
        this.name = name;
    }

    public String getName() {
        return name;
    }

    public void setName(String name) {
        this.name = name;
    }

    public String getCity() {
        return city;
    }

    public void setCity(String city) {
        this.city = city;
    }

    public Integer getSize() {
        return size;
    }

    public void setSize(Integer size) {
        this.size = size;
    }
}| 1 | Establish the top layer of configuration |
| 2 | name is read in from the property key and send as a parameter to the bean. |
7.1. Test @EachProperty
Validate the configuration with a test. Notice multiple beans are created from the configuration. In a controller we can
inject a particular StadiumConfiguration instance bean by using the @Named parameter with qualifier name.
src/test/java/example/micronaut/StadiumConfigurationTest.java
package example.micronaut;

import io.micronaut.context.ApplicationContext;
import io.micronaut.inject.qualifiers.Qualifiers;
import org.junit.jupiter.api.Test;

import java.util.HashMap;
import java.util.Map;

import static org.junit.jupiter.api.Assertions.assertEquals;

public class StadiumConfigurationTest {

    @Test
    void testStadiumConfiguration() {
        Map<String, Object> items = new HashMap<>();
        items.put("stadium.fenway.city", "Boston"); (1)
        items.put("stadium.fenway.size", 60000);
        items.put("stadium.wrigley.city", "Chicago"); (1)
        items.put("stadium.wrigley.size", 45000);

        ApplicationContext ctx = ApplicationContext.run(items);

        (2)
        StadiumConfiguration fenwayConfiguration = ctx.getBean(StadiumConfiguration.class, Qualifiers.byName("fenway"));
        StadiumConfiguration wrigleyConfiguration = ctx.getBean(StadiumConfiguration.class, Qualifiers.byName("wrigley"));

        assertEquals("fenway", fenwayConfiguration.getName());
        assertEquals(60000, fenwayConfiguration.getSize());
        assertEquals("wrigley", wrigleyConfiguration.getName());
        assertEquals(45000, wrigleyConfiguration.getSize());

        ctx.close();
    }
}| 1 | Multiple configurations can be declared for the same class. |
| 2 | Since there are multiple beans to retrieve a bean a Qualifier must be sent. |
8. Running the Application
To run the application use the ./gradlew run command which will start the application on port 8080.
9. Controller
Configuration beans can be injected into the application with just like any other beans. As a demonstration,
create a controller where the beans are constructor injected. The StadiumConfiguration class has two
instances, so for injection we need to use the @Named annotation with a qualifier name to specify the bean.
src/main/java/example/micronaut/MyController.java
package example.micronaut;

import io.micronaut.core.annotation.Nullable;
import io.micronaut.http.annotation.Controller;
import io.micronaut.http.annotation.Get;

import javax.inject.Named;

@Controller("/my")
public class MyController {

    private final TeamConfiguration teamConfiguration;
    private final StadiumConfiguration stadiumConfiguration;

    public MyController(@Nullable TeamConfiguration teamConfiguration,
                        @Nullable @Named("pnc") StadiumConfiguration stadiumConfiguration) { (1)
        this.teamConfiguration = teamConfiguration;
        this.stadiumConfiguration = stadiumConfiguration;
    }

    @Get("/team")
    public TeamConfiguration team() {
        return this.teamConfiguration;
    }

    @Get("/stadium")
    public  StadiumConfiguration stadium() {
        return this.stadiumConfiguration;
    }
}| 1 | Injection of configuration beans; @Named annotation is needed to choose which StadiumConfiguration instance is retrieved. |
| In the browser go to http://localhost:8080/my/team and http://localhost:8080/my/stadium. |
Add test:
src/test/java/example/micronaut/MyControllerTest.java
package example.micronaut;

import io.micronaut.http.HttpRequest;
import io.micronaut.http.client.HttpClient;
import io.micronaut.http.client.annotation.Client;
import io.micronaut.test.extensions.junit5.annotation.MicronautTest;
import org.junit.jupiter.api.Test;

import javax.inject.Inject;

import java.util.Arrays;
import java.util.List;

import static org.junit.jupiter.api.Assertions.assertEquals;
import static org.junit.jupiter.api.Assertions.assertTrue;

@MicronautTest
public class MyControllerTest {

    @Inject
    @Client("/")
    HttpClient client;

    @Test
    void testMyTeam() {
        TeamConfiguration teamConfiguration = client.toBlocking()
                .retrieve(HttpRequest.GET("/my/team"), TeamConfiguration.class);
        assertEquals("Steelers", teamConfiguration.getName());
        assertEquals("Black", teamConfiguration.getColor());
        List<String> expectedPlayers = Arrays.asList("Mason Rudolph", "James Connor");
        assertEquals(expectedPlayers.size(), teamConfiguration.getPlayerNames().size());
        expectedPlayers.forEach(name -> assertTrue(teamConfiguration.getPlayerNames().contains(name)));
    }

    @Test
    void testMyStadium() {
        StadiumConfiguration conf = client.toBlocking()
                .retrieve(HttpRequest.GET("/my/stadium"), StadiumConfiguration.class);
        assertEquals("Pittsburgh", conf.getCity());
        assertEquals(35000, conf.getSize());
    }
}
10. Generate a Micronaut app’s Native Image with GraalVM
We are going to use GraalVM, the polyglot embeddable virtual machine, to generate a Native image of our Micronaut application.
Native images compiled with GraalVM ahead-of-time improve the startup time and reduce the memory footprint of JVM-based applications.
Use of GraalVM’s native-image tool is only supported in Java or Kotlin projects. Groovy relies heavily on
reflection which is only partially supported by GraalVM.
|
10.1. Native Image generation
The easiest way to install GraalVM is to use SDKMan.io.
# For Java 8
$ sdk install java 21.1.0.r8-grl

# For Java 11
$ sdk install java 21.1.0.r11-grl
You need to install the native-image component which is not installed by default.
$ gu install native-imageTo generate a native image using Gradle run:
$ ./gradlew nativeImageThe native image will be created in build/native-image/application and can be run with ./build/native-image/application
It is also possible to customize the name of the native image or pass additional parameters to GraalVM:
build.gradle
nativeImage {
    args('--verbose')
    imageName('mn-graalvm-application') (1)
}| 1 | The native image name will now be mn-graalvm-application |
You can invoke the controller exposed by the native image:
curl http://localhost:8080/my/stadium
curl http://localhost:8080/my/team
11. Next steps
Visit Micronaut Application Configuration to learn more.
12. Help with Micronaut
Object Computing, Inc. (OCI) sponsored the creation of this Guide. A variety of consulting and support services are available.